
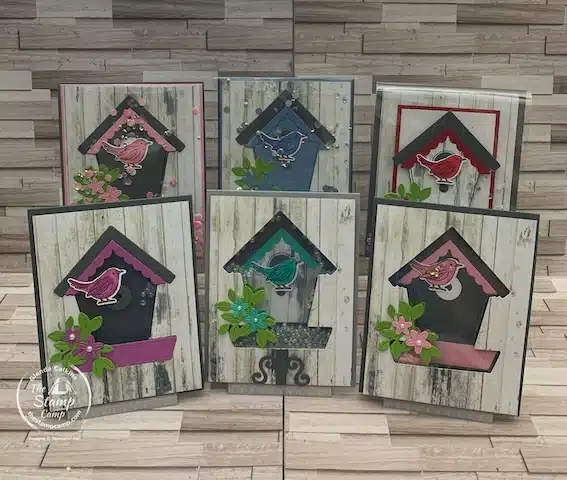
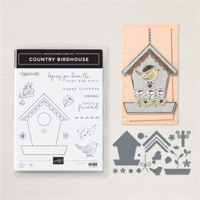
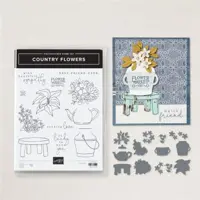
If you are looking for different stamping techniques that involve shaker cards and incorporated into One Sheet Wonder cards then I have you covered with my six different ways to create shaker cards using just one 12 X 12 Sheet of the Country Woods Designer Series Paper, the Country Birdhouse Bundle, and the Country Flowers Bundle.
I created these 6 different shaker cards during last night’s One Sheet Wonder class. Let me just say that these cards took a lot of prep time, and it took me an hour and a half to complete all 6 cards. Now, bear with me as I had quite a night of mistakes and mishaps, but I managed to get through all 6 cards and even with mistakes they turned out really nice. I’m hoping today’s photos will capture how pretty they are in person. If you missed the class, I do have the video below in this blog post.
What is nice about this one sheet wonder layout is you can create any of the 6 different shaker cards with any of the cut pieces, so if you really like one of the shaker cards you can create all 6 shaker cards the exact same way.
Let’s Take a Closer Look At The Stamping Techniques Involved In Each Card:
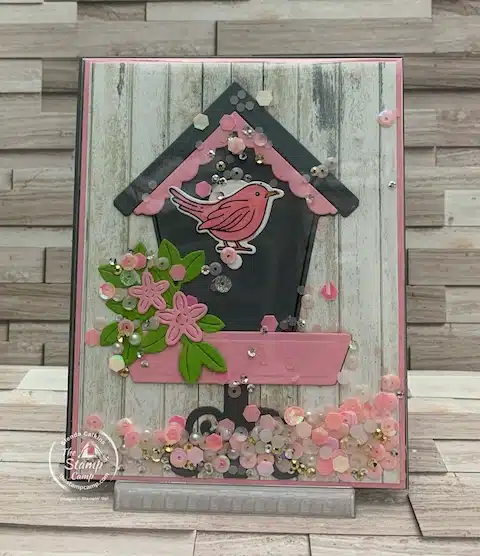
This was the first card of the night and to make this shaker card I used the Stampin’ Up! Clear Envelopes. This is a super quick and easy way to create a shaker and all you do is create your card front, slip it inside the clear envelope, add your shaker contents and seal the envelope all the way around so you have a nice tight fit, then just attach it to your card base. I went a little heavy handed on my sequins, but the girls will love it, especially because it is pink. These sequins are retired, but you can use whatever you have on hand for your shaker bits. If you do not have any sequins, you can use punched or die cut pieces even chunky glitter will work.
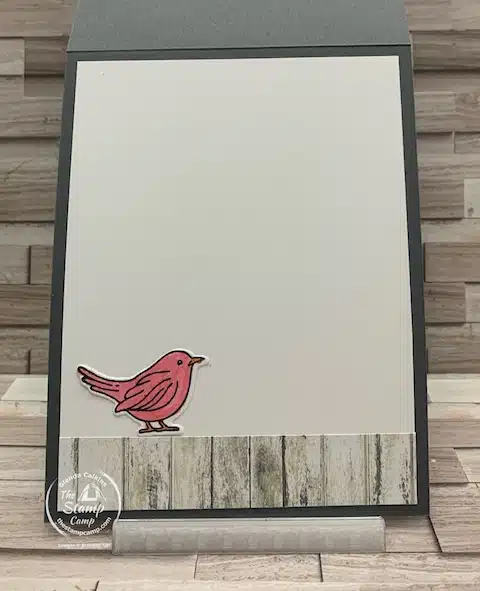
For the inside of the cards I used the left over 1 1/2″ X 4″ pieces of my Country Woods Designer Series paper, cut down to 3/4″ X 4″ and attached them to a piece of Basic White cardstock, I stamped and colored the birds using Black Memento ink and colored them with the coordinating Blends, die cut them out and adhered the birds to the wood strip inside the cards.
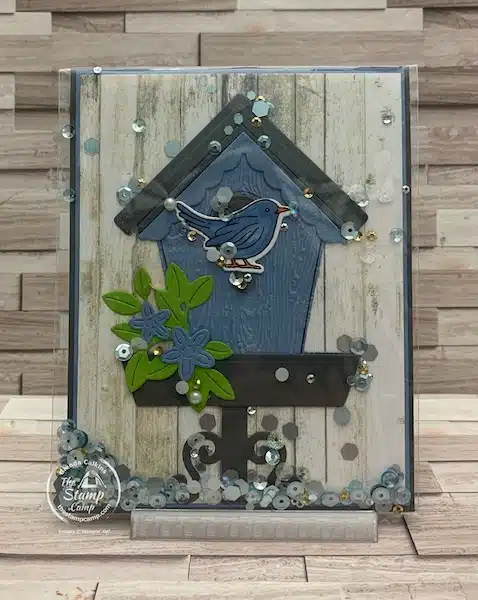
This was the second card, and this card also uses the Stampin’ Up! clear envelopes, but for this card you create your card and then slip the card front inside the clear envelope, fill it with your sequins or shaker bits, and seal it closed on the backside of your card. Yes, you will see the clear envelope on the backside of your card, but it is clear, and I don’t mind seeing that.
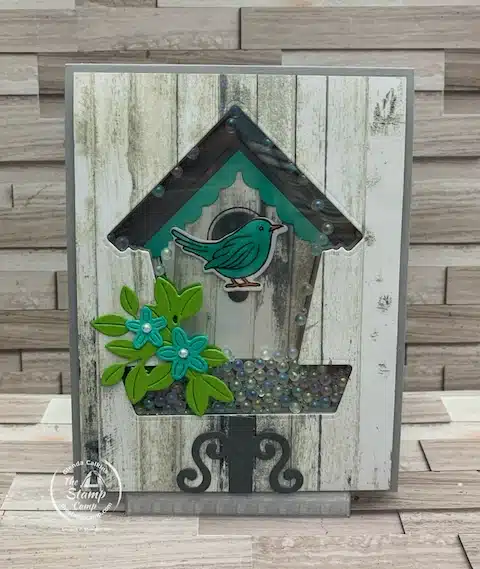
It might be a bit hard to see, but I embossed the Boho Blue birdhouse using the Timber 3D Embossing Folder before I attached the other pieces to the birdhouse. One tip I will give you to make things a bit quicker and easier to assemble is to use the Adhesive Sheets, especially on the intricate pieces. I don’t know about you, but my hands get all sticky from the liquid glue and that little bit of residue will muddy up the clear envelopes and window sheets, which I do not like to see.
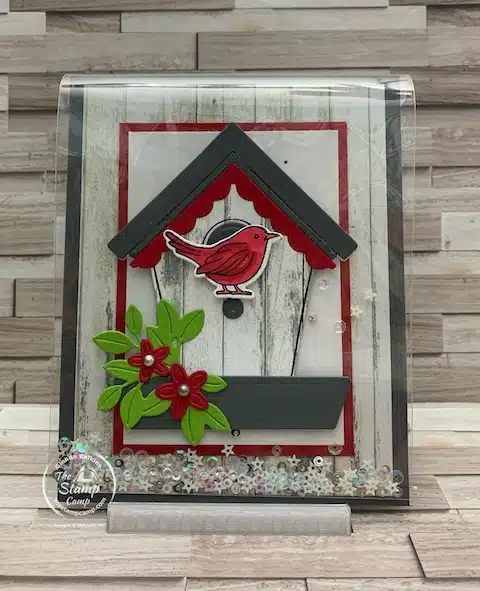
This was the 3rd card of the evening, and it is my version of how you can make the Country Birdhouse Bundle into Christmas cards. Maybe it is the Real Red and Basic Gray cardstock that makes me think Christmas, but also the little shaker pieces I used. These are also retired and for some reason they just seemed Christmasy to me with the white and silver stars and circles.
This card was the start of my mishaps and mistakes. The card front on this card is the clear envelope and it really is an easy card to make; the adhesive strip on the clear envelope was my downfall, but I recovered and finally ended up with this beautiful card.
This is the inside of the card and yes, you can see it through the front but with the birdhouse on the front you have some room to hide your message and signature, so it is not visible from the front.
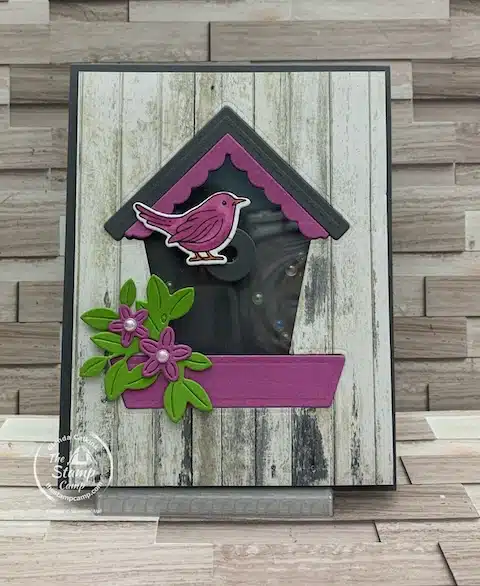
This was card #4 of the evening and if I had to create it again, I would add the birdhouse designer series die cut to the card front before adding the window sheet shaker piece, so it would show through the window and then add the Petunia Pop, Basic Gray and Granny Apple Green die cut pieces to the front as I did here. This card still looks pretty, but I think seeing the die cut birdhouse through the window would make it prettier.
This was the fifth stamping techniques shaker card and this card actually has a double front to it. This was another card that gave me some issues and it still wasn’t created correctly, and afterwards I ended up adding a piece on the inside to cover up the window sheet that was visible, so made a note to adhere the window sheet on top of the Basic Gray card front instead of behind it as I did last night.
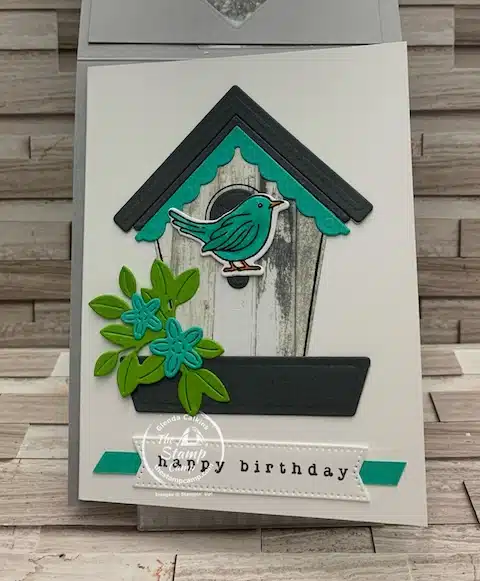
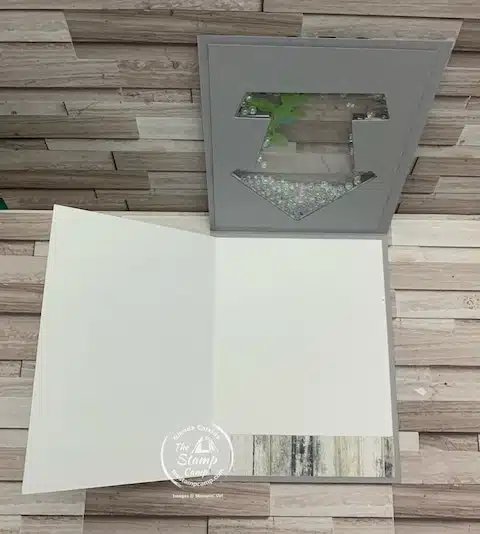
When you flip up the card front this Basic White card is revealed with your birdhouse die cut and the happy birthday sentiment. This can be any occasion card, but I used the Happy Birthday sentiment from the Country Birdhouse bundle. You now have another card to open to reveal the very inside of your card and you have ample space to stamp or write your wishes inside.
I couldn’t find my bird for the inside, so I had to stamp and color another one, but left that for after the class. The blue on this card is another new Summer Splash In Color and I think it pairs well with the Smoky Slate or Basic Gray cardstock.
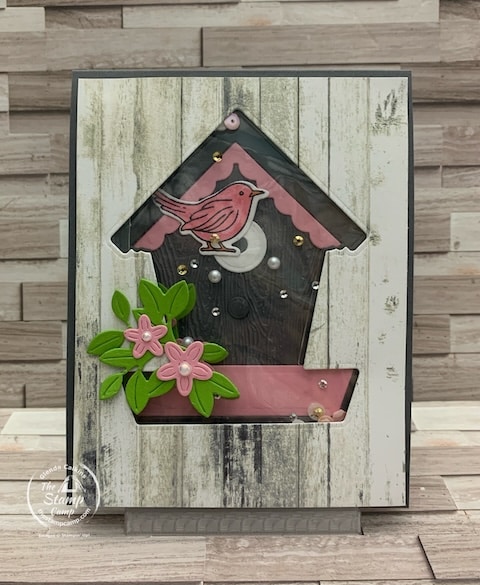
The final card of the night is another double front card just like the card before except I did not use the Window Sheets on this card, instead I used the clear envelope that some gems came in. There are some gem envelopes that are the perfect size for using on your shaker cards, this one ended up being just a bit larger than what I needed, so I showed how you can make it smaller to fit your card front. I also sandwiched the shaker bag between the die cut piece and the card front. I could have used one of the die cut out birdhouses on this card as well, instead of the Basic Gray birdhouse I have here. I did emboss this birdhouse with the Timber 3D embossing folder.
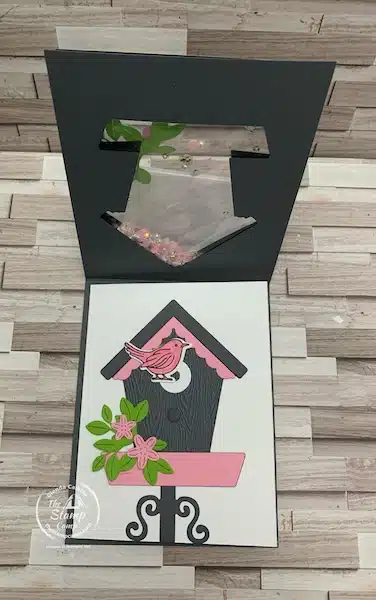
Here is the inside where you can see the completed birdhouse and the shaker bits through the window on the front. So, next time you are thinking about throwing out those clear envelopes that your gems came in; you will think again and save them for shaker cards.
Well yes, that was a long night and I so appreciate you guys hanging in there with me and getting through all six of these shaker cards, like I said at the beginning some of them still have mistakes but I think they ended up pretty nice and we have all learned a tip or two on creating shaker cards that’s for sure.
Here is your Shopping List If You Wish To Try Any of These Stamping Techniques:


Click on any of the products you wish to purchase and add them to your cart.
Remember you MUST use the Host Code unless your order is over $150.00, then do NOT use the host code and you will receive the host benefits, plus my rewards.
Here is the Video on These Six Different Shaker Cards – Using a One Sheet Wonder Technique:
The July Customer Appreciation:
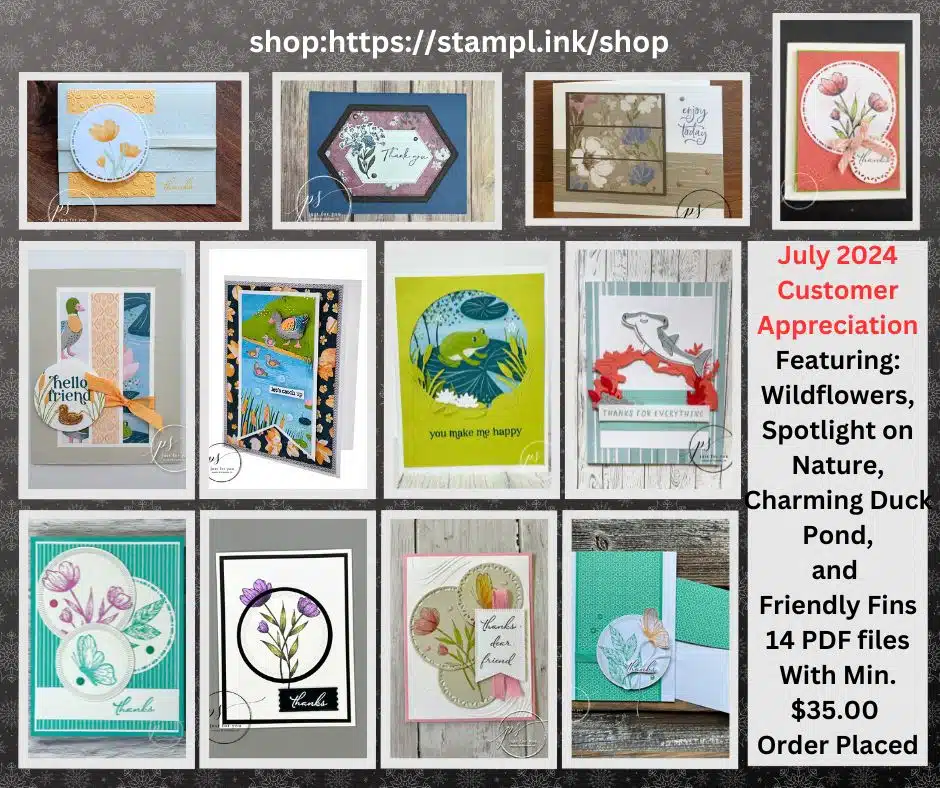
Last month these bundles were an additional 10% off, if you took advantage of that special and purchased any of these bundles you might just want to get this 14 PDF file grouping for FREE! That’s right get a jump start on ideas for those new bundles you just got. In this grouping of PDF files you will find tutorials for the Spotlight on Nature bundle, Charming Duck Pond bundle, Wildflower Designs bundle, and a sample for the Friendly Fins bundle. Get all these PDF file tutorials free with a min. $35.00 order and use of the current host code: R4C2URZK
Place your orders With The Stamp Camp Here: https://stampl.ink/shop
Click HERE to view How To Use A Host Code