
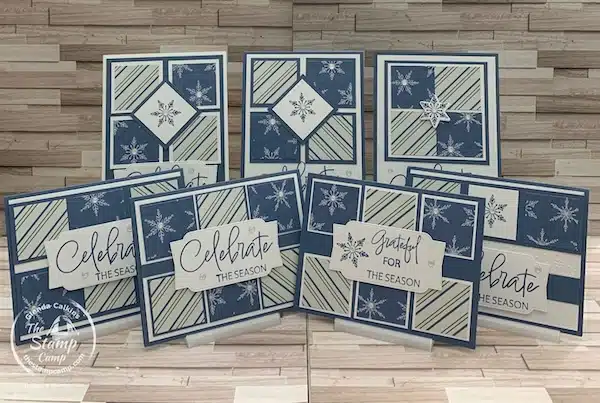
During last night’s One Sheet Wonder class I created seven different Christmas Cards with just Two 6 x 6 Sheets of the Iconic Celebrations Designer Series Paper choose your layout and create away! The beauty of last night’s cards is that each card uses the exact same size squares, so if you really like one layout better than the rest you can create a pile of cards all the same way. This is a great way to stretch your designer paper and make a bunch of cards from just two 6 x 6 sheets of designer series paper. These patterns or layouts can be done in any designer series paper you have on hand. Create masculine cards, birthday cards, baby cards, any occasion just by switching up the prints and the sentiments.
Let’s take a closer look at these One Sheet Wonder Christmas Cards:
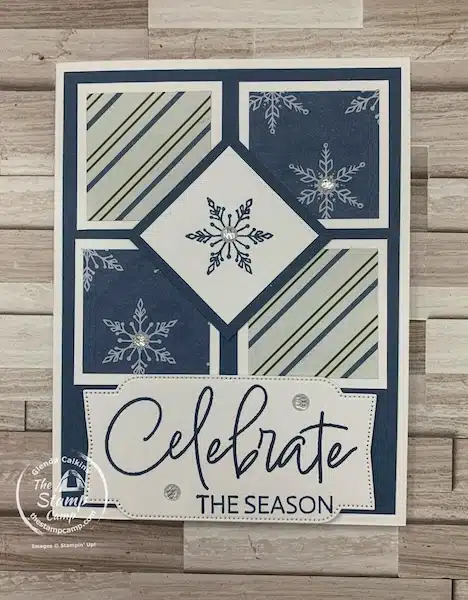
This was the first card of the night and the only card with the Basic White Thick cardstock base. If you want to save on cardstock, then this card might be the layout that you choose for all your cards as you will not need to add a piece of white to the inside as your card is already white. If you choose this layout, you will be able to create 8 cards, because you will only need 4 squares instead of 6. The white mats used on this card are 1/4″ larger than the designer series paper squares, giving you a larger white boarder all the way around the squares.

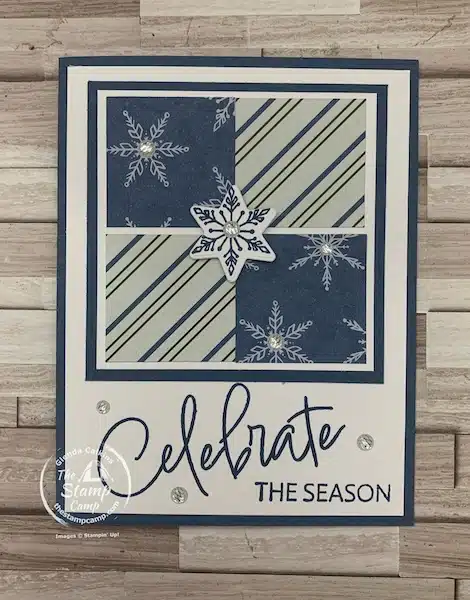
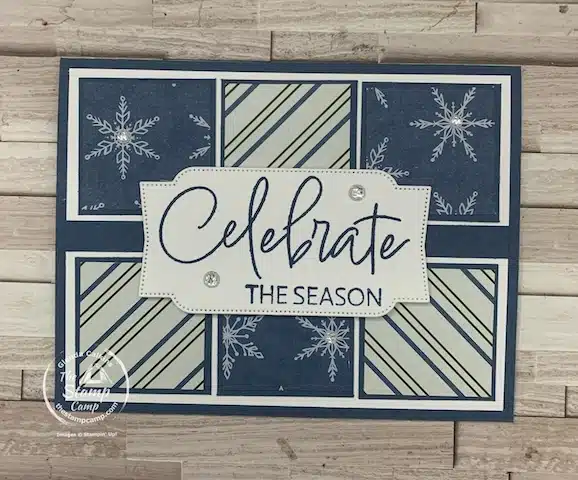
For card #2 I stamped the sentiment on the card front and didn’t use the die cut from the Iconic Imagery bundle. The snowflake stamp is part of the Iconic Imagery stamp set which coordinates with the paper perfectly. For this card, the mats are the Misty Moonlight cardstock and again I made them 1/4″ larger than the printed paper squares. The Pecan Pie & Clear Ribboned Adhesive-Backed Dots are the perfect accessory to highlight the snowflakes and the sentiment. You can add your bling to all the snowflakes or just around the sentiment the choice is yours; but I like to bling out the snowflakes and sentiment.
This card might be preferred if you do not like attaching those squares to more squares as on this card, I attached the squares to a large square of Basic White and then to a larger square of Misty Moonlight. Again, I like to spread the bling love and add it to all the snowflakes.
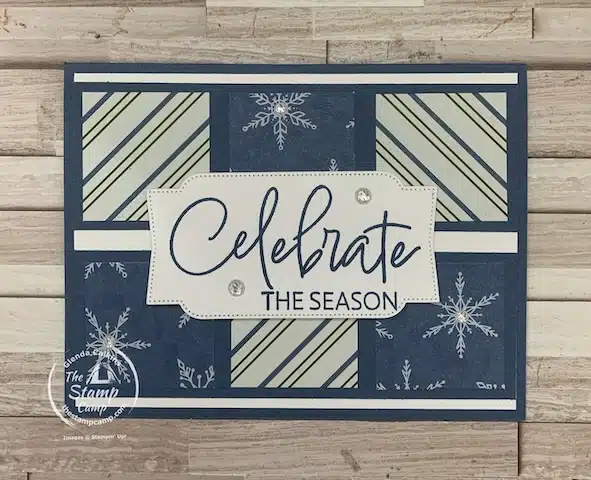
Moving on to using six squares instead of four squares. If you go with this layout, you will get a five cards and have two squares left over, so you could create card #7 with your two left over squares. This is another card where I didn’t use the single mats but added the squares to the Misty Moonlight strips and added them to the card front.
This card has a bit of an illusion to it, as it looks like I matted the squares onto Basic White squares, but I did not. If you watched the video or joined me last night you will find that the Basic White is a piece that covers the card front and I added a skinny strip of the Misty Moonlight cardstock down the center giving it the illusion that it isn’t a solid piece of Basic White cardstock.
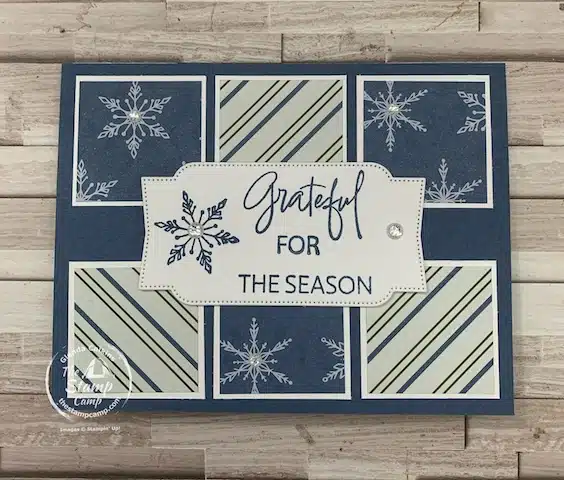
For card #6 I switched up the sentiment piece, stamped the Grateful for The Season, and added a coordinating snowflake to the sentiment piece. I also matted the squares with slightly smaller Basic White squares, showing more of the Misty Moonlight card base.
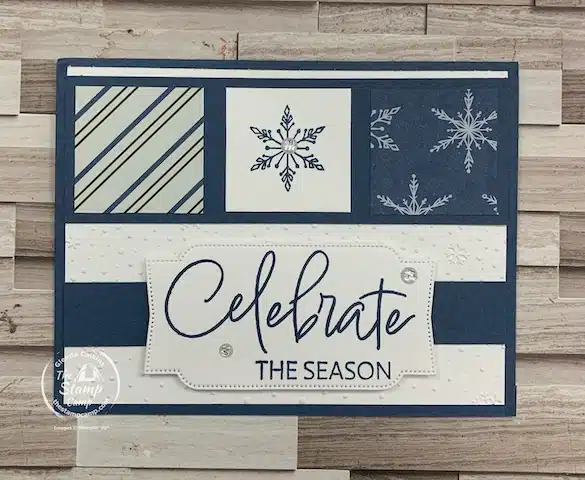
Finally, we made it to card #7. For this card I only used two squares of the Iconic Celebration Designer Series Paper and created my own center square piece with the snowflake stamp and the same size Basic White square. If you choose this layout, you will get 16 cards from just two 6 x 6 sheets of designer series paper. So, if you really want to create a pile of cards this would be the layout of choice.
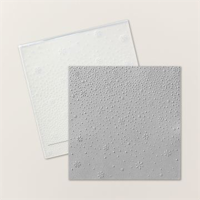
I also embossed the background Basic White cardstock piece using the Snowflake Sky 3D embossing Folder, this is not necessary but does give it a bit more texture and snowy feel to the card.
You may also notice in the video on this card I changed the sentiment and added an additional snowflake to the two snowflakes on the card front, giving the snowflakes more dimension and pop.
Here is your One Sheet Wonder Christmas Cards Shopping List:


Click on any of the products you wish to purchase and add them to your cart.
Remember you MUST use the Host Code unless your order is over $150.00, then do NOT use the host code and you will receive the host benefits, plus my rewards.
Here is the One Sheet Wonder Video:
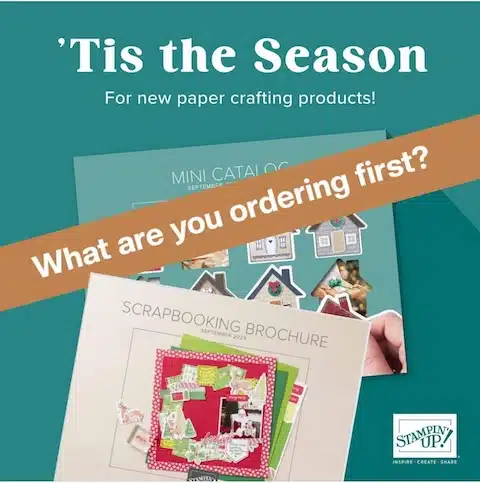
New Mini Catalog and Scrapbooking Brochure – Click on the images in the right-hand side bar to view.
September Customer Appreciation:
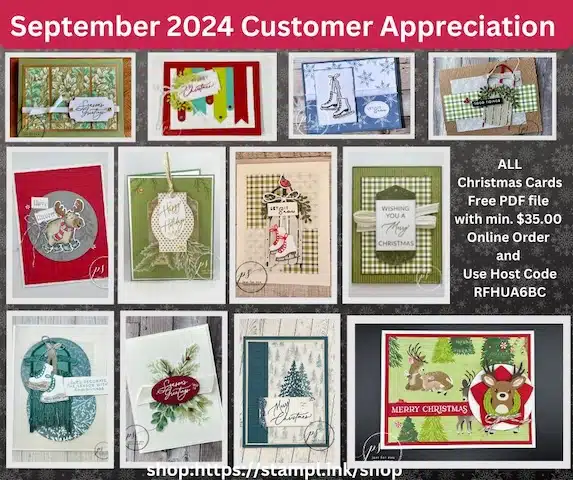
Is it too early to be talking about Christmas Cards? I don’t think it is ever to early to create some fun and festive Christmas cards. Why not get a jump start on your card making this year by creating any of these fabulous card or cards in this month’s PDF file. In this file you’ll find some traditional cards, festive cards, cute and fun cards and an array of endless possibilities.
This month with a min. $35.00 order and the use of my host code you will get ALL12 PDF files for the cards shown in the above photo. These cards were created with the following different stamps and bundles:
– Season of Green & Gold Suite Collection (164121)
– Sophisticated Sled Bundle (164134)
– Reindeer Days Suite Collection (164052)
– Sweetest Star Bundle (164098)
– Christmas Friends Bundle (164088)
– Greetings of the Season Bundle (164113)
– Frosted Forest Dies (164136)
– Iconic Imagery Bundle (164201)
Choose your favorite bundle(s) and get all the PDF files for free with a min. $35.00 order and use of the current host code: RFHUA6BC
Place your orders Here: https://stampl.ink/shop
How many Kits Collection Christmas Wishes kits will you order?
Click HERE to view How To Use A Host Code