
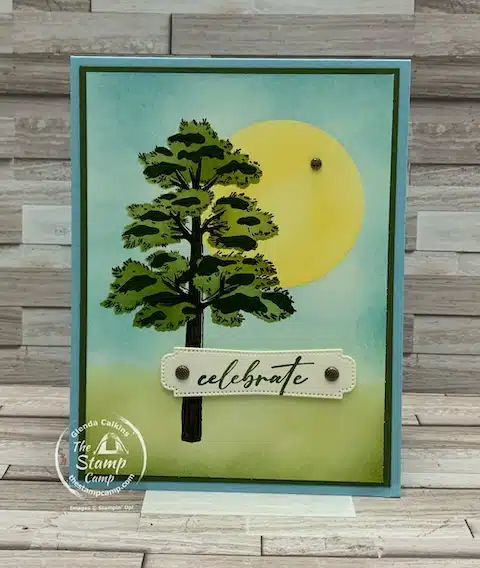
Are you ready to learn a Step-By-Step Stamp Masking Tutorial for creating a scenic print? Check out todays post featuring the Frosted Forest Bundle. This month I’ve been showing you different ways of creating masking techniques and today’s card is super easy to do and you will love your results.
You will start with a blank canvas of either Basic White or Very Vanilla cardstock and create a beautiful scene with just a few stamping elements and ink. So go grab your blending brushes, inks, a circle punch or the stylish shapes dies, and I’ve brought in the new Frosted Forest Bundle.
To begin I started with the circle from the Stylish Shapes die; cut a circle punch will do. Choose the size circle that you would like, mine is probably around a 1 3/4″ or 2″ size. I then cut 2 pieces of Very Vanilla cardstock 3 3/4″ X 5″ and on one of them I die cut out the circle in the upper right-hand corner. I then placed the cut out Very Vanilla piece over the top of the second piece and sponged my Daffodil Delight ink in the circle opening. Remove the top piece and place the die cut circle over the top, using removable tape to keep it in place or you can die cut a sticky note or masking paper using the same die you used. Once you have your yellow circle covered rip a piece of paper or cardstock and cover the bottom portion of your card. Using the Blending Brush and the Balmy Blue ink blend the ink across the top section of your card. Remove the ripped section from the bottom and blend the Old Olive ink across the bottom and into the blue area. You can now remove the sticky note circle or masking paper circle to reveal a night bright sun or moon with the sky and grassy area.
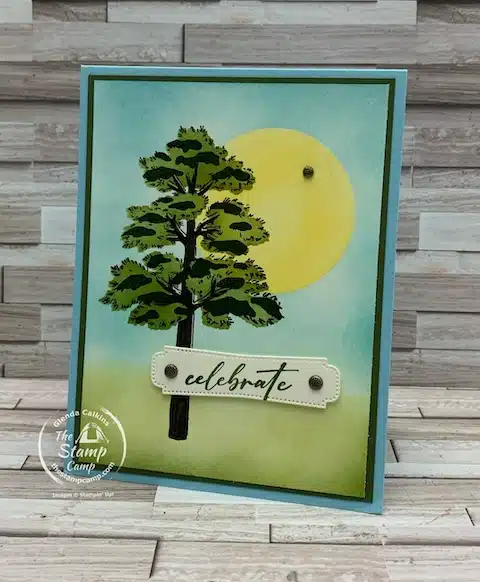
Now you are ready to use the Frosted Forest Mask. Here is your step-by-step stamp masking tutorial for this portion of the card. I started by placing my Frosted Tree Mask labeled #1 onto my sunset background piece as shown and using my blending brush and the Early Espresso ink I lightly blended my ink over the mask until I had the desired color. I removed that mask and added Mask #2 and using the Mossy Meadow ink I lightly blended the ink over the mask. Finally, I added Mask #3 and using the same Mossy Meadow ink and blended the ink over my mask darker. For the final step I inked up the tree stamp and stamped that over the top of my sponged tree, giving it the detail to the leaves and tree trunk.
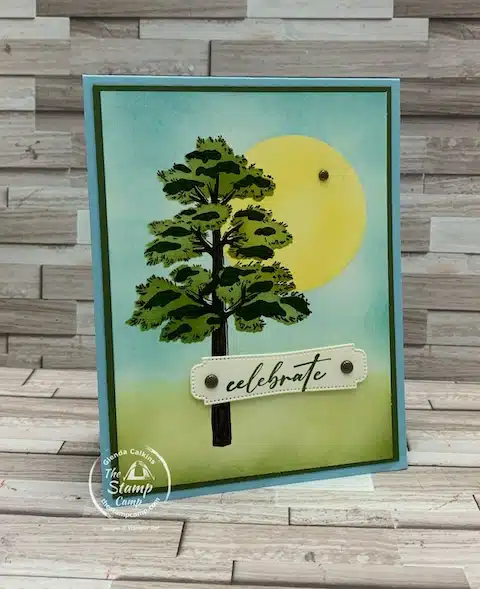
To finish off the card I stamped the celebrate sentiment onto a piece of Very Vanilla cardstock and die cut it out with a die from the Iconic Imagery dies. I attached it to my card front using dimensionals and then added a couple of the adhesive-backed textured dots.
The card base is Balmy Blue and the mat behind the scene is Mossy Meadow.
Here is your shopping list for today’s Step-By-Step Stamp Masking Tutorial:


Click on any of the products you wish to purchase and add them to your cart.
Remember you MUST use the Host Code unless your order is over $150.00, then do NOT use the host code and you will receive the host benefits, plus my rewards.
August Customer Appreciation
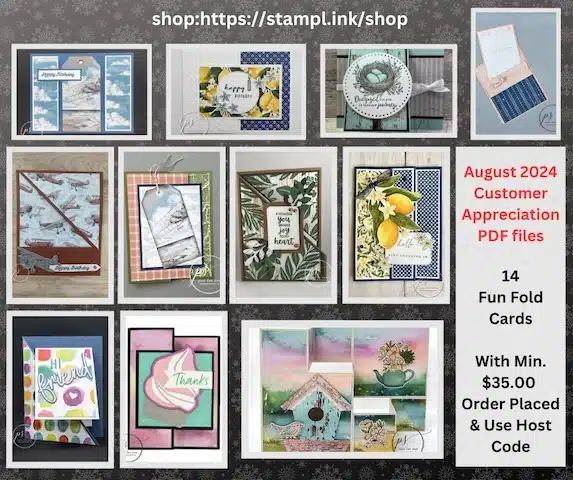
14 PDF Files featuring all fun fold cards, using a variety of current stamp sets and bundles.
We all love a good fun fold and this months customer appreciation pdf files are going to get your creative folds going. Use the PDF files as instructions for stamp sets and papers you already have on hand and have a ball creating cards to impress your family and friends. Some of the folds are repeats just done in different prints so you can see how easily you can adapt your paper prints to the folds and create a whole different look and feel to these popular fun folds.
Place a min. $35.00 online order with me and use the current host code. Remember if your order is over $150.00 DO NOT use the host code; you are your own host and you will receive the hostess rewards.
Host Code for August: DWWHDWYA
Stay tuned for more step-by-step stamp masking tutorials this month.
Place your orders Here: https://stampl.ink/shop
Click HERE to view How To Use A Host Code