
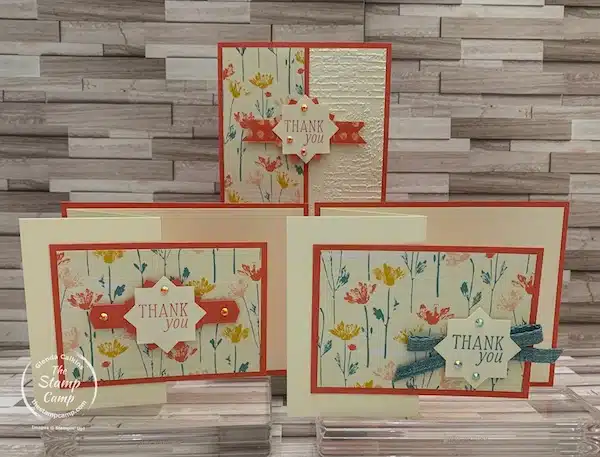
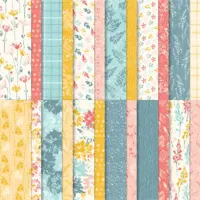
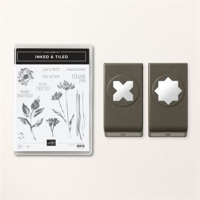
Are you ready for another set of 3 beautiful One Sheet Wonder Cards featuring the Inked Botanicals Designer Series Paper. Did you catch last night’s video? If not you can watch the video down below in this article. In last night’s video I not only showed how to make these 3 cards but I also showed some tips and techniques for using the Inked & Tiled stamp set and punch. I love to show the versatility you have with punches and to show you how to use them in a different way so that it makes the punch more of a value for your craft room.
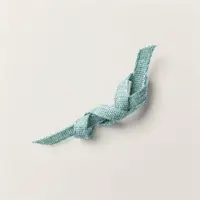
The paper pack and the Lost Lagoon ribbon are part of my Stamp Camp At Home Card Club Kit this month. If you are a club member you will find the PDF file and Download Pattern for today’s cards in the photo gallery here on my blog.
Not a club member and want to know how to become a club member or what it is all about? Check out this blog post HERE.
Let’s Take a Closer Look At These 3 Inked Botanicals Designer Series Paper Cards:
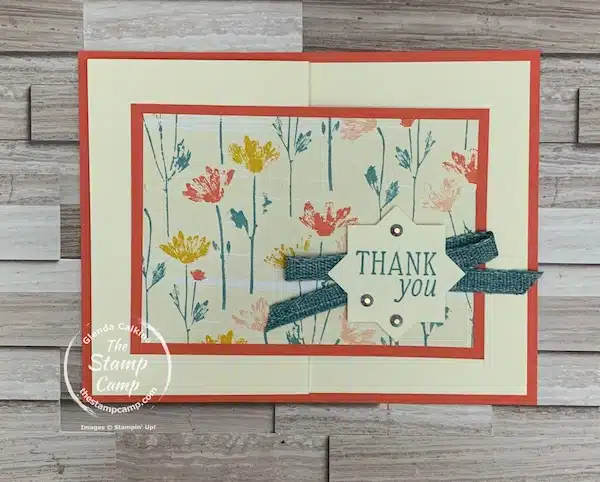
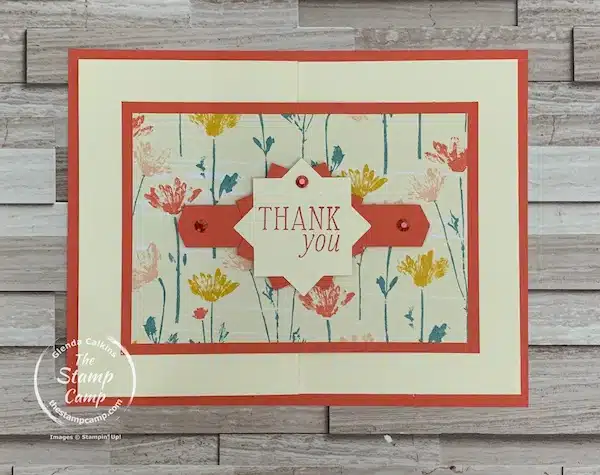
The first 2 cards I created were Z-Fold cards. Yes, you’ve probably created these types of cards before, but did you use up the whole sheet of your designer series paper? I love to create one sheet wonder cards and by using up the whole piece of designer series paper I don’t feel like I wasted any of the gorgeous prints. It is nice to create the same cards with the paper or create all different card designs with the paper. Even though both the first and second card are identical on how they are put together each card was finished a bit differently.
For this first card I used the Lost Lagoon ribbon and made it look like a tied bow and but the sentiment piece on top. No trick really. but if you have never done this before you may find that useful to watch the video. I also stamped the inside of the card with the flower from the Inked & Tiled Bundle. Now the flower, stem and leaves are all on the same stamp so I showed how to multi-color your stamp with the Lost Lagoon and Calypso Coral markers and then how to add a bit more color or shading after stamping your image.
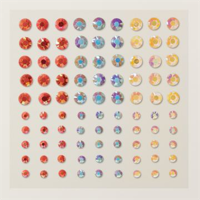
For the second card I used the punch to create the banner under the stamped and punched sentiment pieces. I then added a few of the Iridescent Pastel Gems to the banner piece and the sentiment piece.
For the final 3rd card I used the strip that was left over and attached it to the Very Vanilla cardstock that was embossed with the Exposed Brick 3D Embossing Folder. You will also notice that banner strip under the sentiment piece was flagged. This was another technique I showed with the punch from the bundle. This punch makes it easy to create both the flagged edges or the pointed edges as shown in the second card. I also used the leftover strip from the first cut of the Inked Botanicals Designer Series Paper, I just flipped it over to the other side.
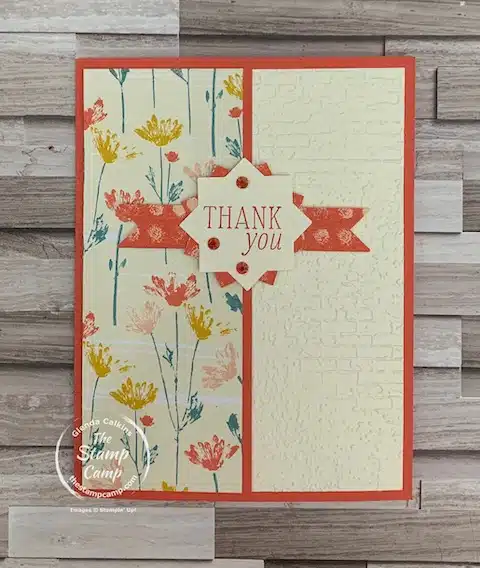
For the inside of this card I inked the stamp using the Lost Lagoon Marker and the Calypso Coral Marker both are in the Subtles pack. I then used the Wink of Stella to blend the stamped image and give it a little sparkle. Just another way to use Markers with stamps and fill in where needed.
Here’s Your Shopping List To Create These Inked & Tiled Bundle One Sheet Wonder Cards:


Click on any of the supplies you wish to purchase and add them to your shopping cart. Make sure to use the Host Code unless your order is over $150.00 then you are your own host and will receive all the host benefits and my PDF File.
Host Code: Q9HARHDY
Here is the Video:
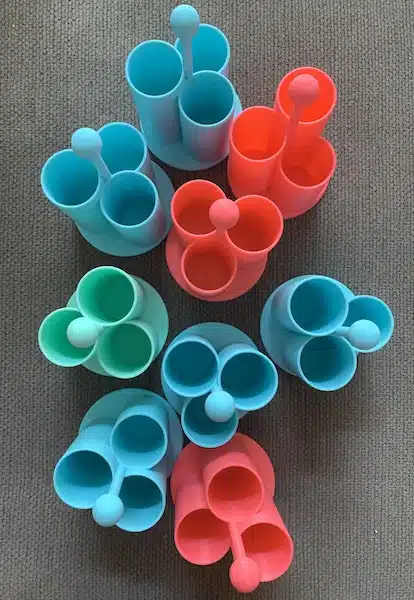
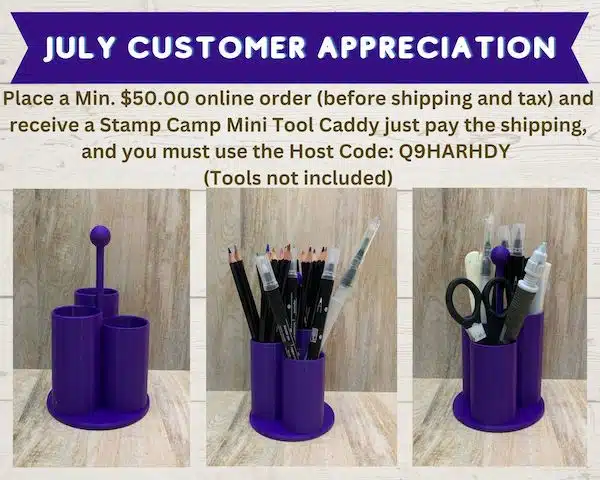
My customer appreciation gift for July is a mini tool caddy. This little tool caddy is so versatile you will definitely want to add it to your craft room. What will you put in your tool caddy? Make it a Watercolor caddy or maybe a caddy for all your miscellaneous crafting items. The choice is yours but I’m sure you’ll love it! Colors of the mini tool caddy will vary. Here are just a few of the tool caddy’s the 3D printer has been spitting out this week. Do you have one coming your way?
How do you receive this mini tool caddy?
Place a minimum $50.00 online order with me (before shipping and tax) and use this host code: Q9HARHDY
Just pay the Shipping
Once I have received your order I’ll send you a PayPal invoice for the shipping of the mini tool caddy. Depending on your area code the price will vary. I will send it in a padded envelope to the address used when you placed your order.
Why am I charging for shipping this time when last month I sent the mono glue holders for free?
– Trial and error on my part; if this is a business for me I need to make a profit on my sales and not give away everything.
– By sending you a PayPal invoice for the shipping I know for a fact that you wanted to receive the gift, if payment is not received in 2 days I’ll cancel the invoice and will know you wish not to receive the mini tool caddy.
– Not only will this help to insure me that you wanted the free gift but will help in keeping the minimum order amount at a lower price point.
Can I purchase a Mini Tool Caddy?
– I will not be selling any of my Mono Glue Holders, Large Tool Caddy’s or the Mini Tool Caddy’s. You can earn these for FREE with my Stamp Camp Rewards. See my Rewards page HERE.
Remember you MUST use the Host Code unless your order is over $150.00!
Please use the host code: Q9HARHDY
Click HERE to view How To Use A Host Code
Is the Inked Botanicals Designer Series Paper on your list?
Place your orders Here: https://stampl.ink/shop