
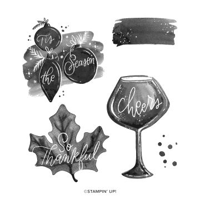
I’m continuing on with the stamping techniques that you can do with the Cheers to the Season stamp set. This stamp set is so versatile and is great for all your upcoming fall and winter events. Plus, this stamp set lends itself to a numerous amount of stamping techniques.
I’ve already showed you a few different fall themed cards with the leaf image from this stamp set. I used a direct ink to stamp method and then a few different cards showing different baby wipe techniques. If you missed those blog post you can catch them HERE and HERE.
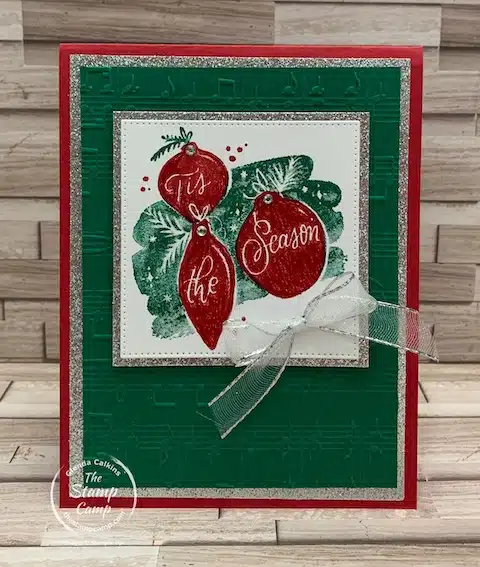
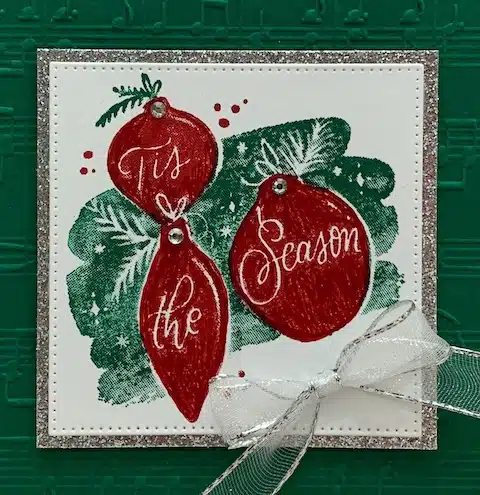
For today’s Christmas card using this stamp set I used the Marker Technique. You may be wondering what is the Marker Technique; I’m not sure I’ve ever heard of that. Well it is simply using markers to multi-color an image before you stamp it onto your cardstock. This can be done in a couple different ways.
First you will need to color your image with the different color markers. For today’s card I used Real Red and Shaded Spruce markers to multi-color my stamp. I then huffed on the stamp and then proceeded to stamp it onto a piece of Basic White cardstock. Then I used the fine tip of the marker to fill in where it wasn’t stamped so nice with the coordinating marker colors. You can also add some shading with the fine tip of other color markers if you like. You may not like how your image stamped but don’t give up; keep filling in with the fine tip of the markers until you get your desired results.
The second way you can use markers to add color to your stamps is to multi-color your image using markers and then lightly mist your stamp with water before stamping. This is more of a watercolor method and is generally better to use watercolor cardstock to stamp on. This is generally a more smeary method and not a crisp stamped image. If you enjoy the watercolor look you will want to give this method a try.
Let’s Take a Closer Look at this Christmas Card Using the Cheers to the Season Stamp Set
I’m not sure if you can see from this picture but the Shaded Spruce cardstock was embossed with the Merry Melody 3D embossing folder. When I read the stamp “Tis the Season” to be Jolly stuck in my head so I thought the background embossed with the Musical notes would be perfect.
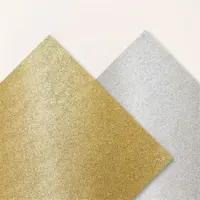
I also wanted to bring out some sparkle to my card so I added a piece of the Silver Adhesive Backed Glimmer Paper. You will not find this paper pack in any of the Stampin’ Up! publications it is an online exclusive paper pack. You can find all the online exclusive items HERE.
Stamping Techniques Tip:
Here’s a tip for you regarding the Sliver Glimmer Paper or really any background paper that you don’t necessarily want to waste by covering it up with another layer of cardstock. Use any type of punch or framelits that you have to die cut or punch out the center of your paper you wish not to cover up. In this case I didn’t want to cover all that gorgeous silver glimmer paper with my shaded spruce cardstock so before adding it to my card I die cut out the center using the Stylish Shapes dies as shown below:
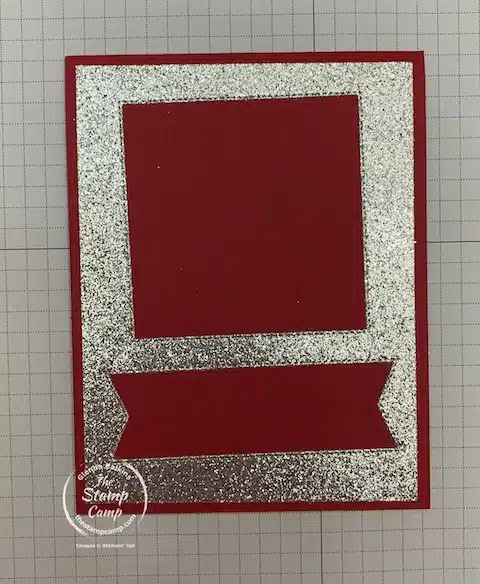
By using the framelit dies from the Stylish Shapes dies I can leave a nice border around the outside edge of the glimmer paper and use the center die cut out pieces for another card. This also makes it so your cards are not as heavy or thick and no one will be the wiser that you removed the center portions.
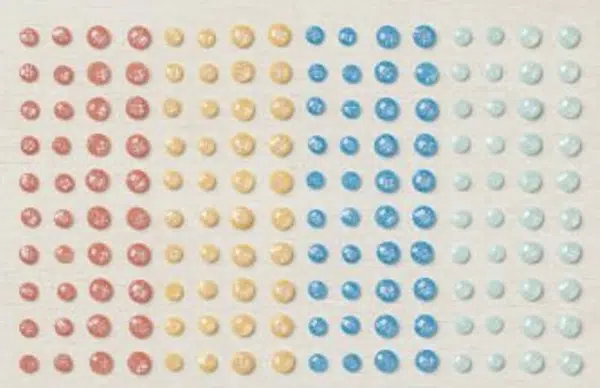
I also wanted to incorporate the silver from the glimmer paper into other elements on my card so I used the Rhinestones to add some sparkle to the ornaments and the Silver and White ribbon from the mini catalog to tie it all together; so to speak.
Here is your shopping list for today’s Cheers to the Season Stamp Set Christmas Card:


Just click on the products you wish to purchase and add them to your shopping cart.
Make sure to use the Host Code unless your order is over $150.00 then you are your own host and will receive all the host benefits.
Host Code: SVETXTY9
When it comes to spreading holiday cheer, the Cheers to the Season Stamp Set is an absolute must-have. This set is one of the best seasonal stamp sets in the New Stampin’ Up! Mini Catalog. With its festive designs and versatile options, this stamp set is sure to elevate your crafting projects to a whole new level of holiday magic. This stamp set will take you from Fall cards, Thanksgiving, Christmas and New Years all in one set! The images are beautiful and this is a set you are sure to love!
Are you ready to take your crafting projects to new heights? Look no further than the Stampin’ Up! Mini Catalog and its must-have stamp sets that will unleash your creativity like never before. From stunning designs to endless possibilities, these seasonal stamp sets are perfect for beginners and seasoned stampers alike. Get ready to impress everyone with your crafting skills as I dive into the world of these must-have stamp sets. This week we are going to be taking a look at the Cheers to the Season Stamp Set.
September Customer Appreciation:
Place a min. $50.00 order (before shipping and tax) and you MUST Use the Host Code: SVETXTY9 and I’ll send you a package of the Fine Sparkle Adhesive-Backed Gems.
Remember you MUST use the Host Code unless your order is over $150.00, then do NOT use the host code and you will receive the host benefits, plus my rewards.
Please use the host code: SVETXTY9
Click HERE to view How To Use A Host Code
Is the Cheers to the Season stamp set on your wish list yet? If not I’m hoping to sway you in that direction this week. I think this stamp set is a hidden gem and I’m hoping you will think so too! In my book this is one of the best seasonal stamp sets you will find.
Birthday Special
We all love stamping specials am I right? Since it is my Birthday Month I thought I’d offer a little adhesive gift tote that you could purchase for yourself or as a gift for someone else. This super cute tote has some of my favorite adhesives inside and when the adhesives are all used up the tote makes a great tool tote for on the go stamping or to keep all your tools together.
I came across these super cute totes and thought how about creating an Adhesive Tote for anyone who would like to purchase one. I also have some Stamp Camp adhesive stickers that you can add to the front and backside of your tote if you wish or keep them plain the choice is yours.

What adhesives will come in your tote?
Each Tote Includes full pack of:
- Foam Adhesive Sheets
- Black Stampin’ Dimensional assortment pack
- Mini Stampin’ Dimensionals
- Stampin’ Dimensionals
- Mini Glue Dots
- Multipurpose Liquid Glue

I have a limited number of these totes available each tote is $34.00, plus $8.30 shipping in a padded Priority Envelope, and includes tracking services.
Tote & Contents over a $45.00 value (Tote Colors will vary: pink, black, orange, blue)
To Order fill out the Form Below: I’ll send you a PayPal invoice once I receive your email request to purchase my Adhesive Tote.
Error: Contact form not found.
What can you do with your tote after your adhesive is used up?
Make it a Tool Tote of course!

Believe it or not these totes hold A LOT! Store all your crafting essential tools inside the totes for traveling or just to keep all your things together.
Place your orders Here: https://stampl.ink/shop