
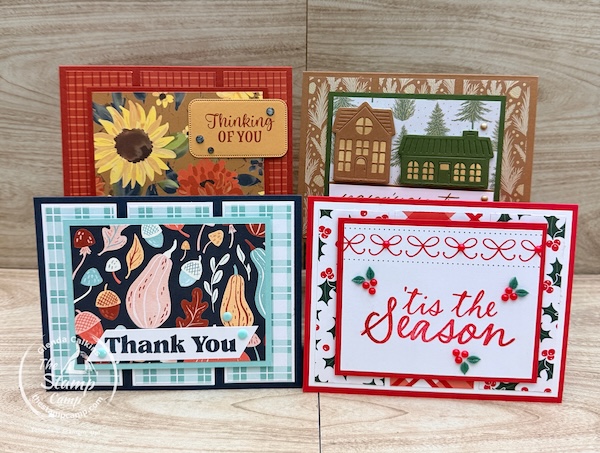
Are you looking for easy card sketches for beginners that you can use to create beautiful handmade cards for any occasion? This week’s Card Sketch #76 is the perfect place to start! With just a few strips of Designer Series Paper, a focal point, and your favorite greeting, you can create gorgeous cards in no time!
Today, I’m sharing four handmade cards featuring different Stampin’ Up!® Designer Series Paper collections. From cozy Christmas villages and cheerful sunflowers to autumn gourds and festive holiday greetings, you’ll see just how versatile one simple card sketch can be!
The best part? You don’t need to be an experienced card maker to give this layout a try. Whether you’re brand-new to stamping or have been making cards for years, The Stamp Camp is here to help you find inspiration and put those beautiful Stampin’ Up! products to good use!
Card #1: A Cozy Christmas Village with Neutral Noel
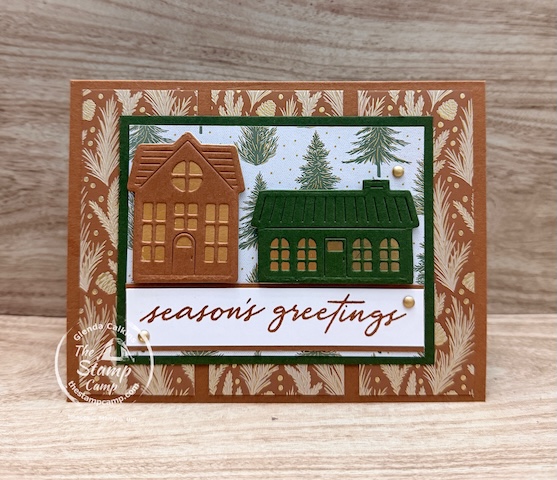
Our first card follows Card Sketch #76 and features the beautiful Neutral Noel Designer Series Paper paired with the Welcome Noel Bundle.
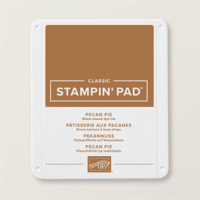
I started with a Pecan Pie cardstock base and added three strips of Neutral Noel Designer Series Paper across the front.
For my focal point, I layered another piece of the Neutral Noel Designer Series Paper onto Mossy Meadow cardstock.
Next came my favorite part—the little Christmas village! Using the Welcome Noel Bundle, I die cut the houses from Pecan Pie and Mossy Meadow cardstock. I also die cut the coordinating house outline from Gold Foil and attached it behind the houses so the gold shines through the windows. It’s such a pretty detail that gives the houses a warm, glowing appearance!
The “Season’s Greetings” sentiment is from the Noel Tidings Stamp Set, and a couple of Gold Adhesive-Backed Dots finish off the front.
For the inside, I added Basic White cardstock with a coordinating strip of Neutral Noel Designer Series Paper.
Card Making Tip: Adding a little Designer Series Paper to the inside of your card is an easy way to carry your design throughout the entire card!
Card #2: Bright and Cheerful Sunflowers
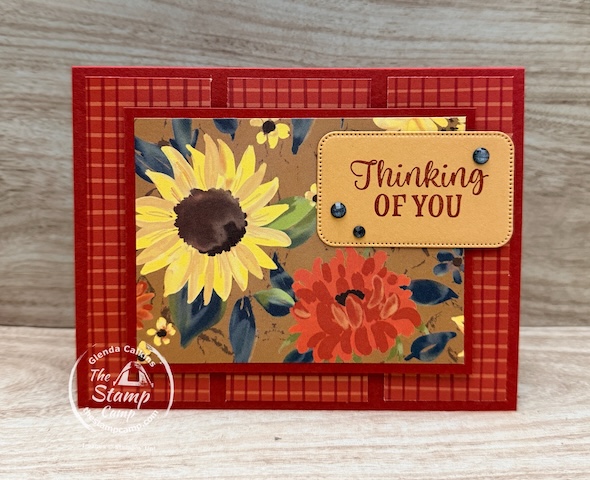
Who doesn’t love sunflowers? For my second card, I’m switching things up with the beautiful Sunflower Fields Designer Series Paper and the Radiant Sunflowers Bundle.
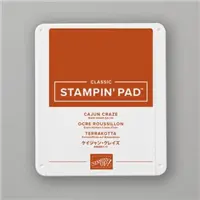
I started with a Cajun Craze cardstock base and attached three strips of Sunflower Fields Designer Series Paper across the front.
For the focal point, I chose another print from the collection featuring larger sunflowers. I matted this piece onto Cajun Craze cardstock and popped it up on the card front for added dimension.
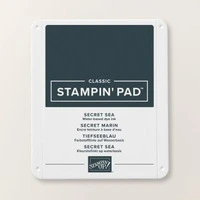
The sentiment and coordinating die cut are from the Radiant Sunflowers Bundle. To finish the card, I added a few Secret Sea accents using the Radiant Dots.
I love how the rich Cajun Craze cardstock complements the sunflower prints!
Card Making Tip: When working with Designer Series Paper, let the beautiful patterns do most of the work! Choose a larger print for your focal point and smaller coordinating prints for your strips. It’s an easy way to create a card that looks like you spent hours designing it!
Card #3: Autumn Thank You with Painted Patch
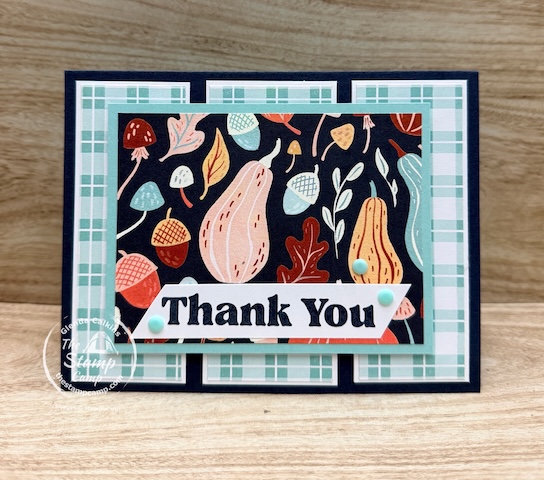
For my third card, I decided to put a little twist on Card Sketch #76 using the Painted Patch Designer Series Paper.
I started with a Secret Sea cardstock base, but instead of attaching my three strips of Designer Series Paper directly to the card front, I matted each strip onto Basic White cardstock.
Here’s the twist: I cut my Basic White mats just a little smaller than the Designer Series Paper strips, creating a slightly different layered look.
For my focal point, I chose another print from the Painted Patch Designer Series Paper featuring beautiful gourds, leaves, and acorns. I layered this piece onto Pool Party cardstock and popped it up on the card front.
The thank-you sentiment comes from the coordinating Painted Pumpkins Stamp Set. A few Painted Patch Adhesive-Backed Dots around the sentiment complete the card.
I love the combination of Secret Sea and Pool Party with these beautiful autumn prints!
Card Making Tip: Don’t be afraid to change up a card sketch! Adding cardstock layers, changing the size of your strips, or adjusting your focal point are all simple ways to make a sketch your own.
Card #4: A Festive Christmas Greeting with Timeless Christmas
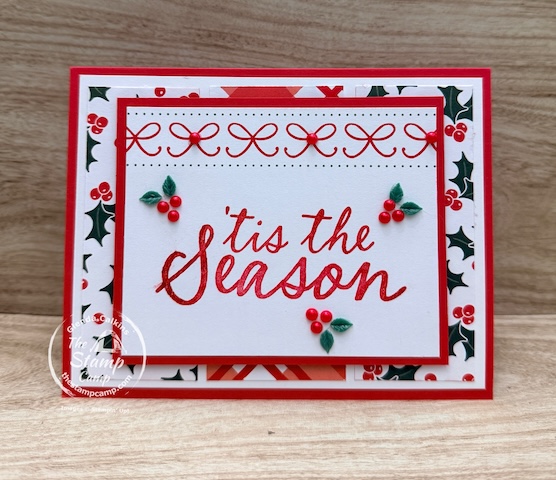
For my fourth and final card, I made another little change to our easy card sketch for beginners.
This time, I started with a 4″ x 5 1/4″ piece of Basic White cardstock and attached three strips of Timeless Christmas Designer Series Paper to the front.
Instead of cutting a rectangular focal point from Designer Series Paper, I used one of the coordinating tag designs included in the Timeless Christmas paper pack.
I trimmed the tag to the size I wanted and stamped my greeting using the Scallop Christmas Cheer Stamp Set.
To finish the card, I added coordinating holly berry embellishments for a festive touch.
What I love most about this card is how easily you can use the printed designs in your Designer Series Paper packs to create beautiful focal points without needing lots of extra supplies.
Card Making Tip: Before cutting into your Designer Series Paper, take a look at all the patterns! Many collections include beautiful designs that can be trimmed down and used as ready-made focal points, tags, or accents.
Why Card Sketch #76 Is Easy Card Sketches for Beginners?
One of the reasons I love sharing my weekly card sketches is to show you that you don’t need complicated layouts or fancy techniques to make beautiful handmade cards.
This week’s simple card sketch for beginners is a great example!
We created four completely different cards using the same basic layout. By changing the Designer Series Paper, cardstock colors, and focal points, each card has its own personality.
And remember, you don’t have to follow the sketch exactly!
As you can see with cards three and four, I changed things up a little by adding layers and using a tag instead of a traditional rectangle.
That’s the beauty of card sketches. They give you a starting point, but the creativity is all yours!
Download Your FREE Card Sketch #76
Are you ready to give this week’s sketch a try?
You can download your FREE Card Sketch #76 below and add it to your collection of printable card sketch templates.
I recommend printing your sketches and keeping them in a binder. That way, whenever you need a little card making inspiration, you’ll have plenty of layouts ready to go!
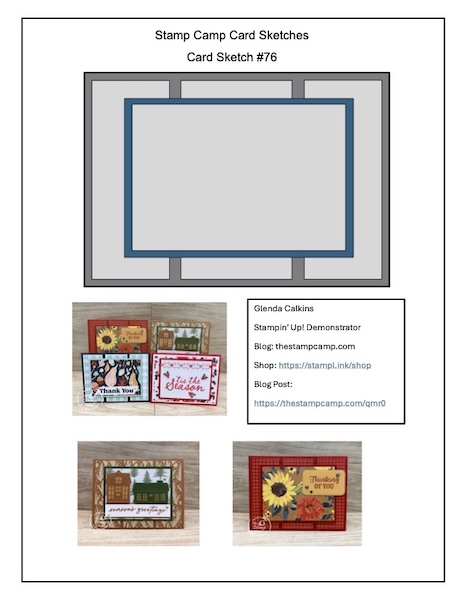
Want Card Sketch #76 with Measurements and Step-by-Step Instructions?
If you love having the exact measurements and instructions so you can recreate the layout quickly and easily, I have a special offer for you!
When you place a minimum $50 qualifying order in my Stampin’ Up! online store, I’ll send you the information to access the downloadable card sketch with measurements and step-by-step instructions.
It’s easy! Simply place a minimum $50 order (before shipping, tax, and rewards) in my Stampin’ Up! online store between October 1-31, 2026.
IMPORTANT: If you’re using your Stampin’ Rewards, make sure your order total is still at least $50 after your rewards have been applied. Your qualifying merchandise total must be $50 or more at checkout, before shipping and tax.
Shop the Supplies for Today’s Easy Card Sketches for Beginners!





Simply choose the products you need, then use Card Sketch #75 as your starting point. Whether you copy one of my cards or create something completely different, I hope today’s easy card sketches for beginners inspires you to pull out your favorite Designer Series Paper and start creating!
Your orders truly are what make it possible for me to continue creating and sharing these downloadable card sketch examples, and inspiration each week. Whether you’re placing your first order with me or you’re one of my returning customers, I sincerely appreciate every order, large or small.
October Customer Appreciation Continues!
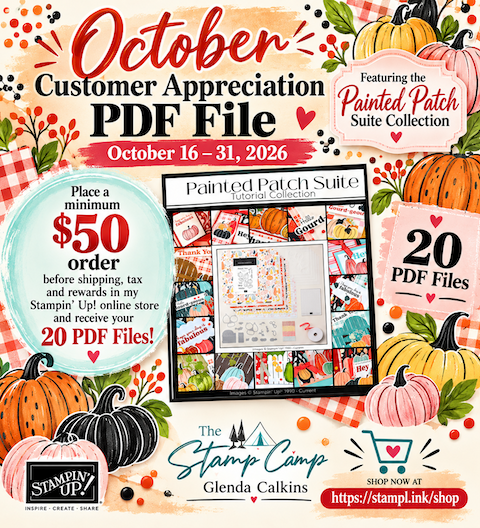
Love pumpkins, fall colors, and creating beautiful handmade cards? Then you’re going to LOVE my October Customer Appreciation gift featuring the Painted Patch Suite Collection from Stampin’ Up!®
From October 16–31, 2026, I’m treating my customers to a fabulous collection of 20 downloadable and printable PDF projects featuring the Painted Patch Suite Collection!
Whether you’re brand-new to stamping or have been making cards for years, these projects are packed with creative inspiration to help you get the most out of your Stampin’ Up! supplies.
What’s Inside the Painted Patch PDF Collection?
You’ll find 20 beautiful handmade card projects, including:
- Fun fold cards with creative twists and unique designs.
- Quick and easy cards perfect for beginner stampers.
- Step-by-step PDF instructions you can download and print.
- Helpful tips, techniques, and different card folds to expand your creativity.
- Plenty of inspiration for using your favorite Designer Series Papers, stamps, and coordinating products.
The best part? You can save these PDF files, print them, and refer to them whenever you’re ready to create!
How to Receive Your FREE October Customer Appreciation PDFs
It’s easy! Simply place a minimum $50 order (before shipping, tax, and rewards) in my Stampin’ Up! online store between October 16–31, 2026.
IMPORTANT: If you’re using your Stampin’ Rewards, make sure your order total is still at least $50 after your rewards have been applied. Your qualifying merchandise total must be $50 or more at checkout, before shipping and tax.
SHOP HERE: https://stampl.ink/shop
You Get to Choose Your FREE PDF Collection!
Here’s something extra special about this month’s Customer Appreciation offer!
Once I’ve received your qualifying order, you get to choose which collection you’d like to receive:
Option 1: Painted Patch Suite Collection
Receive access to my exclusive Painted Patch Album featuring 20 gorgeous card projects, complete with downloadable and printable PDF instructions. Perfect for anyone who loves pumpkins, autumn colors, and creative card folds!
Option 2: Sunflower Fields Suite Collection
Prefer sunflowers? Choose my Sunflower Fields Album instead and enjoy 34 beautiful card projects featuring the Sunflower Fields Suite Collection, complete with downloadable and printable PDF instructions.
The choice is yours! Want BOTH sets of PDF files place a min. $100.00 order (before shipping, tax, and rewards) in my Stampin’ Up! online store between October 16–31, 2026.
IMPORTANT: If you’re using your Stampin’ Rewards, make sure your order total is still at least $100 after your rewards have been applied. Your qualifying merchandise total must be $100 or more at checkout, before shipping and tax.
After placing your order, simply email me with your choice of the Painted Patch or Sunflower Fields PDF Collection, and I’ll email you the unlock code to access your selected album on The Stamp Camp blog or I’ll send both passwords if your order is over $100.00.
SHOP WITH THE STAMP CAMP TODAY!
Thank you so much for choosing The Stamp Camp for your Stampin’ Up! shopping and creative inspiration! I truly appreciate every order, whether you’re shopping with me for the first time or you’re one of my wonderful returning customers.
I can’t wait to share these beautiful projects with you and help inspire your next handmade creation!
Happy Stamping!
Glenda Calkins
The Stamp Camp
Your Independent Stampin’ Up! Demonstrator
One thought on “Easy Card Sketches for Beginners: From Fall to Christmas!”
I have 3 of these cards design stamp sets. These are so pretty. Thank you for sharing.