
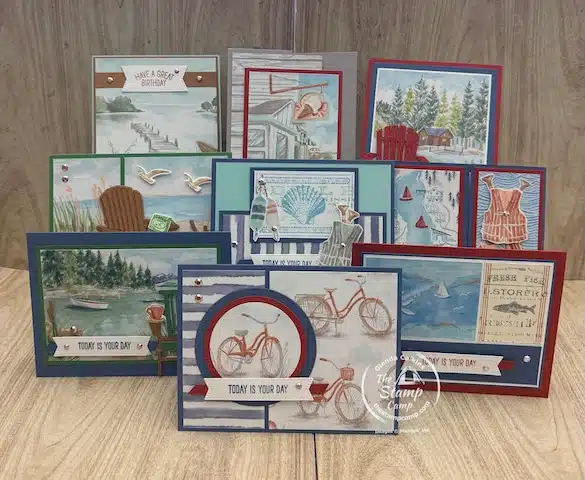
Did you tune in to last night’s One Sheet Wonder Cards class featuring the beautiful Waterside Retreat Suite? This month’s project is one of the exclusive bonus tutorials included in my Suite of the Month Class, and it is packed with inspiration for anyone who loves creating beautiful cards with their designer series paper.
With just one 12 x 12 sheet from the Waterside Retreat Designer Series Paper pack I created nine beautiful handmade cards. The result was a collection of scenic cards that are perfect for birthdays, thinking of you cards, thank you cards, masculine cards, and so much more.
Remember, all orders of $75.00 or more (before shipping and tax) placed in my Stampin’ Up! online store this month will receive access to ALL of my Waterside Retreat Suite downloads, PDF tutorials, video tutorials, and bonus 3D projects. It is an incredible value and a great way to get the most from your crafting supplies.
What I love most about this One Sheet Wonder 12×12 design is how versatile it is. By carefully cutting a single sheet of designer paper, you can create a variety of card layouts while showcasing the beautiful scenic images throughout the paper. Each card has its own unique look and feel, yet they all coordinate beautifully as a collection.
For these cards, I used sentiments from the coordinating Relaxing Waterside Bundle, which paired perfectly with the peaceful lakeside scenes found in the designer paper. The greetings were kept simple so the stunning artwork could remain the focal point of each design.
This collection of One Sheet Wonder Cards includes a variety of layouts, from simple cards that are quick and easy to assemble to a few fun fold designs that add extra interest and surprise. The different card styles demonstrate just how much variety you can achieve when working from a single sheet of patterned paper.
The real showstopper of the evening was the final card—a gorgeous double easel card. This design took the scenic paper to a whole new level and created a beautiful display piece that would be treasured by anyone who receives it. It was the perfect way to finish off the class and prove that a single sheet of designer paper can go a very long way.
Let’s take a look at each of the nine card samples I created from just one 12 x 12 sheet of the Waterside Retreat Designer Series Paper.
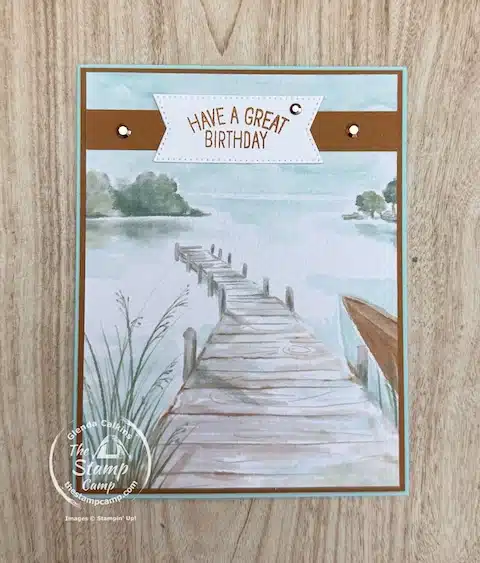
Card #1 is super simple to create and is a perfect example of why I love One Sheet Wonder Cards. Simply trim the scenic image from your 12 x 12 sheet to fit the card front, add a coordinating sentiment, and finish it off with a few embellishments. In just minutes, you have a beautiful handmade card that lets the designer paper do all the work.
Card #2 combines a couple of pieces from the Waterside Retreat Designer Series Paper to create a beautiful layered design. By pairing two coordinating patterns from the One Sheet Wonder 12×12 layout, this card comes together quickly while still providing plenty of visual interest.
A simple sentiment is all that is needed to brighten someone’s day and keep the focus on the gorgeous scenery featured in the paper. To finish the card, I added just a few Metallic Gems to the front for a subtle touch of sparkle and elegance.
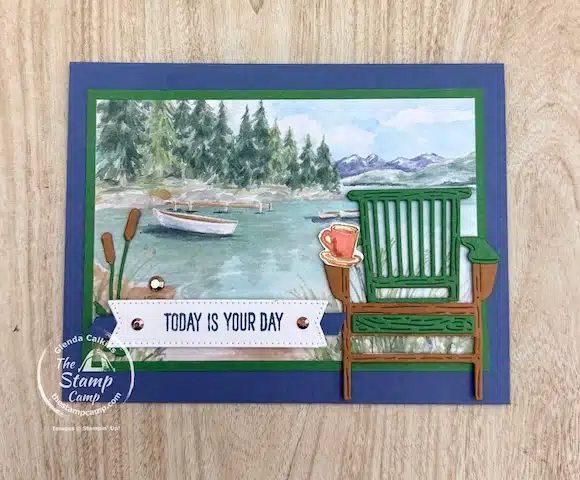
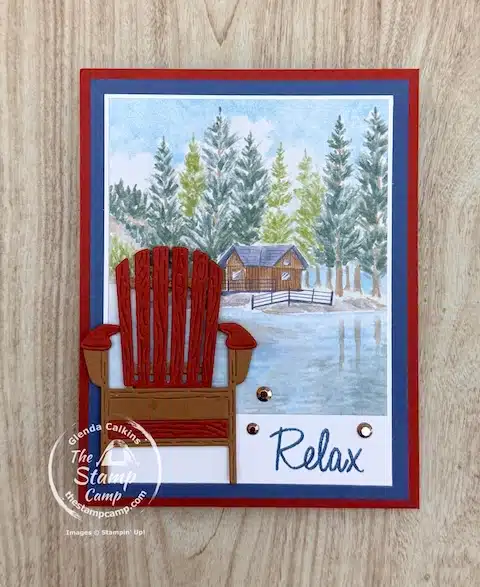
Card #3 showcases another one of the beautiful scenic prints from the Waterside Retreat Designer Series Paper. The peaceful waterside view creates the perfect backdrop for a relaxing card design that invites you to slow down and enjoy the moment.
To enhance the scene, I die cut an Adirondack chair and added a few cattails along with a cup of coffee, creating a cozy setting that looks like the perfect place to sit and unwind. The coordinating sentiment completes the card without taking away from the stunning scenery.
This card demonstrates how a few simple die-cut elements can transform a piece of designer paper into a charming focal scene. One of the things I love about One Sheet Wonder Cards is that each card can have its own unique personality while still being created from the same 12 x 12 sheet of paper. The added details on this card make it feel peaceful, relaxing, and perfect for sending a thoughtful greeting to a friend or loved one. It is sure to be a hit with anyone who receives it.
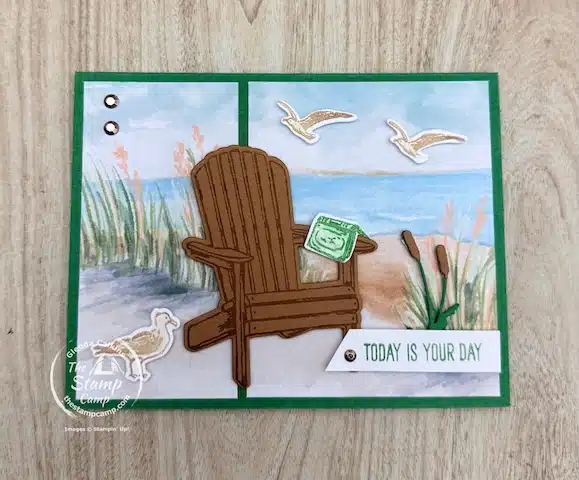
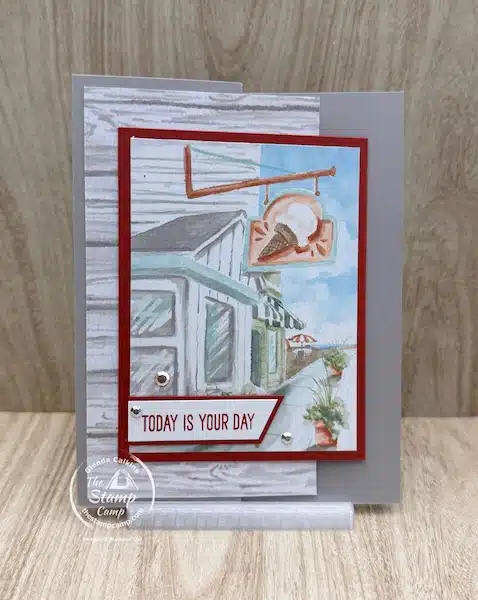
Card #4 features yet another beautiful scenic print from the Waterside Retreat Designer Series Paper. To complement the peaceful waterside view, I added a die-cut Adirondack chair, a few cattails, some seagulls, and a sweet sentiment. These simple additions help bring the scene to life and create a card that feels calm and inviting.
To add a little extra interest to the design, I cut the scenic print into two separate pieces before adhering them to the card front. This simple technique creates additional dimension and helps draw the eye across the card while still allowing the gorgeous scenery to remain the focal point.
The great thing about this design is that the choice is completely up to you. You can leave the scenic piece intact for a more traditional look or cut it apart as I did to create a slightly different layout.
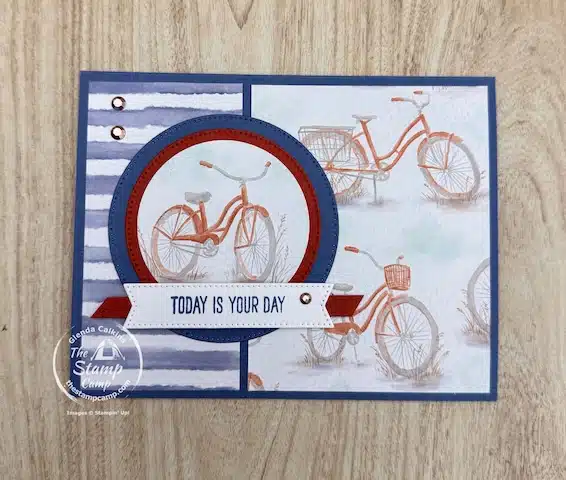
Card #5 is a change of scenery, so to speak, as I switched from the scenic waterside prints and used the backside of the Designer Series Paper. To add some interest, I incorporated a piece of the bicycle print from the paper pack, creating a fun and playful design with a completely different look and feel from the previous cards.
For the focal point, I used a circle punch to punch out one of the bicycles from the designer paper and then layered it onto a couple of coordinating circle die cuts. This simple technique allows you to highlight one of the paper’s fun images without requiring any stamping or coloring.
I think this card would be perfect for a child or teenager celebrating a birthday, but it could also work well for congratulations, encouragement, or just a cheerful note to brighten someone’s day. It is amazing how versatile these One Sheet Wonder Cards can be when you start incorporating both sides of the paper.
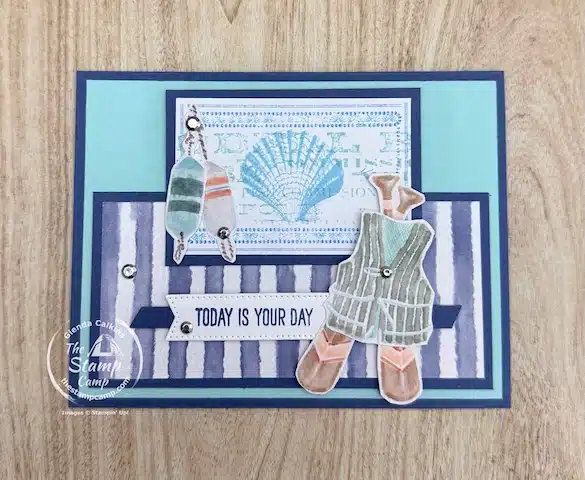
Card #6 features both the front and backside of the Waterside Retreat Designer Series Paper. Combining the scenic print with one of the coordinating patterns from the reverse side creates a cohesive design that showcases the versatility of this paper pack.
To enhance the fishing and lakeside theme, I hand-cut several images directly from the designer paper, including buoys, oars, and a life jacket. These added elements bring extra detail and dimension to the card front while tying in perfectly with the outdoor retreat feel of the suite.
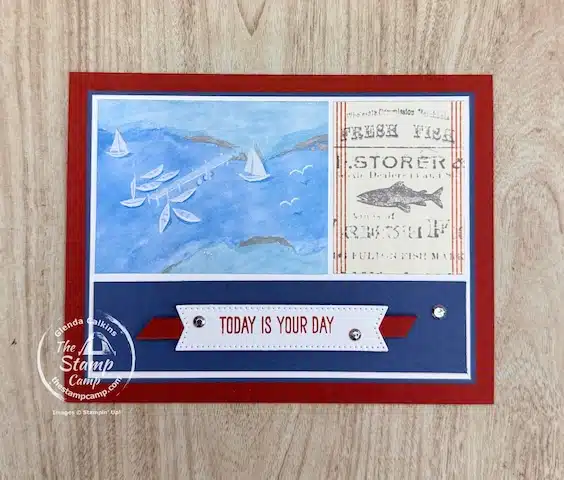
Card #7 is the first of the fun fold cards in this One Sheet Wonder Cards Tutorial, and it really showcases how a few simple details can completely transform a scenic print.
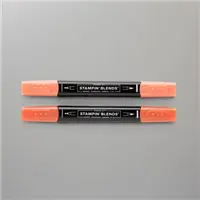
To add a bit more interest to the designer paper, I used my Cajun Craze Stampin’ Blends to color all of the sailboats featured in the scene. This simple coloring technique helps the sailboats stand out against the background and brings a pop of color to the card front without overwhelming the beautiful waterside view.
To continue the lakeside theme, I hand-cut another life jacket and a few oars from other prints in the paper pack and added them to the card front. These extra elements coordinate perfectly with the scene and add dimension and visual interest to the overall design.
One of the things I love about creating easy one sheet wonder cards is that you can take a simple piece of designer paper and customize it to fit your style. Whether you choose to leave the print as is or add coloring and hand-cut elements like I did here, the possibilities are endless.
Card #8 is another fun fold card that combines multiple elements from the Waterside Retreat Designer Series Paper into one interactive design. On the card front, I layered a scenic print together with the woodgrain pattern, creating a warm and natural backdrop that sets the tone for the entire card.
The real fun begins with the interactive openings. When you open the first section on the card front, it reveals a bicycle that was punched from another piece of the Designer Series Paper. This unexpected detail adds a fun surprise element while keeping the design cohesive with the paper pack theme.
Then, when you open the card fully, there is an additional reveal—another bicycle that has been hand cut from the paper and placed on the inside of the card. This layered reveal makes the card feel extra special and adds a little moment of delight for the recipient as they explore each section.
Although this double-opening fun fold design may look complicated at first glance, it is actually very simple and easy to create once you understand the basic folds.
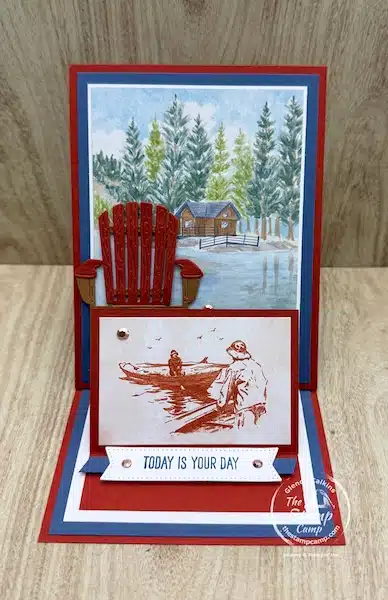
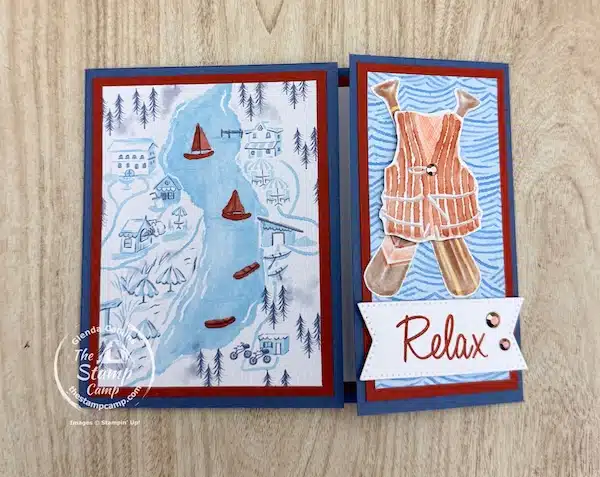
Card #9 is the final card in this One Sheet Wonder Cards Tutorial, and it is truly the showstopper of the entire collection. This double easel card features two different scenic prints from the Waterside Retreat Designer Series Paper, creating a layered, dimensional design that perfectly captures the peaceful lakeside theme.
On the card front, I completed the scene by adding an Adirondack chair along with a simple sentiment. These small details help bring the outdoor setting to life while still allowing the beautiful designer paper to remain the focal point.
When you easel up the front panel, it reveals another scenic print from the paper. This second layer also functions as an easel and includes its own coordinating sentiment, adding even more interest and interaction to the design. Each layer builds on the last, creating a card that is both eye-catching and fun to display.
To finish the inside of the card, I added a hand-cut fish along with another sentiment, tying everything together with a cohesive waterside theme. These final touches complete the scene and make the card feel polished and thoughtful from every angle.
This double easel design is the perfect ending to the One Sheet Wonder 12×12 project. It may look intricate, but it is surprisingly simple to create once broken down step by step.
This final card is the perfect summer greeting for anyone on your list—whether for birthdays, thinking of you, or just a cheerful note to brighten someone’s day.
Here is your Shopping List for These Nine One Sheet Wonder Cards:


Click on any of the supplies you wish to purchase and add them to your shopping cart; I SO appreciate any and all orders!
Here is the Video Tutorial:
Here is the June Customer Appreciation:
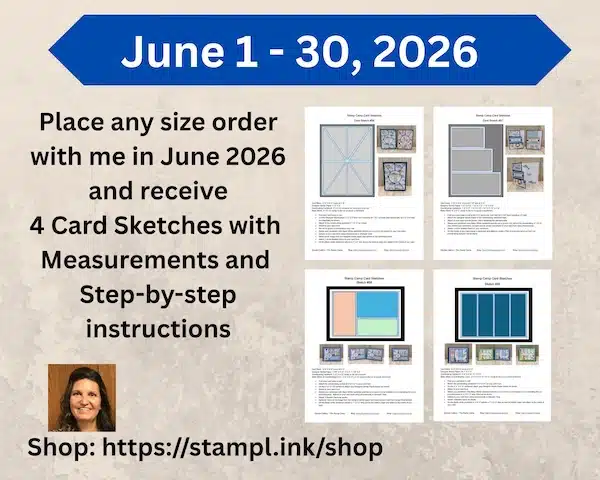
Place a min. $1–$49.99 Order in my Stampin’ Up! Store
You will receive:
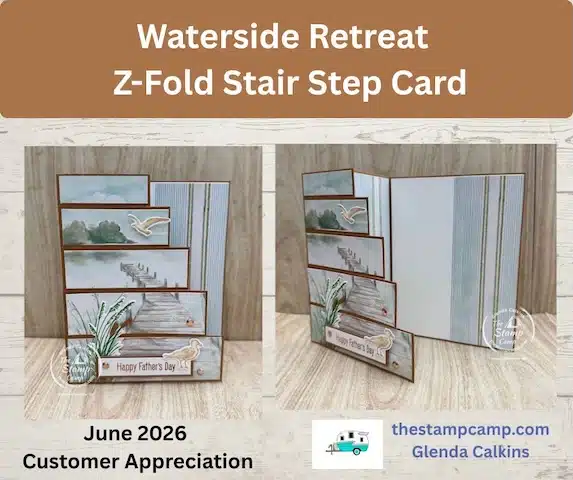
- A Download PDF file with Step-by-step video tutorial for a Z-Fold Stair Step Card perfect for any occasion
- Four Card Sketches with Measurements and Step-by-Step Instructions (This month it is Card Sketches 56-59)
Want More Inspiration and Ideas for the Waterside Retreat Suite:
Place a min. $50+ Order (before shipping & tax)
You will receive:
- The Z-Fold Stair Step Card PDF file and video shown above.
- 4 Card Sketches with Measurements and Step-by-step instructions
- 4 Beautiful Cards using the Waterside Retreat Suite (one simple card and 3 fun fold cards)
- Step-by-step videos + PDF instructions for all 4 cards
- 8 bonus card PDF tutorials (cards not shown and no video tutorial but step-by-step instructions)
- Total 17 cards


Looking for a 3D Project or a Great One Sheet Wonder Project:
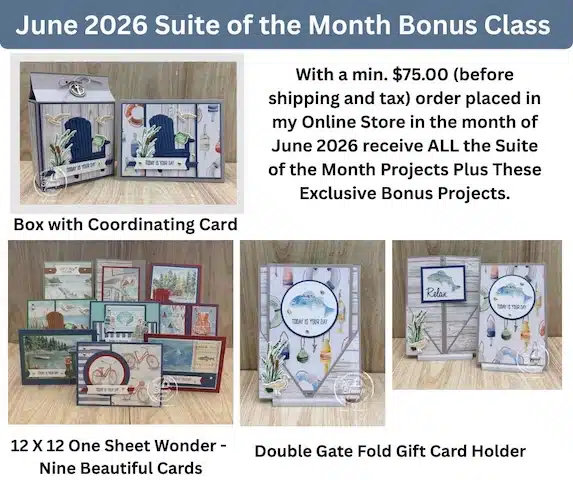
Place a min. $75+ Order (before shipping & tax)
You will receive:
- Everything in the $50 level PLUS
- 3 additional BONUS projects:
- A Double Gatefold Pocket fun fold gift card holder
- A One Sheet Wonder (9 cards) 3 are fun fold cards
- A beautiful Gift /Treat Box with coordinating card
- Total 28 cards plus a 3D box
I hope you enjoyed seeing all the projects I have ready to share using the beautiful Waterside Retreat Suite! I truly had so much fun creating these for you, and I know you’re going to love making them too.
If you’d like to get your hands on these tutorials, now is the perfect time to place your order and take advantage of this month’s Suite of the Month Class offerings.
Simply place your Stampin’ Up! online order with me and you’ll receive all the coordinating projects based on your order level.
You can shop anytime in my online store here:
Have questions? I’m always happy to help—just send me a message!
Thank you so much for stopping by, and for your continued support of my small business. It truly means so much to me.
Happy Stamping!
Place your orders Here: https://stampl.ink/shop
2 thoughts on “The Stamp Camp One Sheet Wonder Cards Tutorial: 9 Cards, One Sheet”
Do you have a way to get the directions for free? I am a demonstrator so can’t place an order with you.
Hi Jamie, I can send you a PayPal invoice for $46.00 for the full month’s Suite of the Month Class featuring the Waterside Retreat suite. Just let me know. Thanks and Happy Stamping!