
It’s time for another Weekly Sketch Challenge, and today’s focus is all about simple card sketches for beginners. Sketches are one of the easiest ways to jump-start your creativity because the layout is already done for you—you just get to play with your favorite papers, stamps, and embellishments.
For this week’s challenge, I’m sharing easy card sketches with Designer Series Papers. If you’ve ever wondered what to do with those gorgeous patterned papers in your stash, this is the perfect way to show them off without feeling overwhelmed.
Why Use Card Sketches?
-
They give you a starting point—no blank page stress!
-
You can create multiple cards quickly by swapping out the papers.
-
They work for any occasion: birthday, thank you, holidays, or just because.
This week’s sketch is pretty simple, but that’s exactly why it’s so versatile! Not only is it perfect for simple card sketches for beginners, but it can also be the starting point for some fabulous fun fold cards if you want to step it up.
I’ve shown my take on today’s sketch in both a vertical and horizontal direction, so you can decide which layout is your favorite. This is one of those easy card sketches with Designer Series Papers that works beautifully no matter which way you turn it.
Tip: Try flipping the sketch or rotating it to see how your Designer Series Papers give a completely different look.
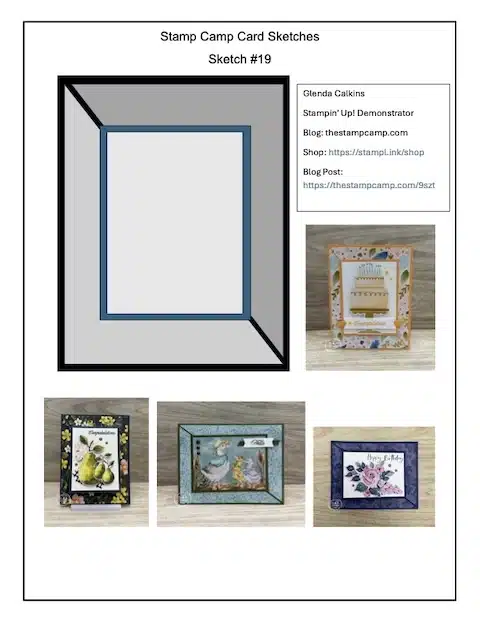
To download and print Sketch #19 Click HERE
To download and print Sketch #18 Click HERE
To download and print Sketch #17 Click HERE
To download and print Sketch #16 Click HERE
To download and print Sketch #15 Click HERE
To download and print Sketch #14 Click HERE
To download and print Sketch #13 Click HERE
To download and print Sketch #12 Click HERE.
To download and print Sketch #11 Click HERE.
If you would like to print Sketches #1 – #10 Click HERE.
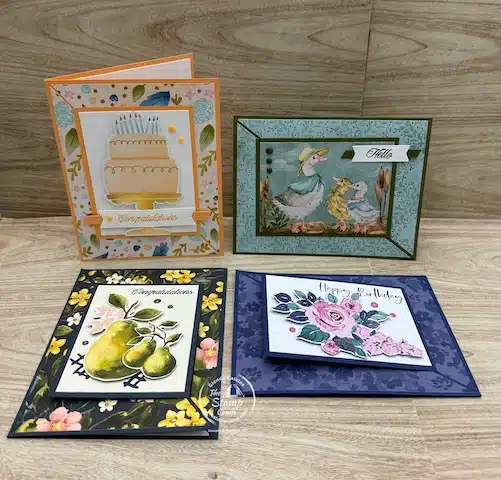
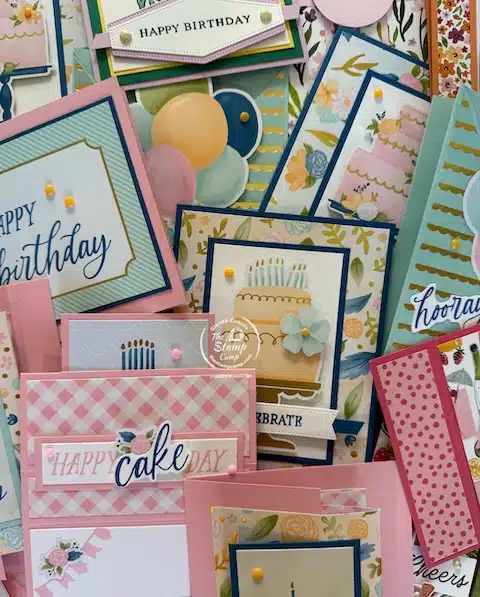
A Closer Look at My Cards
Now let’s take a look at each of the cards I’ve created with today’s sketch. I started with a basic layout that’s perfect for beginners.
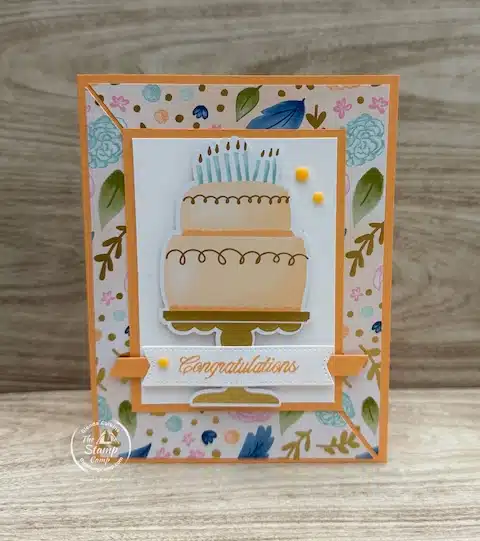
Card 1: Vertical Layout
The first card uses today’s sketch in the vertical layout. The card base is Peach Pie, cut at 5 1/2″ x 8 1/2″ and scored at 4 1/4″. For the background, I chose a bold pattern from the Wildflower Birthday Specialty Designer Series Paper, cut to 4″ x 5 1/4″ and then sliced on the diagonal to fit the sketch.
The center focal panel is another layer of Peach Pie cardstock, cut to 3″ x 4″, with a Basic White panel measuring 2 3/4″ x 3 3/4″. This clean space really lets the focal image shine.
For the main image, I chose a die-cut cake image which is part of the Specialty Designer Series Paper and popped it up with Dimensionals for added depth. The sentiment, “Congratulations,” comes from the Perfectly Pears stamp set and ties the design together beautifully.
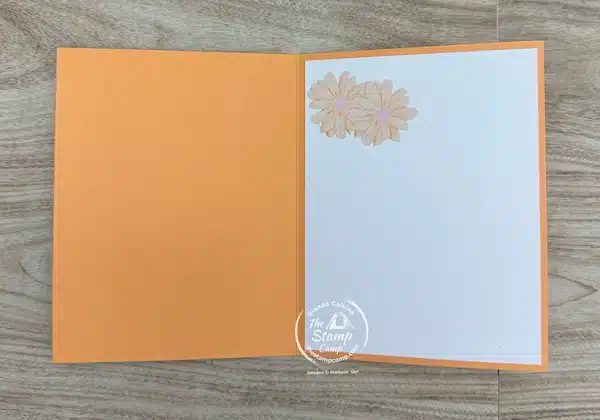
For the inside, I added a panel of Basic White cardstock cut to 4″ x 5 1/4″. To carry the design from the front to the inside, I tucked in a couple of the flower die cuts from the Wildflower Birthday Specialty Designer Series Paper.
One of my favorite things about this paper pack is that it includes two full sheets of ready-to-use die cuts. No fussy cutting, no extra die cutting required—just pop them out and add them to your project. It’s such an easy way to step up your design while keeping the process beginner-friendly.
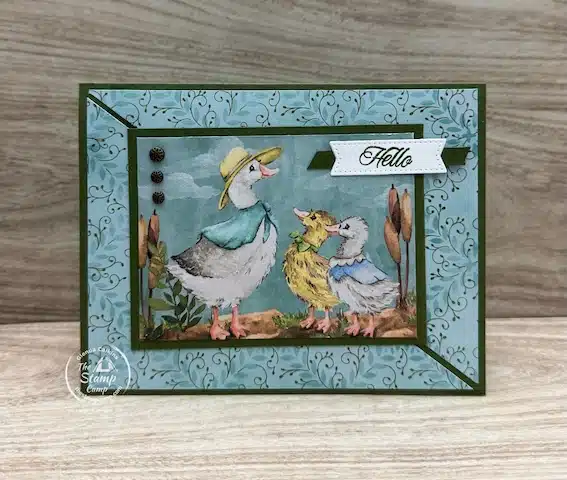
Card 2: Horizontal Layout
For my second card, I turned the sketch to a horizontal layout. I used the charming Storybook Moments Specialty Designer Series Paper, which—just like the Wildflower Birthday pack—includes two sheets of ready-to-use die cuts. I love how quick and easy it is to build a card when the images are already cut and ready to go.
The measurements for this card are exactly the same as the vertical version:
-
Mossy Meadow Card Base: 5 1/2″ x 8 1/2″, scored at 4 1/4″
-
Background DSP: 4″ x 5 1/4″, cut on the diagonal
-
Focal Panel: 3″ x 4″ Mossy Meadow with a 2 3/4″ x 3 3/4″ scene from the designer series paper
Simply turning the sketch sideways gives the whole design a fresh look, while still keeping it simple enough for beginners to recreate.
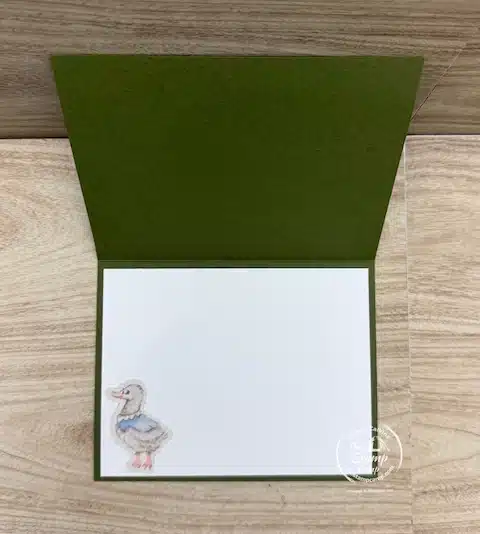
On the inside, I added a panel of Basic White cardstock cut to 4″ x 5 1/4″. To finish it off, I tucked in a sweet little duckling die cut from the Storybook Moments Specialty Designer Series Paper.

Card 3: Vertical Fun Fold
For card #3, we’re taking the vertical sketch and turning it into a fun fold card. The card base is the new Secret Sea In Color, cut at 5 1/2″ x 8 1/2″ and scored at 4 1/4″. I cut the base on the diagonal from the score line down to the bottom left-hand side to create a dynamic flap.
Next, I created a mini card from another piece of Secret Sea, measuring 3″ x 8″ and scored at 4″. The mini card was added to the card front, with the diagonal flap neatly tucked inside, creating a fun layered look that’s interactive and playful.
For the design, I used the Painterly Pears Designer Series Paper. The pears on the mini card were hand-cut from one of the prints in the pack for a personalized touch. The sentiment and coordinating Secret Sea die cut come from the Perfect Pears Bundle, and to finish it off, I added a few low-profile sparkle dots for just the right amount of shine.
For the inside of the mini card, I added a couple more hand-cut pears from the Painterly Pears Designer Series Paper. This simple touch ties the inside to the front design and completes the fun fold in a cohesive, polished way.
Even with a fun fold, the card stays beginner-friendly while giving a little extra “wow” factor.
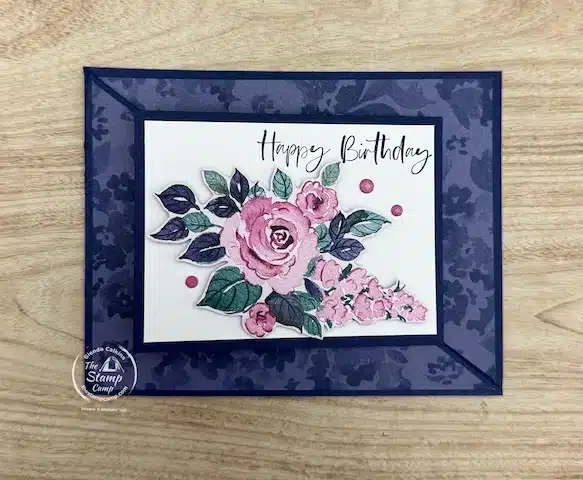
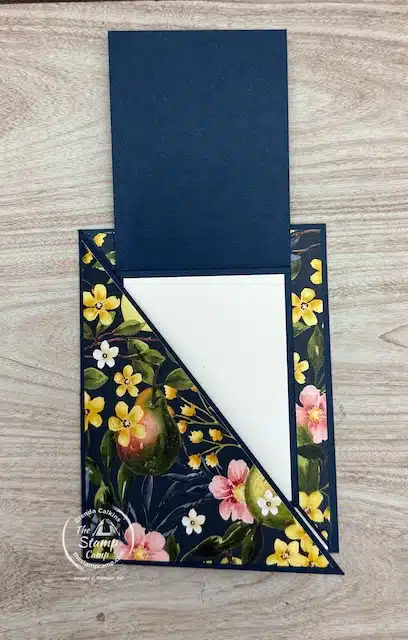
Card 4: Horizontal Fun Fold
For card #4, I turned the sketch to a horizontal layout. Unlike card #3, the card base was cut 4 1/4″ x 11″ and scored at 5 1/2″, but the angled flap was cut in the same way—from the score line to the outside left-hand side.
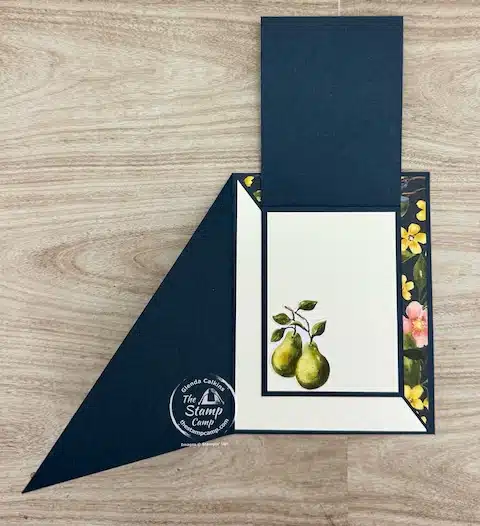
I paired the Night of Navy card base with the coordinating Floral Charm Designer Series Paper for a fresh, vibrant look. The mini card features a floral image hand-cut from one of the prints in the DSP pack, and the sentiment comes from the coordinating Charming Day stamp set.
This design shows how the same sketch can easily be adapted to a horizontal fun fold while staying simple and beginner-friendly.
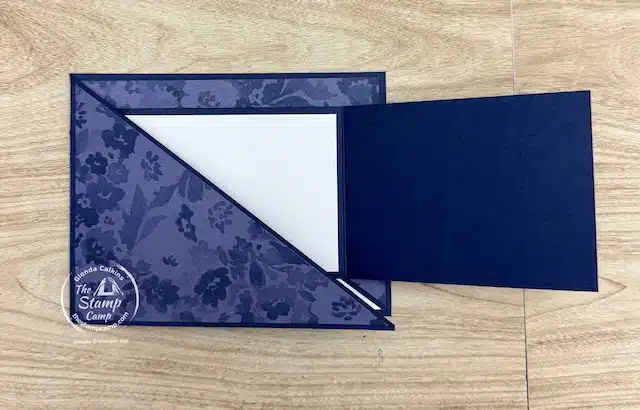
Looking at this photo, you can clearly see how the angled side of the card front fits neatly inside the mini card, creating that fun fold effect. You can also see how the Designer Series Paper was cut on the diagonal, which adds visual interest and ties the whole design together. This little detail really helps the card feel polished while keeping it beginner-friendly.
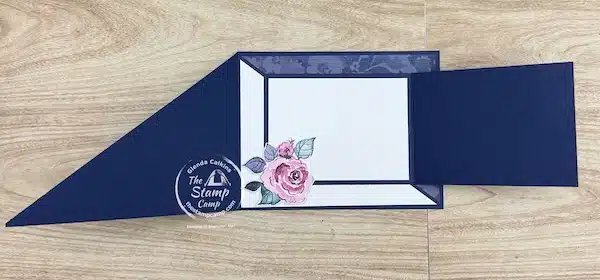
For the inside, I hand-cut a smaller flower bouquet from the DSP and attached it in the bottom left-hand corner, with the angled piece from the card front tucking neatly inside the mini card. This creates a cohesive, layered look and keeps the fun fold interactive.
Shopping List for These Simple Card Sketches for Beginners:

Price: $16.50


Click on any of the supplies you wish to purchase and add them to your shopping cart. I appreciate and and all order you can send my way.
Join me every Wednesday for more simple card sketches for beginners!
New Customer Appreciation(s) Announced TODAY!
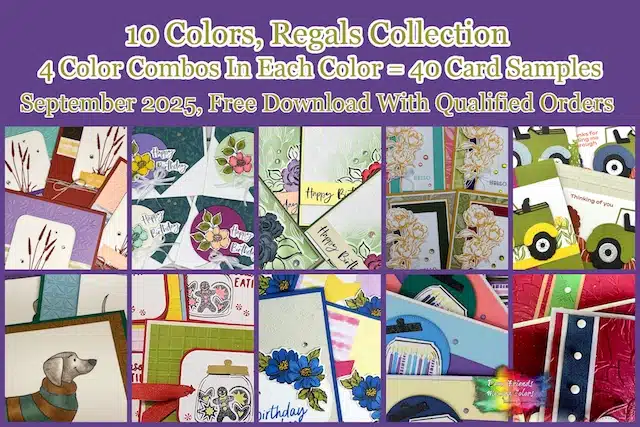
September Customer Appreciation – Huge PDF file Featuring the Regals Color Family
 Orders of $50.00 or more (before tax and shipping) placed on my online store will qualify for this month’s download.
This month’s PDF download includes the Regals Color Combination: Forty Color Combinations and Forty Cards in the download.
Plus, a Bonus PDF file featuring the Cajun Craze color.
My customer appreciation (PDF Download) is unavailable for purchase and only available with qualified orders. It is a token of appreciation to all who place orders with me.
September is my Birthday Month So Join Me Every Week For An Added Customer Appreciation!
September Kick-Off Special!
I’m starting this first week of September with a FREE package of 12 handmade cards when you place a minimum $75 order.
Plus—you’ll also receive my 40 Regal Color Combination PDF files to spark your creativity!
And don’t forget… every Monday I’ll be sharing a brand-new Customer Appreciation Gift of the Week. It’s my way of saying thank you for your support and for being part of this creative community!
Place your orders Here: https://stampl.ink/shop