
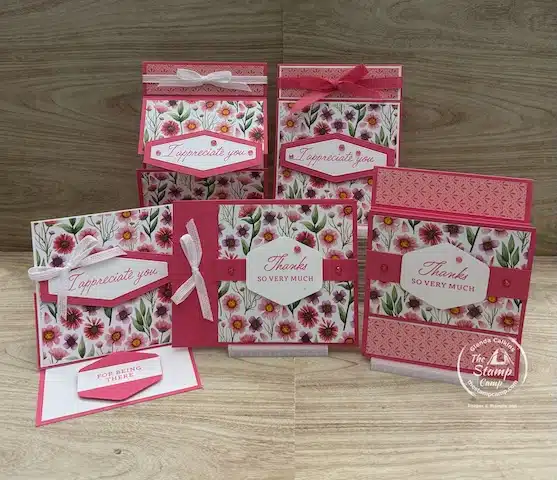
Did you catch last night’s One Sheet Wonder Card Techniques featuring the Floral Impressions Designer Series Paper? If not, no worries—I’ve got you covered! Today I’m sharing all of the cards I created along with the full video tutorial.
Last night I demonstrated how to make five different book binding cards using just one 12″ x 12″ sheet of Floral Impressions Designer Series Paper. If you remember, last week I shared five horizontal book binding cards with the same paper. This time, the designs were vertical book binding cards plus one fun book binding center pop-out card—a fresh twist on the same technique!
Let’s get started on these fun book binding cards!
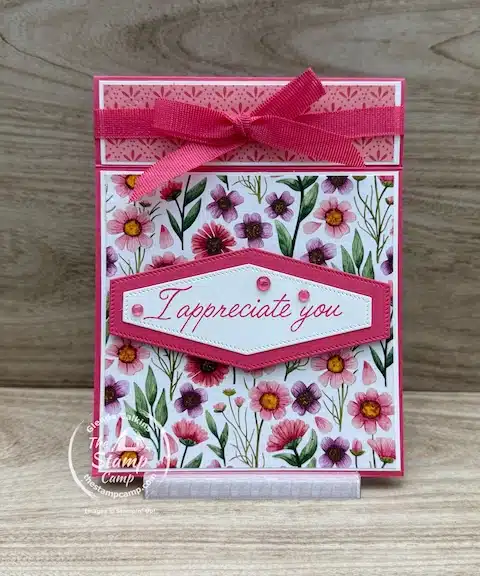
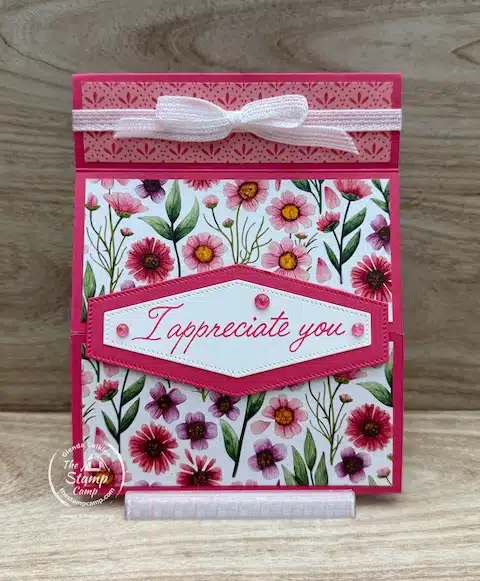
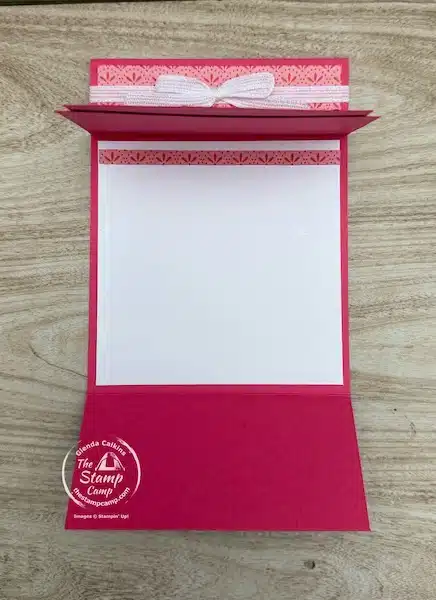
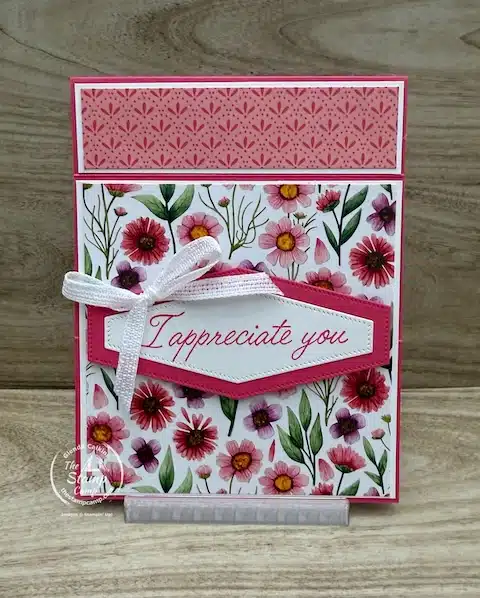
Card #1 – Vertical Book Binding Card
The first card is a classic book binding design, but with a twist—it’s created vertically instead of horizontally.
-
Card Base: Strawberry Slush cardstock, cut 4 1/4″ x 11″, scored at 4 1/4″ and 5 1/2″.
-
Mats (optional): Basic White pieces cut at 4 1/8″ x 4 1/8″ for the main panel, and 1 1/8″ x 4 1/8″ for the strip under the ribbon.
-
Designer Paper: Floral Impressions DSP layered on top of the mats.
-
Ribbon: Strawberry Slush ribbon across the binding section.
-
Sentiment: From the Impressions Abloom stamp set, die cut with the Nested Essentials Dies. Both the Basic White and Strawberry Slush layers were cut with the same die set for a polished look.
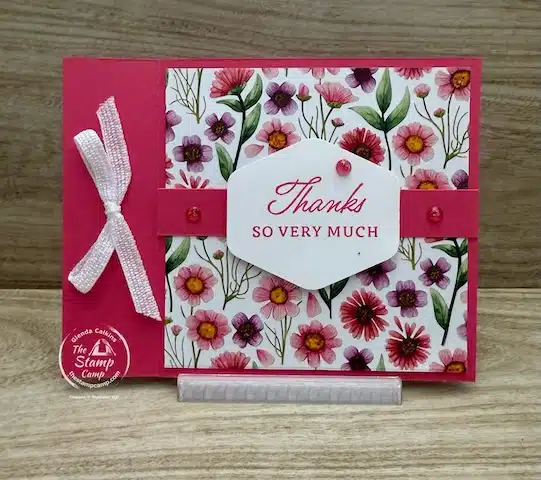
Card #2 – Vertical Gatefold Card
For the second design, I created a Vertical Gatefold card—a fun variation that shows off both the folds and the designer paper beautifully.
-
Card Base: Strawberry Slush cardstock, cut 4 1/4″ x 11″, scored at 2 1/8″, 3 3/8″, and 8 7/8″.
-
Designer Paper: A 4″ x 4″ square of Floral Impressions DSP, cut into two panels measuring 1 7/8″ x 4″ each. These attach to the front gatefold flaps.
-
Inside Layer: The remaining strip of DSP is adhered to a 4″ x 4″ Basic White panel for the inside of the card, tying the whole design together.
-
Ribbon Accent: I finished the card with a touch of white ribbon at the top, adding a soft and elegant accent to the book binding gatefold style.
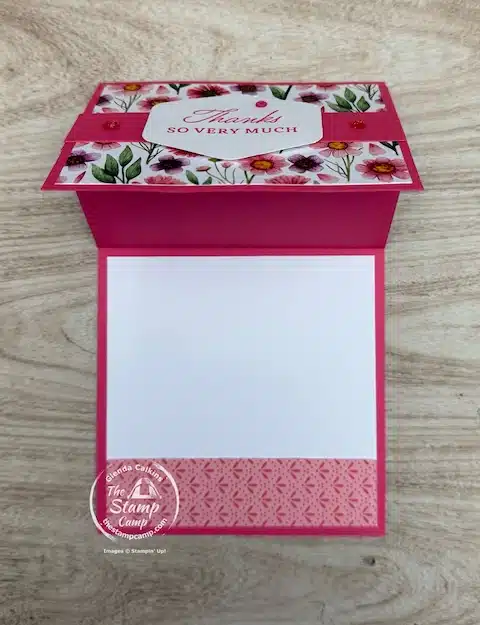
In the photo, you can see how the card opens and how that little strip of designer series paper was added to the inside for an extra pop of color.
Card #3 – Easel Card
The third design is a Vertical Easel Card—a fun interactive fold that displays beautifully when propped open.
-
Card Base: Strawberry Slush cardstock, cut 4 1/4″ x 11″, scored at 2 1/8″, 4 1/4″, and 5 1/2″.
-
Mats: Like Card #1, the Floral Impressions Designer Series Paper is layered on Basic White mats to make the patterns pop.
-
Easel Mechanism: To make the easel card stand up, I punched a sentiment from Basic White using the Heartfelt Hexagon punch and popped it up on the inside to act as a stopper.
-
Two-Tone Tip: For a layered look, adhere a strip of Basic White to a wider Strawberry Slush piece before punching. This gives you a white area to stamp on while incorporating the Strawberry Slush border, tying in the card colors beautifully.

The photo shows how the easel fold works and how the two-toned punched sentiment holds the card open while adding a polished touch.
Card #4 – Z Fold Vertical Book Binding Card
The fourth design is a Z Fold Vertical Book Binding Card—(Full disclosure: I followed the wrong directions at first, which made it a bit confusing, but the measurements below are correct.)
-
Card Base: Strawberry Slush cardstock, cut 4 1/4″ x 11″, scored at 2 1/8″, 4 1/4″, and 5 1/2″.
-
Coordinating Mat: A piece of coordinating cardstock 3 1/4″ x 4 1/4″ for layering.
-
Designer Paper:
-
Cut the 4″ x 4″ Floral Impressions DSP down to 3″ x 4″ for the main panel.
-
Use a 1″ x 4″ strip for the top book binding portion.
-
The leftover 1″ x 4″ strip from your One Sheet Wonder cutting goes on the inside bottom edge of a 4″ x 4″ Basic White panel.
-
In the photo, you can see how the Z fold creates movement and dimension, and how the DSP strips tie the inside and outside of the card together.
Card #5 – Corner Pop-Up Book Binding Card
The fifth design is the Corner Pop-Up Book Binding Card—a real showstopper! When you open this card, it has almost a “stage” effect, making the center of the card the star.
-
Card Base: Horizontal Strawberry Slush cardstock, cut 4 1/4″ x 11″, scored at 4 1/4″ and 5 1/2″
-
Designer Paper: Start with an 8″ x 8″ piece of Floral Impressions DSP:
-
Score at 4″ in both directions
-
Score diagonally in one direction only
-
Cut out the corner 4″ x 4″ square (this becomes the front of the card).
-
-
Card Front: The 4″ x 4″ square from the 8″ x 8″ scored piece is used as the card front.
-
Book Binding Accent: I added a white ribbon tied in a bow, attached with a glue dot for a polished, dimensional touch.
-
Video Tutorial: The video will show exactly how to score, cut, and fold this unique design so you can recreate the pop-up effect perfectly.
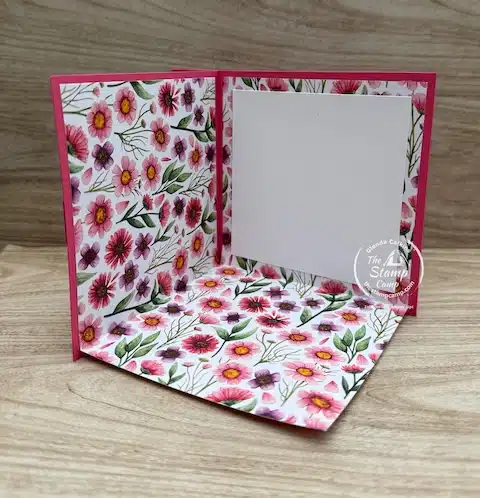
The photo highlights the “stage” effect of the corner pop-up and how the DSP layers create depth and interest.
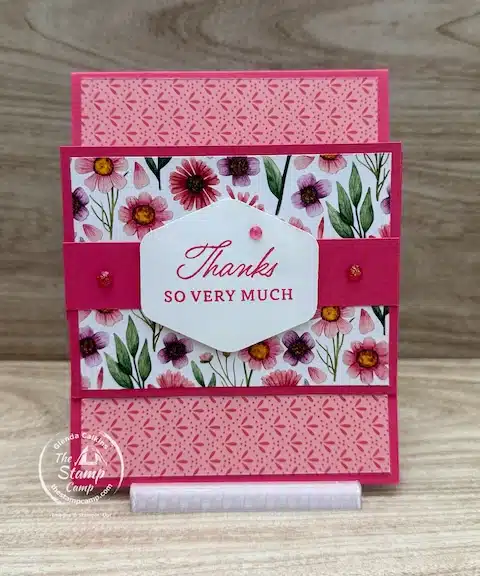
Wrap-Up & Shopping List
These five One Sheet Wonder Card Techniques show just how versatile one 12″ x 12″ sheet of Floral Impressions Designer Series Paper can be! From vertical book binding cards to a dramatic corner pop-up, each design uses simple folds and layering to create cards that look complex but are easy to make.
Shopping List for These One Sheet Wonder Card Techniques:


Click on any of the supplies you wish to purchase and add them to your shopping cart. I so appreciate any and all orders you can send my way.
Watch the One Sheet Wonder Card Techniques Video Tutorial:
Want to see exactly how each fold, cut, and score comes together? Check out the video tutorial where I walk you through all five cards step by step. You’ll see the pop-up mechanism, gatefolds, easel stand, and stage-like corner pop-up in action—it’s easier to follow when you can see the folds in motion!
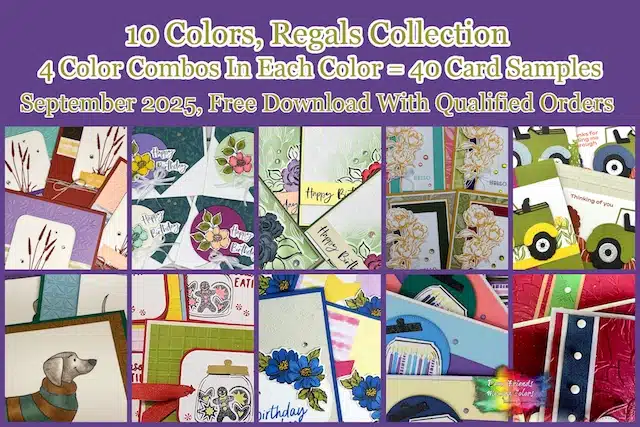
September Customer Appreciation – Huge PDF file Featuring the Regals Color Family
 Orders of $50.00 or more (before tax and shipping) placed on my online store will qualify for this month’s download.
This month’s PDF download includes the Regals Color Combination: Forty Color Combinations and Forty Cards in the download.
Plus, a Bonus PDF file featuring the Cajun Craze color.
My customer appreciation (PDF Download) is unavailable for purchase and only available with qualified orders. It is a token of appreciation to all who place orders with me.
September is my Birthday Month So Join Me Every Week For An Added Customer Appreciation!
September Kick-Off Special!
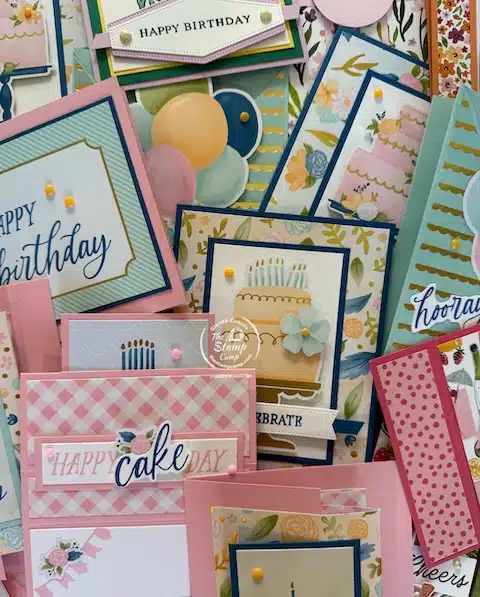
I’m starting this first week of September with a FREE package of 12 handmade cards when you place a minimum $75 order.
Plus—you’ll also receive my 40 Regal Color Combination PDF files to spark your creativity!
And don’t forget… every Monday I’ll be sharing a brand-new Customer Appreciation Gift of the Week. It’s my way of saying thank you for your support and for being part of this creative community!
Place your orders Here: https://stampl.ink/shop