
If you missed last night’s One Sheet Wonder card class, you’re probably not alone! I ran into a few hiccups getting my YouTube Live to start, and ended up having to redo the first card. Technology keeps us on our toes, doesn’t it?
But have no fear—I’ve added the replay video to this post so you can watch it anytime and follow along at your own pace.
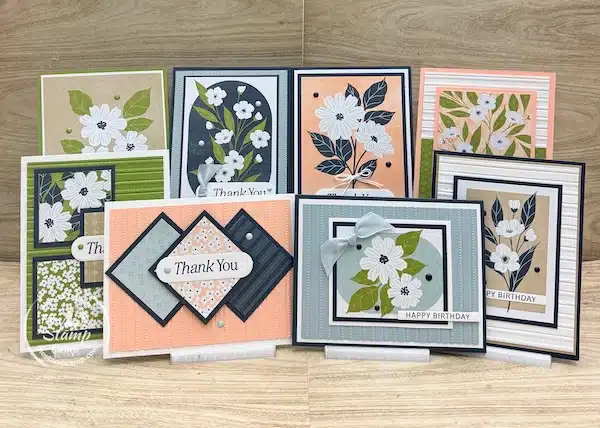
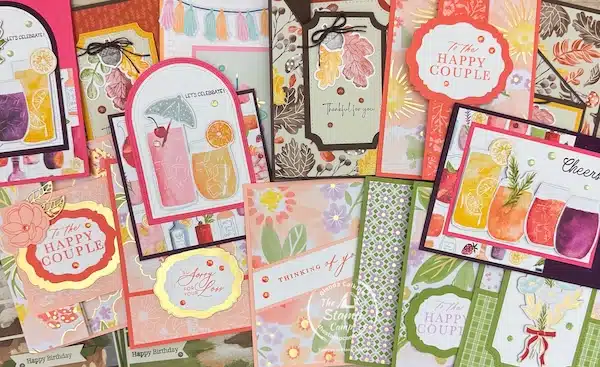
Before you jump into the video, let’s take a closer look at each of the cards I created using just one 12″ x 12″ sheet of the Lovely Blossoms Designer Series Paper.
For these cards, I used elements from the entire Lovely Blossoms suite, and everything coordinates so beautifully. The star of the show is definitely the Designer Series Paper. It includes the perfect One Sheet Wonder pattern—which is the exact print I used to create all eight of these cards.
One of the things I love most about this paper pack is how it’s designed. You get four different double-sided designs, and three sheets of each one—so when you find a pattern you love, you have plenty to keep creating!
To bring these cards together, I paired the paper with the rest of the suite elements:
- The Lovely Arrangements Bundle for stamping and die cutting
- Moody Palette Glossy Dots for that perfect finishing touch
- 5/8″ Cloud Cover Ribbon for soft texture and dimension
- And the Lovely Stripes Embossing Folder to add subtle detail and depth
All of these pieces work together effortlessly, making it easy to create cards that look polished and put together—without a lot of guesswork.
Now, let’s take a closer look at each card…
I started by cutting off the top three larger prints from the Designer Series Paper. The way this particular sheet is designed makes it incredibly easy to cut apart and turn into beautiful cards—perfect for a One Sheet Wonder!
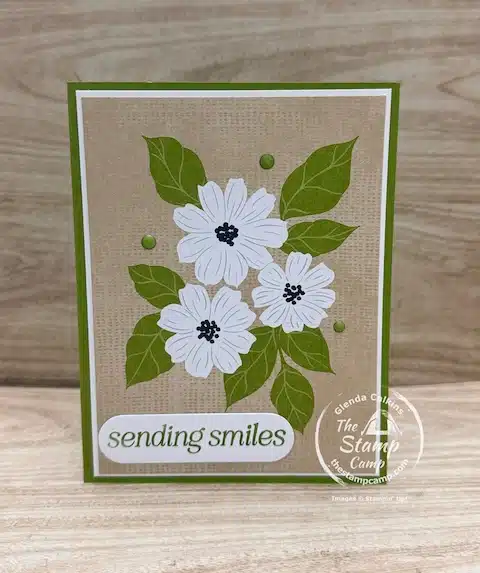
The first card is my super quick and easy design, and honestly, you could use this same layout for all three of the larger images.
Simply trim your Designer Series Paper to your desired size and layer it onto a mat piece, or adhere it directly to your card front for an even simpler look. Add a few of the Moody Palette Glossy Dots, and just like that—your card is complete!
For the inside, you can decorate it with a leftover strip of Designer Series Paper or stamp a floral image using the coordinating bundle to tie everything together.
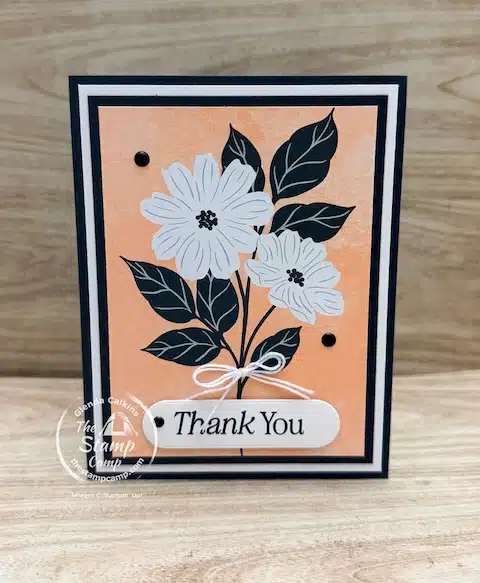
For the second card, I stepped it up just a bit from the first design by adding a few extra layers behind the focal piece from the Designer Series Paper. This simple addition really helps the image stand out and adds a bit more dimension to the card.
I also added a sweet detail by tying a double bow using Basic White Twine and attaching it to the flower for a soft, elegant touch.
To finish the card, I stamped a sentiment and die cut it using the coordinating Lovely Arrangements Bundle, then added a few more Moody Palette Glossy Dots for that perfect finishing detail.
And that completes card #2!
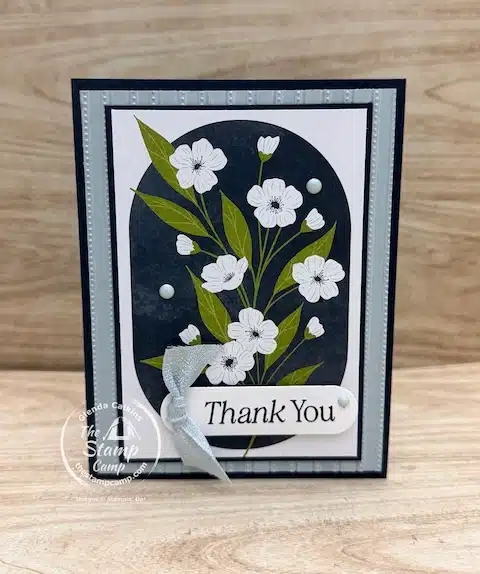
For card #3, I stepped it up even more by adding texture and dimension to the design.
I embossed the background layer on the card front, which adds a beautiful subtle detail and really elevates the overall look. Then I matted the cut piece from the Designer Series Paper to help it stand out even more.
To finish the card, I added a piece of the Cloud Cover Ribbon, along with a sentiment and a few Moody Palette Glossy Dots for that perfect finishing touch.
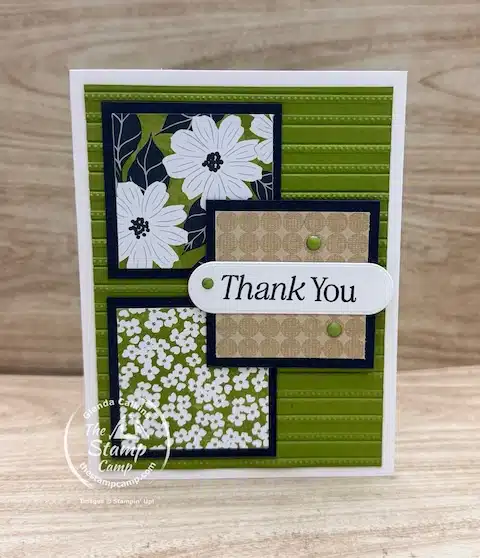
For card #4, I used the three squares from the bottom strip of the 12″ x 12″ Lovely Blossoms Designer Series Paper.
In the video, I used a slightly different color combination, but the layout is exactly the same. This is a great reminder that you can easily switch up colors and still keep the same design!
I embossed the background mat on the card front using the Lovely Stripes Embossing Folder to add texture. Then, I layered each of the three squares onto Secret Sea cardstock and arranged them on the card front.
To finish the card, I added a sentiment and a few Moody Palette Glossy Dots for a simple yet polished look.
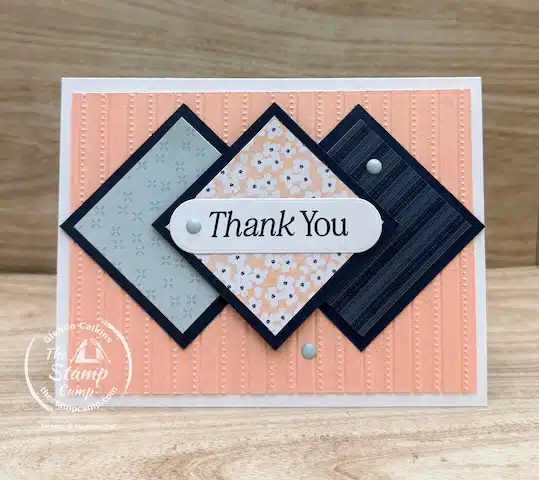
For card #5, I again embossed the background mat using the Lovely Stripes Embossing Folder, but this time I turned the card to a horizontal layout for a different look.
I arranged the three squares in a diamond pattern on the card front, which adds a fun and eye-catching design element. Each of the squares was matted onto Secret Sea cardstock to help them stand out.
For the embossed background layer, I pulled in the Petal Pink color from the Designer Series Paper, which really ties everything together beautifully and adds a soft contrast to the design.
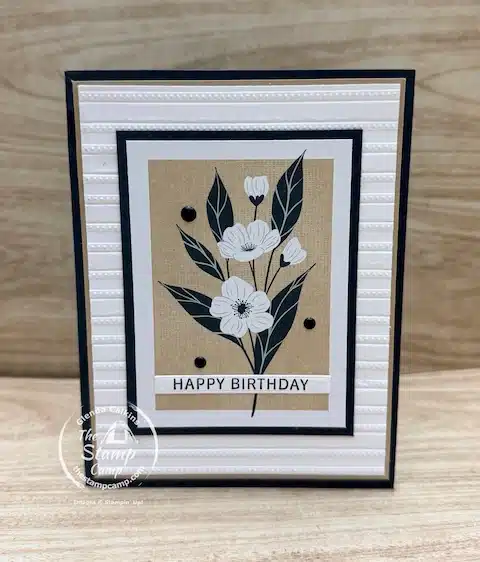
For card #7, I embossed the Basic White background piece once again to add that beautiful texture. I then layered it onto a piece of Crumb Cake cardstock and adhered it to my Secret Sea card base.
For the focal point, I used another piece from the One Sheet Wonder cut pieces. The way I cut the paper gives the illusion of multiple layers, but it’s actually just matted onto a single piece of Secret Sea cardstock and then attached to the card front.
This time, I stamped a “Happy Birthday” sentiment onto a small die cut from the Lovely Arrangements Bundle and placed it across the focal point.
To finish the card, I added a few more Moody Palette Glossy Dots—such a simple detail that really completes this stunning design.
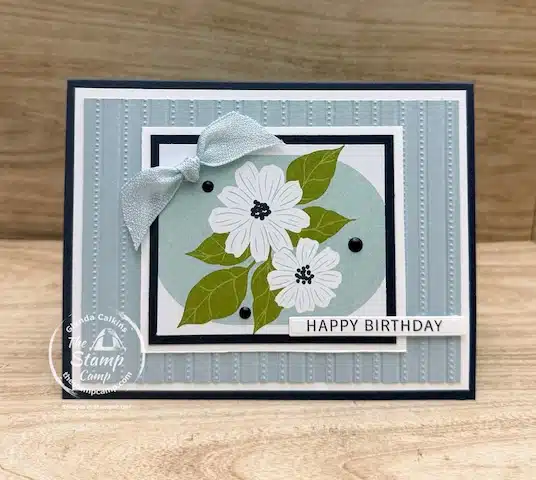
Card #8 was created in the horizontal direction and is a stepped-up version of card #7.
For this design, I added a few extra layers to the focal image to give it more depth and dimension. I also included another knot using the Cloud Cover Ribbon for a soft finishing touch.
In the video, I forgot to add the “Happy Birthday” die cut piece—but you can see it included on my finished card sample.
The card base is Secret Sea, followed by a layer of Basic White, and then an embossed piece of Cloud Cover cardstock for added texture. The focal image from the One Sheet Wonder was matted onto Secret Sea and then Basic White before being added to the card front.
And there you have it—eight stunning cards created from just one 12″ x 12″ sheet of the Lovely Blossoms Designer Series Paper!
Don’t forget, this paper pack includes three sheets of this design, which means you can make all eight cards three times… for a total of 24 gorgeous cards from one pack!
Here is your Supply List for These Eight Stunning Lovely Blossoms One Sheet Wonder Cards:


Click on any of the supplies you wish to purchase and add them to your shopping cart. I appreciate any and all orders you can send my way. If you would like to personally receive one of these cards check out this months Customer Appreciation give away! I would love to send you a pack of my handmade cards.
Here is the link to the video:
If you’d like the downloadable project sheet, all you need to do is simply fill out the Contact Me form with your name and email address, and let me know which One Sheet Wonder project sheet you would like to purchase.
For this set, please specify:
“April 2, 2026 – Eight Stunning Lovely Blossoms One Sheet Cards”
The cost for the downloadable project sheet is $9.95.
The Stamp Camp Customer Appreciation for April 2026:
My card racks are full and it is time to give away packs of my handmade cards.
Place a minimum $50.00 order (before shipping and tax) with me during the month of April 2026, and you’ll receive a package of 10 handmade cards from me.
It’s my way of saying thank you for choosing me as your demonstrator and supporting my small business.
Place your orders Here: https://stampl.ink/shop