
Welcome back to another Quick and Easy Card Sketch Ideas post! This week’s Card Sketch #34 is one of those simple card sketch templates you’ll find yourself using over and over again. It’s super simple, quick to put together, and perfect for busy crafting days.
The beauty of this sketch is its versatility. You can easily create a standard card using the sketch as-is, but with just a few different cuts, this same design can be transformed into a simple gift card holder in just minutes. That’s what makes card sketches such a valuable tool — one sketch, multiple fun and easy card design techniques!
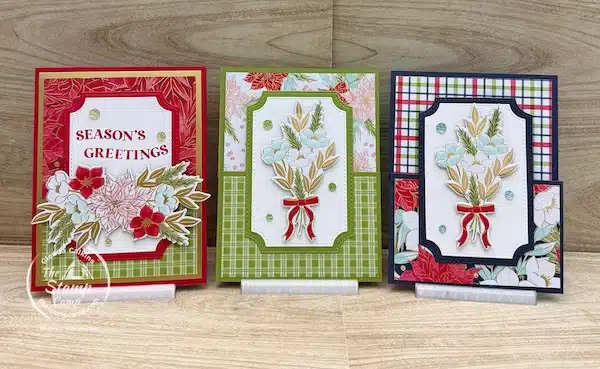
For all of today’s cards and projects, I used the Traditions of Christmas Specialty Designer Series Paper, Traditional Sparkling Sequins, and the Traditional Labels Bundle. These products work beautifully together and add just the right amount of elegance and sparkle to each project.
One important thing to note — all of these products are currently on the Last Chance list, and some of them are available at a discount. If you already have all of your Christmas cards and gift card holders finished for this year, now is the perfect time to grab these items while they’re on sale.
Use this opportunity to stock up and get a head start on next year’s projects. Creating cards and gift card holders ahead of time makes the holiday season so much less stressful — and it’s never too early to get a jump start on next year!
Don’t Forget Your Printable Card Sketch!
Print it out, slip it inside a page protector, and add it to your 3-ring binder so you always have a handy cardmaking resource right in your craft room. Over time, you’ll build a whole library of sketches you can flip through anytime you need inspiration. Remember the Stamp Camp for your Quick and Easy Card Sketch Ideas!
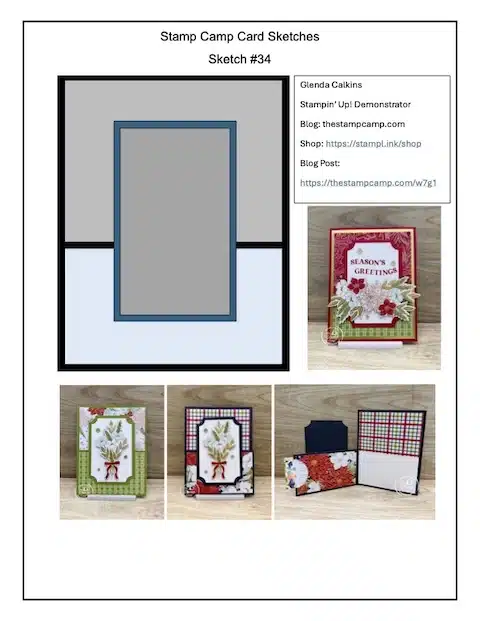 To download and print Sketch #34 Click HERE
To download and print Sketch #33 Click HERE
To download and print Sketch #32 Click HERE
To download and print Sketch #31 Click HERE
To download and print Sketches #21 – #30 Click HERE
To download and print Sketches #11 – #20 Click HERE
To download and print Sketches #1 – #10 Click HERE
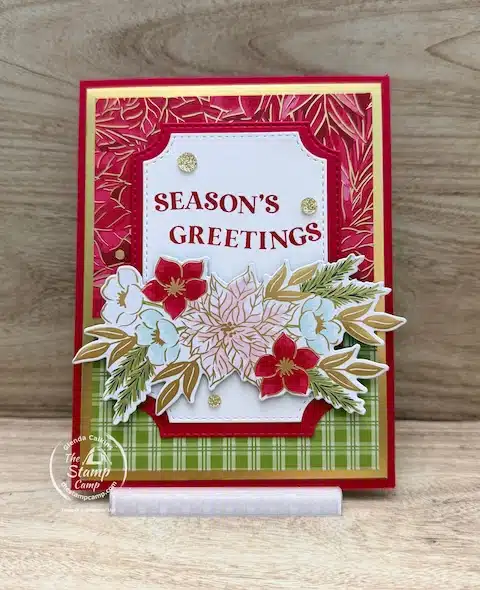
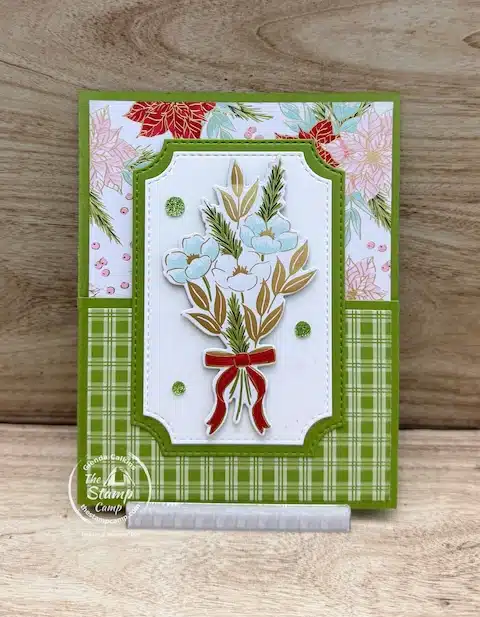
Card #1
Card #1 is just beautiful, and I honestly think it’s because of that gorgeous floral swag bouquet that was die cut directly from the designer series paper — or maybe it’s the paper itself. Either way, this card comes together very quickly and has such an elegant look.
The card base is Real Red cardstock, cut to 5 1/2″ x 8 1/2″ and scored at 4 1/4″. I added a layer of Gold Foil cut to 4″ x 5 1/4″ for a touch of shine.
The Designer Series Paper is cut into two pieces:
-
Top piece: 3″ x 3 3/4″
-
Bottom piece: 1 7/8″ x 3 3/4″
For the focal point, I used the Branching Out Dies to create both the Real Red mat and the Basic White mat. The sentiment was stamped on the Basic White layer, and the floral swag bouquet was popped up with dimensionals to add a bit of depth and interest.
This card is a perfect example of how simple card sketch templates and fun and easy card design techniques can create a stunning card without a lot of extra work.
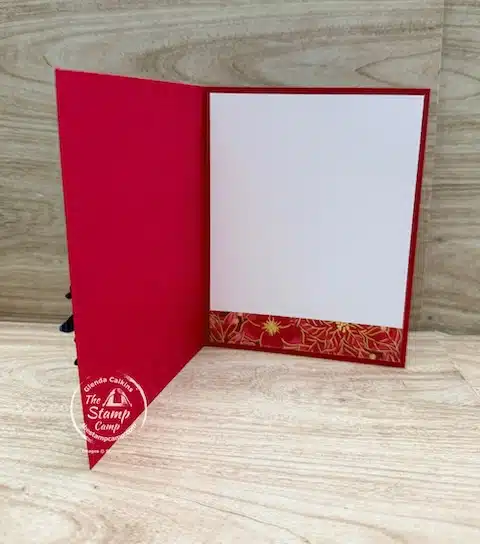
For the inside of the card, I kept things simple by cutting a piece of Basic White cardstock to 4″ x 5 1/4″ and adding a coordinating strip of the Traditions of Christmas Specialty Designer Series Paper along the bottom edge. This small detail ties the inside of the card to the front and finishes the card off beautifully without adding extra bulk.
Card #2
At first glance, Card #2 looks very similar to Card #1 — it uses the same Traditions of Christmas Specialty Designer Series Paper and features another beautiful floral bouquet. However, a small cut-away on the card front turns this design into a unique fun fold card that also doubles as a gift card holder.
The card base is Old Olive cardstock, cut to 5 1/2″ x 8 1/2″ and scored at 4 1/4″. To create the fun fold, I cut down the score line 2 3/4″, then turned the cardstock, lined it up at 2 3/4″ along the side, and cut away the top section of the card front.
For the Designer Series Paper:
-
Bottom front DSP: 2 1/2″ x 4″
-
Top DSP on the Basic White inside layer: 2 3/4″ x 4″
Once again, I used the Branching Out Dies to create coordinating mats in Old Olive and Basic White. This time, I left off the sentiment and simply popped up the floral bouquet with Stampin’ Dimensionals, adding a few of the green sequins for a subtle touch of sparkle.
This card is a great example of how simple card sketch templates and a few easy cuts can create a fun and easy card design technique that works as both a card and a gift card holder.
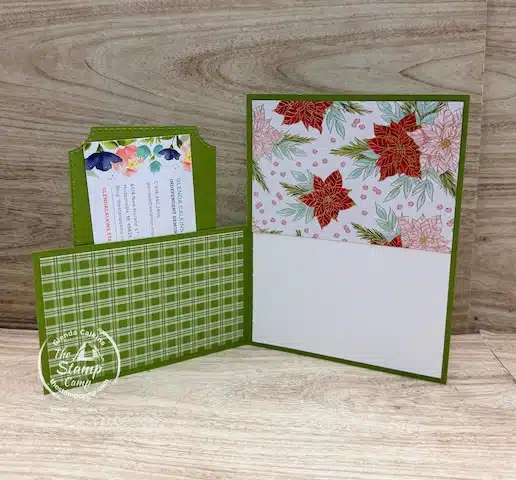
When you open the card, you’ll see a piece of Basic White cardstock added to the inside, cut to 4″ x 5 1/4″. The top Designer Series Paper is attached directly to the top portion of this Basic White layer.
One important detail to keep in mind when adding the Branching Out die-cut mats to the card front: only apply liquid glue along the bottom edge and up the sides. Do not glue across the top. This creates a pocket on the inside of the card that’s perfect for holding a gift card, check, or cash.
To give the inside of the card a more finished look — and to really show off the gift card holder — I also added another piece of Designer Series Paper to the backside of the front flap. This extra layer adds polish and makes the gift card pocket stand out beautifully.
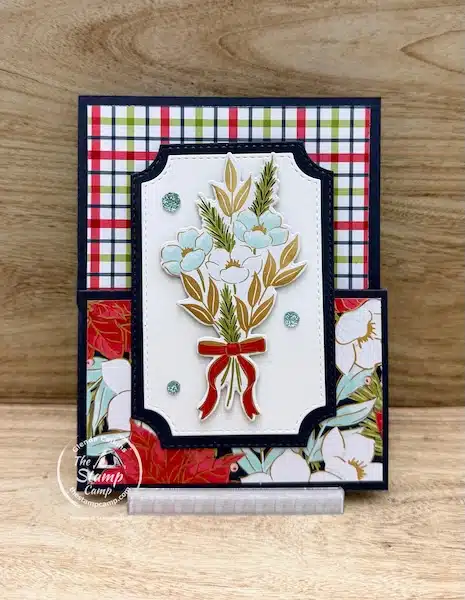
Card #3
Card #3 is another gift card holder, but this time the cut is done just a little differently than Card #2. Visually, the two cards look the same, but the cutting and scoring process is different — giving you another fun and easy option using the same card sketch.
The card base is Secret Sea cardstock, cut to 5 1/2″ x 8 1/2″ and scored at 4 1/4″. Cut down the score line 2 3/4″, then turn your cardstock sideways and score at 2 3/4″ down to the score line (instead of cutting this section away).
Fold down on the new score line and attach a piece of coordinating Designer Series Paper, cut to 2 1/2″ x 4″. Using a circle punch, punch half of a circle from the side to make it easy to slide your gift card in and out of the pocket.
Next, fold the top portion down and apply a thin line of adhesive along the bottom edge and one side only to create the pocket for your gift card, check, or cash.
For the front bottom panel, attach another piece of Designer Series Paper, also cut to 2 1/2″ x 4″.
To finish the card, I once again used the Branching Out Dies to create mats in Secret Sea and Basic White. I left off the sentiment, popped up a floral bouquet with dimensionals, and added a few blue sequins for just the right amount of sparkle.
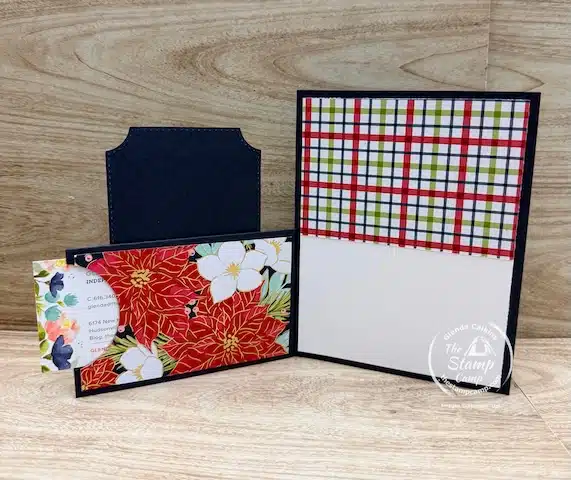
For the inside of the card, I once again added a piece of Basic White cardstock, cut to 4″ x 5 1/4″, with a coordinating piece of Designer Series Paper across the top edge, cut to 2 3/4″ x 4″. In the photo, you can see how the gift card holder slides perfectly into the pocket, making this fun fold both practical and easy to use.
Shop Your Favorite Supplies for Quick and Easy Card Sketch Ideas From The Stamp Camp:


Sale: $14.85
Price: $16.50


Click on any of the supplies you wish to purchase and add them to your shopping cart. I so appreciate all your orders, Thank YOU so Much!
Join me every Wednesday for Quick and Easy Card Sketch Ideas!
The Stamp Camp Customer Appreciation for December:
Place a min. $50.00 online order with me and I’ll send you a package of 12 handmade cards.
- Place your order December 8 – 31, 2025 and I’ll send you 12 All-Occasion cards.
Place your orders Here: https://stampl.ink/shop