
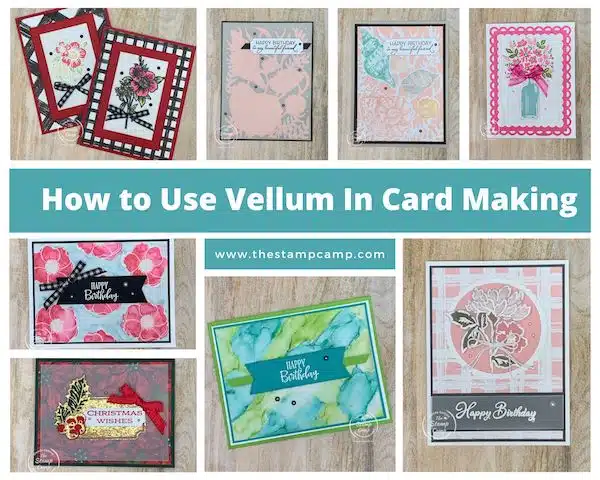
This week’s question is “How to Use Vellum”. This week I’m going to show you my top tips and techniques with vellum. I invite you to join me on my YouTube Channel “The Stamp Camp” on Thursday night at 8:00PM EST where I’ll show you how today’s cards were done.
We are going to start off with the simplest technique for using vellum on your cards. This is simply a vellum overlay on your card front. An overlay is a piece of vellum that you place over the top of a bright or busy piece of designer paper to soften it. This technique is used a lot on Wedding invitations. The information is typed onto the vellum and then is attached over a photo of the bride and groom. Generally, it is attached by punching two holes at the top and running a piece of ribbon through the holes and tying a bow or knot.
The biggest question regarding vellum in card making is how to adhere vellum to your card fronts. I’m going to show you various techniques for adhering vellum to your cards.
With this card all you do is cut your vellum to the size you want and adhere your stamped images to the top of the vellum. On this card I used the Leaves of Holly Bundle to create the center die cut and the sentiment. I adhered it to the vellum using the adhesive sheets behind my die cut.
To adhere it to my Boughs of Holly Designer Series Paper I just added adhesive behind the die cut piece.
How to Use Vellum – With Embossing Folders
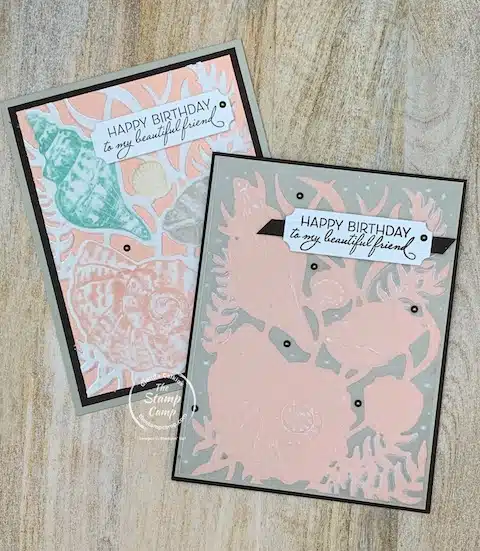
I love to use vellum with my embossing folders, and I know you will as well when you give it a try. On both cards I used the Seashells 3D Embossing Folder, but I adhere each one differently.
Let’s start with the card in the back. I first took a piece of Basic White cardstock and die cut it using the Seaside Seashells die. The next step was to stamp each of the seashells onto the coordinating die cut seashell. I used the Friends are like Seashells stamp set to do this. Next, I took a piece of cardstock vellum and die cut that as well. Then I placed the die cut inside the Seashells 3D Embossing Folder and ran it through my cut & emboss machine. To adhere the vellum to the stamped die cut seashell piece I used my silicone mat, liquid glue, and a sponge.
Now let’s look at the front card. This card was done a bit differently. I first die cut a piece of Petal Pink cardstock using the Seaside Seashells die. Next, I cut a piece of Vellum and a piece of adhesive sheet the same size. I adhered the adhesive sheet to the vellum and then placed it inside the Seashells 3D embossing folders and ran it through my cut & emboss machine.
I removed the adhesive sheet from the backside and attached it to my die cut Seaside Seashells die cut piece. This was then attached to the Sahara Sand cardstock and finally to the Early Espresso card base.
How to Use Vellum – With Heat Embossing
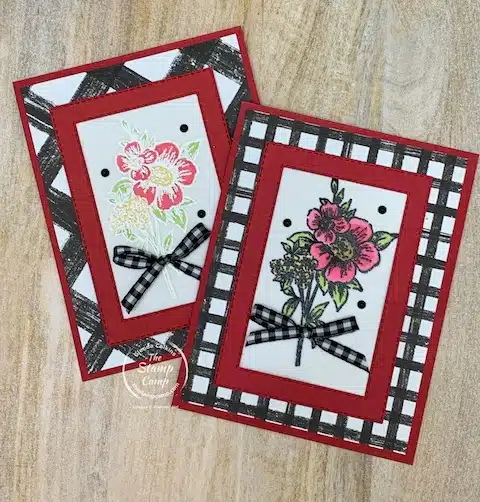
This technique is called the stained-glass technique. This technique has been around for a while, and it will give you different looks depending on if you use white embossing powder or black embossing powder. I used the same flower image from the Blessings of Home stamp set for both of these samples except one was embossed in black and the other in white.
When you are using embossing powders on vellum you will want to make sure that you use an embossing buddy. This will help to ensure that your embossing powder will only stick to your stamped image and not the vellum. Now that you have your vellum prepared ink up your stamp using the Versamark ink and stamp onto your vellum. Apply your embossing powder tapping off any excess. Now using the heat tool melt the embossing powder moving on once the powder has become shiny. Yes, you can burn your vellum if you heat it too long or stay in one spot too long. After you have melted all the embossing powder turn your vellum over to the backside and using your blends or markers color in the image.
To adhere the vellum on these two cards I created a frame using the Stitched rectangles dies. I simply put adhesive on the backside of the “frame” and added the vellum to the back of the frame. The “frame” was then attached to a piece of Basic White card stock and on one it was popped up on the front of my card and on the other one it was attached directly to the card front.
How To Use Vellum – Blends With Alcohol
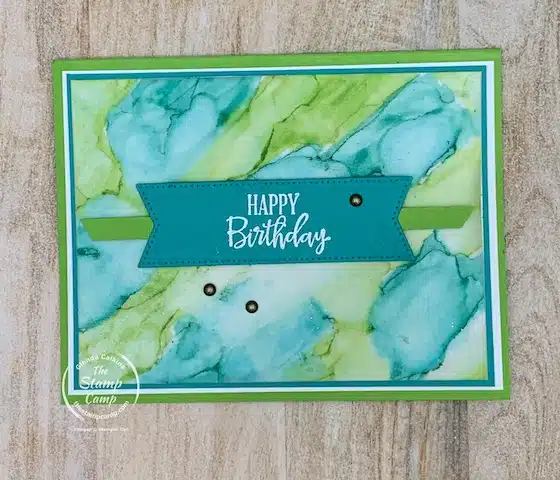
Are you ready to get inky and have some fun? This card uses a fun technique with Stampin’ Blends and 91% alcohol. It is important that you have at least 91% or better alcohol to do this technique.
Start with a piece of vellum cut to any size you like and begin scribbling on the vellum with your Stampin’ Blends. I used Bermuda Bay Dark and Granny Apple Green Dark on this sample. For best results I think try to stick to 2 or 3 colors. Once you have your vellum colored; take the water painter and go over the blends with the alcohol. The wetter it is the more it will bleed and run. You can also put the alcohol in the spritzer and spritz your colored vellum. Once it is good and wet you can use a straw to blow the alcohol around as well. You will need to let this dry or heat with your heat tool.
To adhere the vellum to the Basic White cardstock you can either add the adhesive sheet behind the vellum or use a sponge and liquid glue to dab the Basic White cardstock or the backside of the vellum.
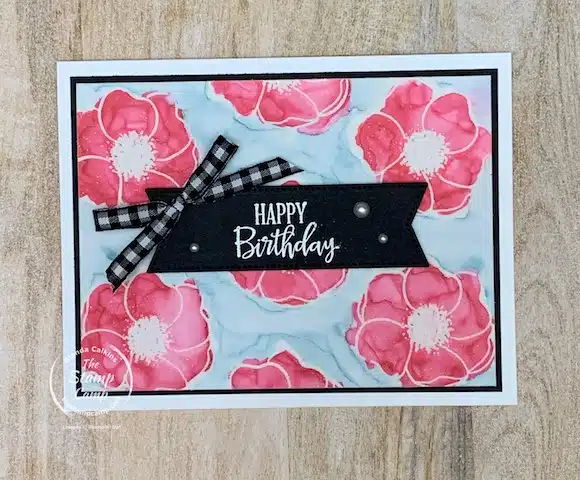
For this card I first stamped the flower images using Versamark ink onto a piece of Vellum; then I heat embossed it with White embossing powder. Next, I colored around the flowers with the Balmy Blue Stampin’ Blend and the flowers were stamped using the Real Red Stampin’ Blend. Then I went over the top of the colors with the alcohol and the waterpainter. This was adhered to a piece of Basic White cardstock using the Adhesive Sheets method.
How to Use Vellum – With 2 Step Stamps
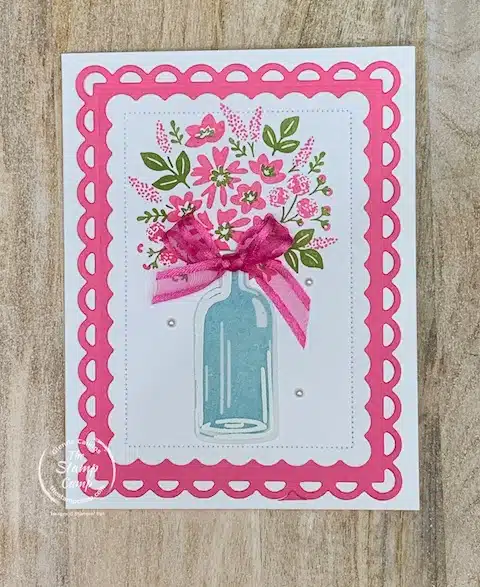
What did I use vellum on for this card? I used it on the flower bottle. I stamped the solid image of the bottle using Balmy Blue ink onto Basic White cardstock. I stamped on the vellum using Versamark ink and heat embossed it with White embossing powder. I adhered the vellum over the top of the Balmy Blue bottle using a piece of adhesive sheet. I then used the coordinating Vintage Bottle punch to punch it out. This is the Bottled Happiness Bundle from the annual catalog.
How to Use Vellum – Dry Embossing Technique
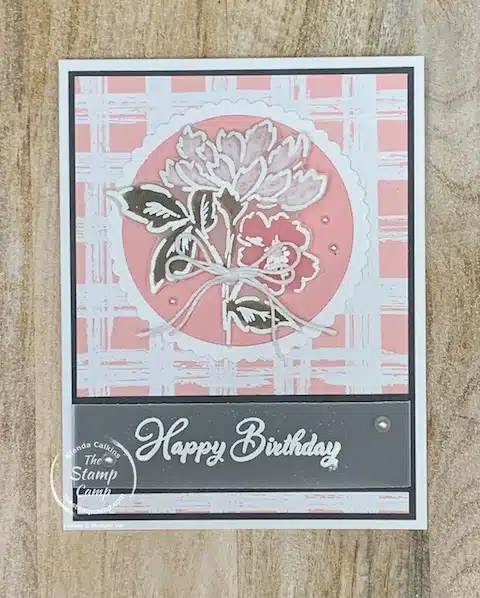
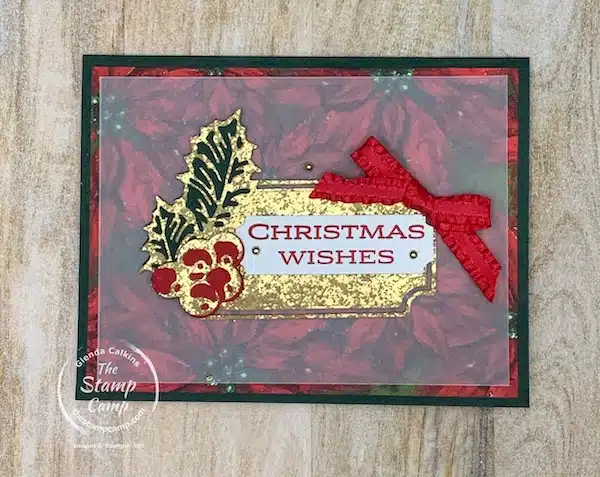
This final card has many different ways to use vellum in your card making. Can you spot the different techniques that I showed you on the other cards? This card has heat embossing, the stained-glass technique, dry embossing and another way to adhere vellum to your cards.
Let’s take a look at the dry embossing on this card. I used the Hand-Penned Petals stamp set and stamped and embossed the flower image shown onto my vellum. I then turned it over and place it onto my foam mat and using my stylus I colored in the flower. When you flip it over to the front side it will show whiter and will be a bit popped out. You will not want to push your stylus too hard because you can tear through the vellum. Once I had my larger flower dry embossed, I colored the backside of the other images using the Blends. This was die cut out with the coordinating Penned Flowers dies and attach to the circle using a mini glue dot, which was covered with the White Baker’s Twine Bow.
For the sentiment I cut a piece of Vellum the width I wanted and scored each end at 1/2″. I stamped and embossed my sentiment on the vellum and then attached the 1/2″ scored sections to the backside of the Basic Gray cardstock piece.
Now are you ready to join my Thursday night and see all these techniques in action?
Click on the button below to download and print the Project Sheets. Then join my live at 8:00PM EST on my YouTube Channel this Thursday, November 3.

Need any products? Click on any products in the download and it will redirect you to my online store where you can view them larger and/or add them to your shopping cart.
Remember to use the Host Code if you order is under $150.00! If your order is over $150.00 you are your own host and will receive the host benefits.
Host Code: JVEHCPAK
PIN IT
Stamp Camp Customer Appreciation for October:
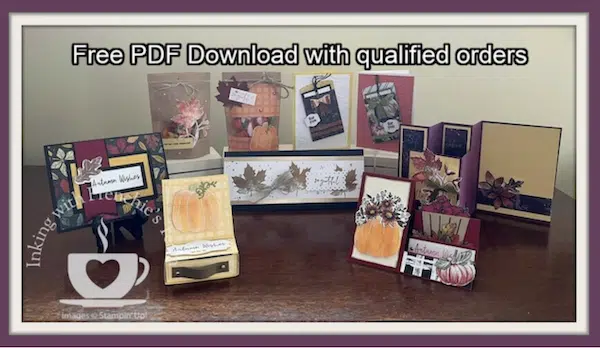
Check out this month’s Customer Appreciation PDF file! It is packed with awesome cards and projects. Did I say packed? I mean chocked full of awesome fun fold cards, like an Easel Side-Step card, a Triple Fold Card, Peek-a-boo Treat Bags, Slim-Line Card, an Easel Card with a Drawer for goodies, plus a gift card holder/card all in one! Plus, these projects have some of that gorgeous Designer Series Paper from Stampin’ Up! used on them. Mix and match what papers you have on hand; substitute where needed. It is just that simple. Now if this doesn’t get you excited for the PDF file maybe the photo below will! Just gorgeous and great Fall projects and cards!
This month’s customer appreciation PDF file was created by Susan Molloy a fellow team mate. Susan did a fabulous job creating these Colors of Autumn fun fold cards and 3D projects.
How do you get the PDF File? Place a min. $40.00 Online Order with me and you MUST use the Host Code: JVEHCPAK
If you wish to see the list of supplies you will need for this month’s Customer Appreciation PDF file Click HERE.
Also, if you haven’t already make sure to check out my Buyers Rewards Program and print off your slip and start tracking your purchases for FREE stamp set(s).


2 thoughts on “How To Use Vellum In Card Making My Top Tips”
These are beautiful cards Glenda. Where do I find the adhesive sheets that you talk about on many of the samples?
Thanks Denise, You will find the adhesive sheets here: https://www.stampinup.com/products/adhesive-sheets
They are on page 127 of the annual catalog #152334 $11.00.