
Did you happen to catch last night’s One Sheet Wonder 12×12 class? If not, no worries! You can get all the details and watch the replay in today’s blog post so you can craft right along with me.
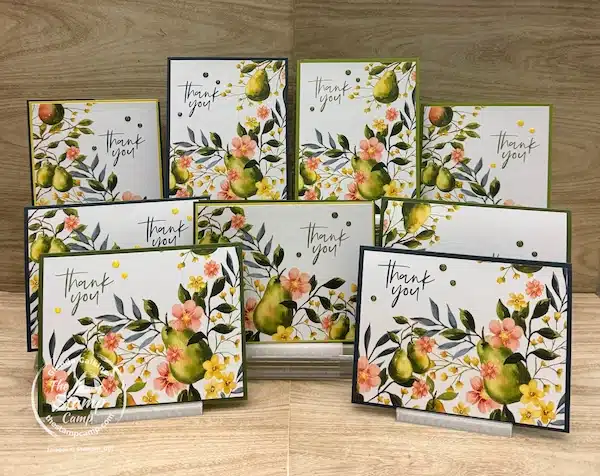
Last night I used the Painterly Pears Designer Series Paper to create 9 beautiful cards from just two 12″ x 12″ sheets. I featured two of the same prints on purpose so I could share a great tip with you — how simply changing the direction you cut your designer paper allows you to create cards either vertically or horizontally.
A Simple Cutting Change = Two Different Looks
One of the things I love most about a One Sheet Wonder 12×12 layout is how versatile it is. By rotating your paper before cutting, you can:
-
Highlight different parts of the print
-
Create vertical or horizontal focal panels
-
Give the same layout a completely different feel
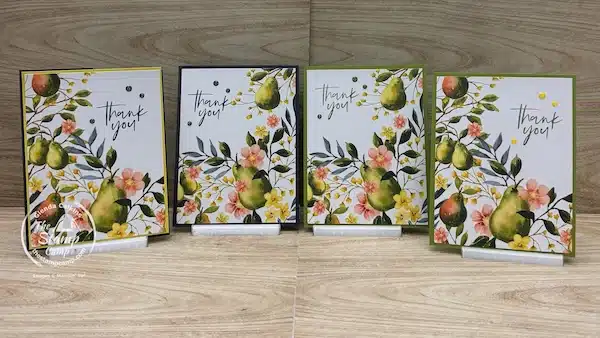
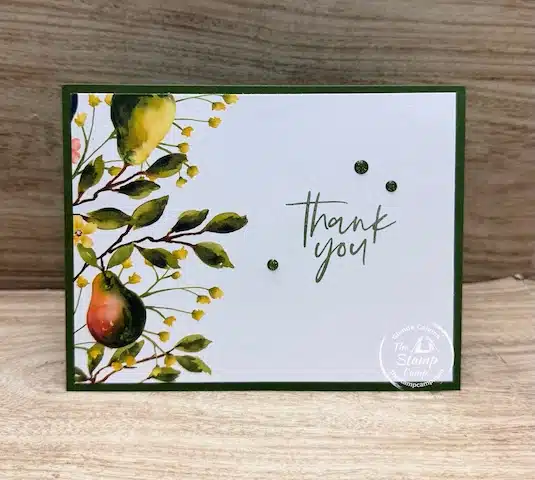
First up are the vertical designed cards.
By choosing to use two of the six cut pieces as the inside panels, I was able to create four completely finished cards from just one 12×12 sheet. That means beautiful coordinating outsides and decorated insides — all from a single sheet of designer paper.
All four cards have the same elegant layout, which makes this design perfect if you’re creating a coordinated gift set. The patterned paper really does all the work for you!
But here’s the fun part…
Even though they look the same at first glance, one of the four is actually a fun fold card. With just an added score line and an extra cardstock mat, that simple designer paper panel transforms into something extra special.
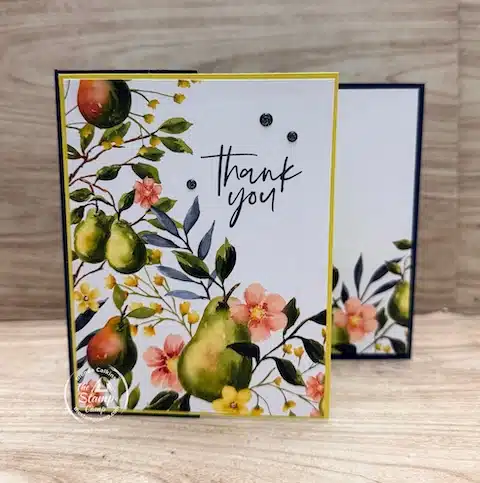
For this vertical Z-Fold design, I used one of the cut pieces on the card front and another coordinating piece on the inside panel. The beauty of this fold is that when the card is displayed, you can see both the front and the inside at the same time — which really shows off that gorgeous designer paper.
This design is incredibly versatile too. It would make:
-
A stunning birthday card
-
An elegant wedding card
-
A lovely anniversary card
All you have to do is change up the sentiment to fit the occasion.
Horizontal One Sheet Wonder Cards
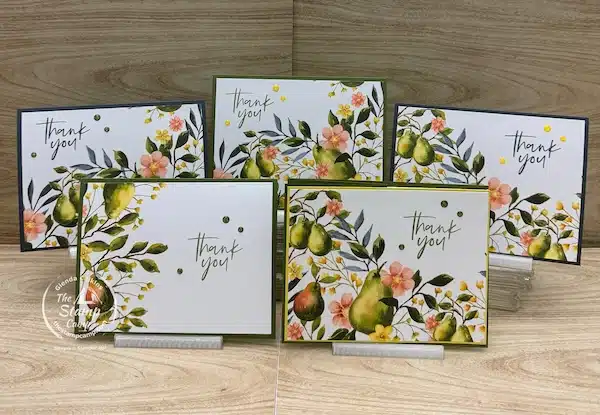
For the second 12×12 piece, I created five horizontal cards.
These cards are designed just like the first four, with the same clean layout and simple layering — the only difference is how I used the cut pieces. Instead of placing one of the panels on the inside of the card, I used it right on the front.
By doing that, I was able to show you how you can use every single piece on the card fronts if your goal is to maximize your paper.
If you choose to design them this way, you could actually create 12 full card fronts from two 12×12 sheets of designer series paper.
This card demonstrates exactly what happens when you use the two center cut pieces on the card front instead of placing one on the inside.
I absolutely love how it looks — the design is just as striking on the front as it is when used on the inside. Both options are beautiful and show off the designer series paper in slightly different ways.

Horizontal Z-Fold Card
I also wanted to show how easy it is to create a horizontal Z-Fold card.
All it takes is:
-
Adding one score line to your horizontal card base
-
Adding a mat behind your designer series paper piece
That’s it! The simple addition of a score line transforms a basic card into a fun fold, giving it movement and visual interest.
This layout is perfect for showing off your designer paper in a new way, and like the vertical Z-Fold, it works beautifully for birthdays, weddings, or any occasion — just change the sentiment.
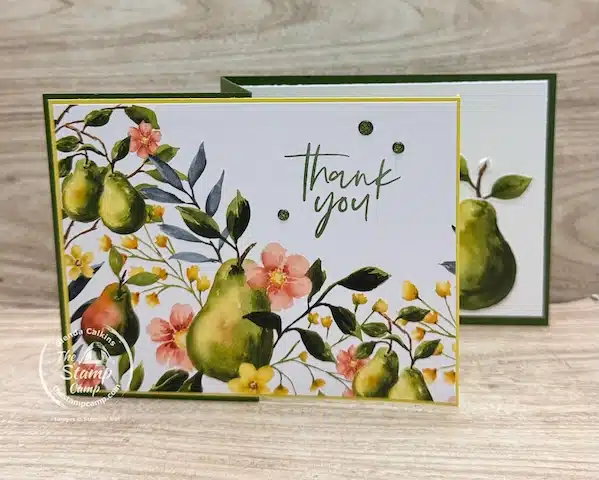
Fixing a Mistake with a Handmade Touch
If you watched last night, you probably saw that I messed up one of my strips of paper that was supposed to go on the inside of this Z-Fold card.
No worries — I had a simple solution! After the video, I hand-cut a pear from another print in the Painterly Pears pack and adhered it to the inside of the card.
Now, when the card is displayed:
-
You see the beautiful designer paper on the card front
-
And the sweet pear inside, perfectly coordinating with the outside
This little fix is a great reminder that even if a mistake happens, a simple hand-cut element can save the design and make the card even more personal.
Shopping List for Your One Sheet Wonder 12×12 Cards


Click on any of the supplies you will need and add them to your shopping cart. Thanks SO much for your order, it is greatly appreciated!
How To Get This Week’s One Sheet Wonder Card Designs Download Project Sheets
Option #1 – Join the One Sheet Wonder Club
If you love creating One Sheet Wonder cards, the One Sheet Wonder Club is perfect for you. Club members receive downloadable project sheets each month.
To join the One Sheet Wonder Club for $24.95/month, subscribe HERE.
Option #2 – Purchase Individual Download
You can also purchase the downloadable project sheet for this specific set for $9.95. Simply fill out the Contact Me form with your name, email address, and specify which One Sheet Wonder download project sheet you wish to purchase. For this set, please note:
“Feb 26, 2026 – Nine Painterly Pears One Sheet Wonder Cards.”
No matter which option you choose, you’ll be able to recreate these quick and easy card tutorials and enjoy all the fun of crafting beautiful handmade Easter cards.
Check out the Video Below For This Week’s One Sheet Wonder 12×12 Cards:
The Stamp Camp Customer Appreciation for February 2026:
February is my Stampin’ Up! Anniversary, so I decided to celebrate by sharing my favorite offering — my Stamp Camp at Home Card Club Kits!
These kits are chock-full of value, packed with products, creative ideas, one sheet wonder patterns, exclusive downloads, and bonus PDF files. All of this makes my Stamp Camp at Home Card Club Kits one of the most valuable and idea-packed services available.
Try My Stamp Camp at Home Card Club Kit Club — FREE This Month!
If you’ve ever thought about joining my Stamp Camp at Home Card Club Kit Club, this is the perfect month to give it a try — for FREE!
Simply place a minimum $100.00 online order (before shipping and tax) with me, and I’ll send you a past Stamp Camp at Home Card Club Kit for FREE!
Important Details to Know:
-
Kits are limited and available while supplies last
-
If you see a kit you love, be sure to place your $100.00 minimum order ASAP
-
After placing your order, email me using the contact form HERE
In your email, please include:
-
Your name
-
Your email address
-
The kits you’d like to receive, listed in order of preference
I strongly recommend listing more than one preference. Once a kit is gone, it’s gone — and you’ll receive the next available choice on your list.
No kit is guaranteed and all kits are first come, first served.
Please note: I have additional kits available beyond what’s shown in the photo below. You’ll find the full list of available kits below the photo.
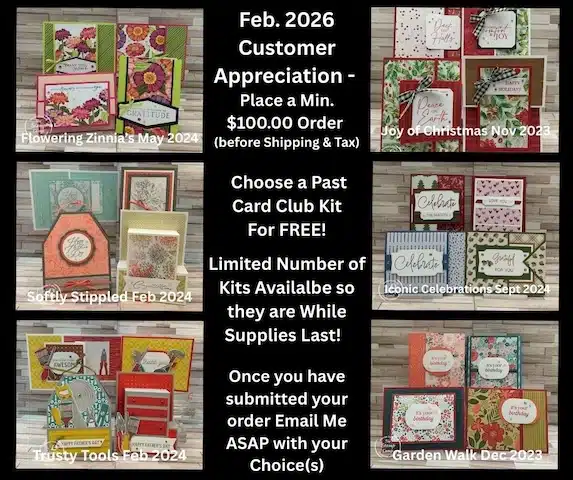
Available Kits:
Flowering Zinnia’s
Softly Stippled
Trusty Tools
Garden Walk
Joy of Christmas
Iconic Celebrations
Splendid Autumn
If you would like to see these kits you can find them in my Photo Gallery under Stamp Camp Card Club
Each Stamp Camp at Home Card Club Kit Includes:
-
Designer Series Paper
-
Cardstock to create 8 cards
-
All die cuts or punched pieces needed
-
Envelopes
-
Embellishments (these were the coordinating gems, jewels, dots, ribbons, etc. from the suite)
-
All bonus PDF files associated with that kit
This is a fun, risk-free way to experience Stamp Camp at Home — and I can’t wait to send one your way!
Place your orders Here: https://stampl.ink/shop