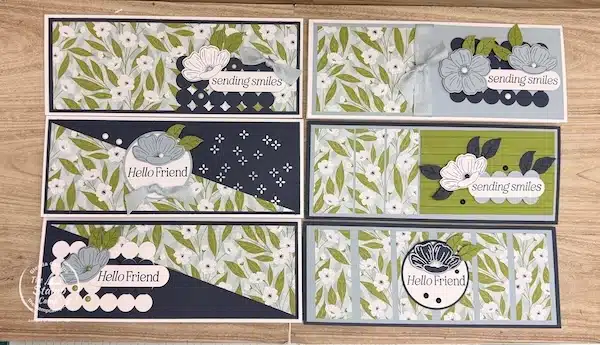
Last night’s One Sheet Wonder class featured the beautiful Lovely Blossoms designer series paper, and I have to say—this project turned out even better than I expected.
Going into the class, I thought I would be able to create five slimline cards from one 12″ x 12″ sheet. But once I started cutting and designing, I realized I could actually get six cards from just one sheet—and that’s always a win!
This set includes:
Three traditional slim cards that fit perfectly inside a legal-size envelope
Three slimline gift card holders—perfect for adding cash, a check, or a gift card
These designs are ideal for occasions like Mother’s Day, graduations, and birthdays, making this a very practical set to have on hand.
What I love most about these simple one sheet card designs is how versatile they are. Each group of three cards starts with the exact same cuts from the paper. The only difference is in how the card fronts are decorated—changing up the colors, sentiments, and small details gives each card its own unique look without adding extra work.
This is one of those projects where the one sheet wonder concept really shines. You do the cutting once, and from there it’s just a matter of mixing, matching, and assembling. It keeps things simple, efficient, and creative all at the same time.
And if you’ve been wanting to try slimline cards, this is such a great way to start. The longer layout works beautifully with the paper pieces and gives your cards a fresh, updated feel.
If you missed the class, don’t worry—I’ve included the full video below in this post so you can follow along.
If you’d like the downloadable project sheet, all you need to do is fill out the Contact Me form with your name and email address, and let me know which One Sheet Wonder project sheet you’d like to purchase.
For this set, please specify: “April 16, 2026 – Six Slimline Lovely Blossoms One Sheet Wonder Cards”
The cost for the downloadable project sheet is $9.95.
First, let’s take a closer look at each of the cards and how they came together.
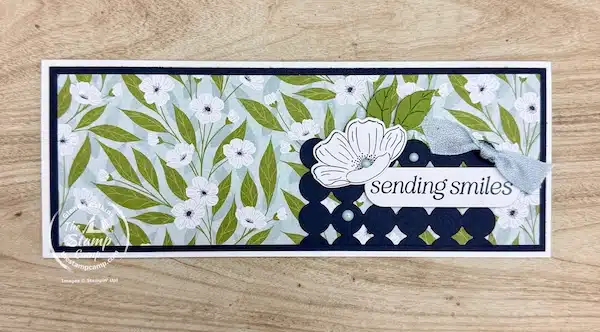
For card #1, I kept things simple and really let the paper shine by using a full panel of the Lovely Blossoms designer series paper on the front of my slimline card. This is one of my favorite approaches when working with simple one sheet card designs—sometimes the paper does all the work for you.
To add a focal point, I used die cuts from the coordinating Lovely Arrangements bundle. I stamped the flower image onto Basic White cardstock using Secret Sea ink, then die cut it out. The leaves were die cut from Old Olive cardstock, which coordinates with the leaves in the paper.
For a little extra detail, I included a Secret Sea accent piece that was die cut from the edge of a scrap piece of Secret Sea cardstock.
To finish off the card, I tied a piece of Cloud Cover ribbon into a simple knot and added a few Moody Palette Glossy Dots for a touch of shine.
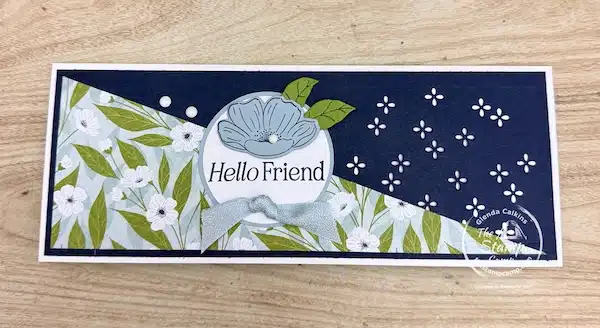
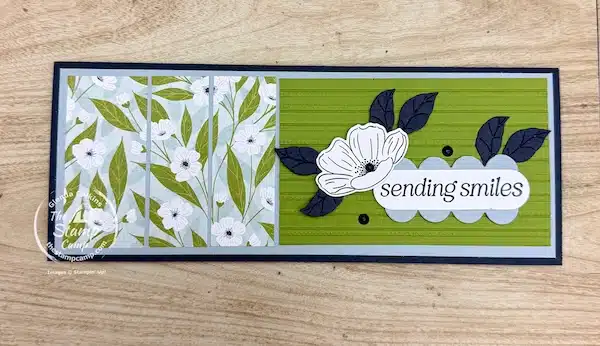
For card #2, I added a bit of interest to the right-hand side of this slimline card by using another die cut element from the Lovely Arrangements dies. It creates a subtle detail that really helps frame the design without overpowering it.
The designer series paper for this card was cut on an angle, which is a great little trick when working with a one sheet wonder. This allowed me to get two cards from just one strip, making these simple one sheet card designs even more efficient.
This time, I kept the sentiment clean and classic. I stamped it onto Basic White cardstock, punched it out with a circle punch, and then layered it onto a Cloud Cover circle for a soft, coordinated look.
For the floral element, I switched things up by stamping the flower onto Cloud Cover cardstock and die cutting it out. It gives a slightly different feel from the first card while still keeping everything cohesive.
To finish it off, I added a few more Moody Palette Glossy Dots and another simple knot of Cloud Cover ribbon.
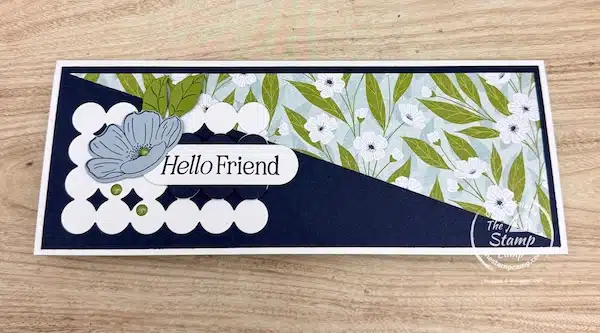
For card #3, I used the other half of the diagonal-cut strip from the previous card—another great example of how a one sheet wonder helps you get the most from every piece of paper.
To add texture and detail, I used the dotted die cut from the Lovely Arrangements bundle. I also carried that detail through to the sentiment by adding a strip of the dotted die cut behind it, then popping the entire sentiment layer up with dimensionals for a bit of added depth.
To finish the card, I added another flower die cut and a few Moody Palette Glossy Dots for just the right amount of embellishment.
This card pulls everything together beautifully and shows how easy it is to create multiple slimline cards with a cohesive look while still keeping each one a little different.
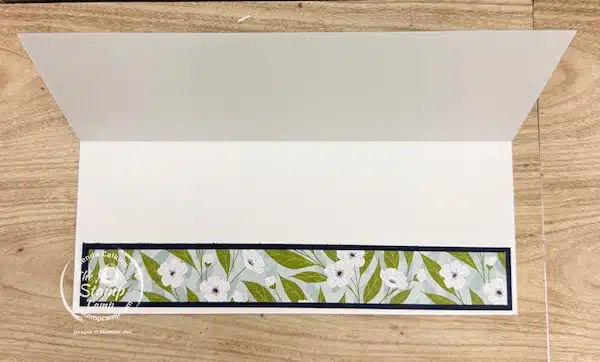
For the inside of each of these first three cards, I kept things simple and coordinated with the fronts. I added a strip of the designer series paper across the bottom edge, matting it onto a coordinating piece of cardstock before adhering it down.
This is such an easy way to carry your design through to the inside and tie everything together—especially when working with simple one sheet card designs. It uses up those extra pieces perfectly while giving your slimline cards a polished, finished look.
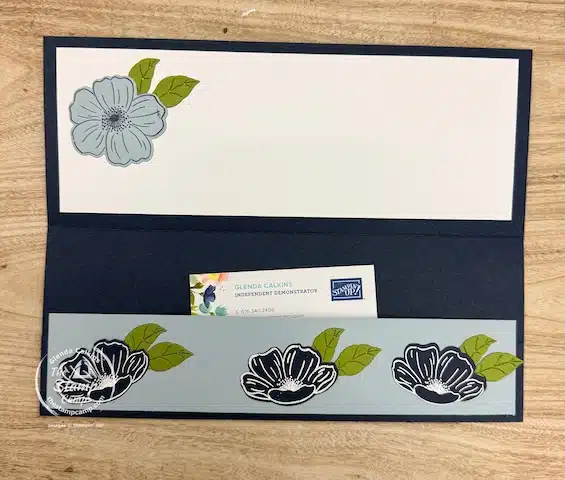
Card #4 is where we begin the gift card holders in this One Sheet Wonder set. The last three cards are all designed to hold cash, a check, or a gift card, so the card base is cut and scored a bit differently to create a pocket inside.
Because of those adjustments, the front design is slightly different from the first three slimline cards. For these, I worked with smaller pieces of designer series paper—each measuring 3 X 3 1/2″.
To add a little extra detail, I ran a piece of Cloud Cover ribbon along the edge of the designer paper and finished it off with a knot in the center.
I then accented the right-hand side with die cuts, a sentiment, and flower die cuts to tie everything together.
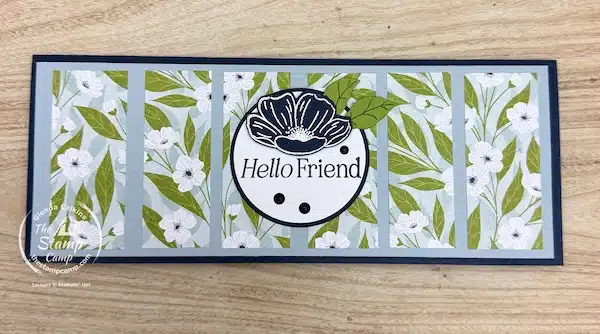
For card #5, I changed up the layout by taking the 3″ x 3 1/2″ piece of designer series paper and cutting it into strips. I then arranged those strips along the left-hand side of the card front, which adds a fun bit of interest while still staying true to the one sheet wonder concept.
Next, I added a layer of Old Olive cardstock that I embossed using the Lovely Stripes embossing folder. Unfortunately, I just found out this morning that this embossing folder is already sold out and no longer available. The good news is you can easily substitute it with another embossing folder you have on hand, or simply leave the Old Olive cardstock plain for a clean look.
To finish the card, I added a simple sentiment along with a die cut flower and leaves to tie everything together.
This design is a great example of how simple one sheet card designs can be easily adapted with what you have on hand, and it works beautifully for occasions like Mother’s Day or even a birthday.
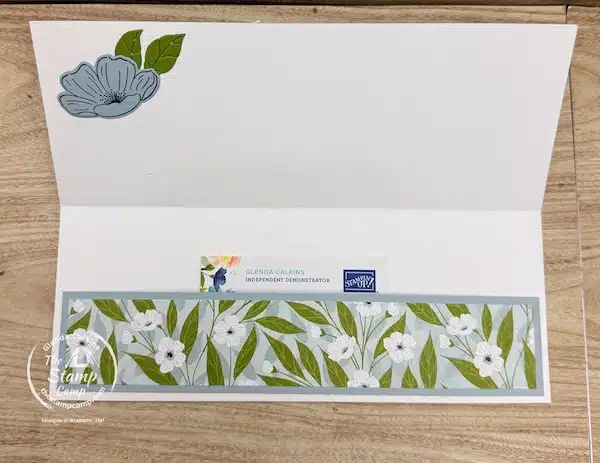
For the inside of the first two gift card holders, I continued the coordinated look by adhering a strip of designer series paper onto a matching piece of cardstock. I then attached this layered piece to the inside pocket.
To finish it off, I added a flower die cut with leaves in the upper left-hand corner. This simple detail ties everything back to the front of the card and keeps the overall design cohesive throughout the project.
Card #6 – Gift Card Holder
For the final card, I used the last two sections of the designer series paper that were left over. I decided to cut both pieces into smaller strips and adhere them to the card front.
This is such a great way to finish off your paper when working with a one sheet wonder—just use a variety of strip sizes and layer them across the front for a fun, coordinated look. It’s a perfect example of how simple one sheet card designs help you use every last bit without any waste.
To complete the card, I added a simple sentiment punched out with a circle punch and finished it off with a flower die cut.
And just like that, one 12″ x 12″ sheet of paper turned into six beautiful slimline cards, including gift card holders—perfect for so many occasions!
The inside of each gift card holder reveals a pocket designed to hold cash, a check, or a gift card—making these cards as practical as they are pretty.
Since I didn’t have any designer series paper left over for this last card, I simply added a coordinating strip of cardstock along the inside. To keep everything consistent with the front of the card, I embellished the strip with die cut flowers and leaves.
This is a great reminder that even when your patterned paper is completely used up in a one sheet wonder, you can still carry the design through using cardstock, stamps, and die cuts. It keeps your simple one sheet card designs cohesive from front to inside while still letting each card feel finished and intentional.
Here is the Shopping List For These Slimline Cards Created from One Sheet of Designer Series Paper:
Click on any of the supplies you wish to purchase and add them to your shopping cart. I appreciate any and all orders you can send my way.
Here is the Video Tutorial:
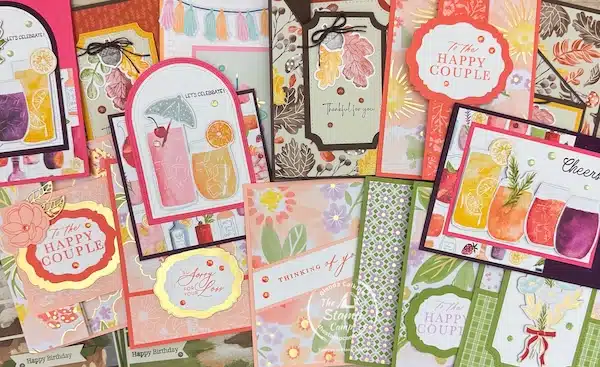
The Stamp Camp Customer Appreciation for April 2026:
My card racks are full and it is time to give away packs of my handmade cards.
Place a minimum $50.00 order (before shipping and tax) with me during the month of April 2026, and you’ll receive a package of 10 handmade cards from me.
It’s my way of saying thank you for choosing me as your demonstrator and supporting my small business.