
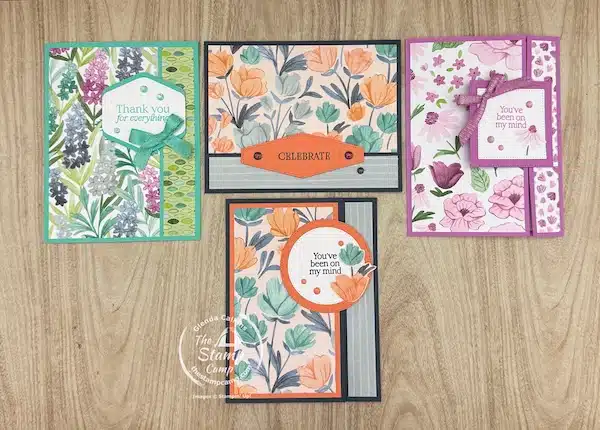
This week’s quick and easy card sketch ideas are bursting with possibilities! Who knew one simple layout could inspire so many unique card designs?
You can start with a basic A2 card base and use the sketch vertically as shown, or rotate it for a horizontal option. Once you’ve tried both orientations, let your creativity take over—explore fun fold cards and beyond!
For my samples, I used the Florals in Bloom Designer Series Paper, but don’t feel limited by that—this layout works beautifully with any Designer Series Paper you have on hand. You can also use just cardstock and stamps. Create your own designer paper or mix and match with cardstock for a custom look that’s truly your own.
The sentiments on all the cards is from the Beautiful Motifs stamp set.
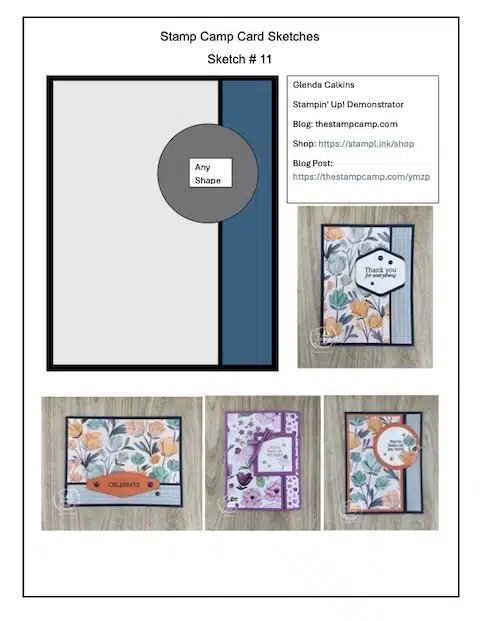
Download and print today’s sketch by clicking on the photo or click here.
If you’re new to my blog and haven’t grabbed the previous sketches, you can download sketches 1–10 by clicking here. Each sketch includes a link to its original blog post where I share ideas on how to use the sketch in a variety of ways—including a fun fold or two!
Why No Measurements?
Many have asked why I don’t include measurements directly on the sketch. I leave them off intentionally to give you the freedom to play and explore.
My Easy Card Sketch Templates are designed to be a creative jumping-off point—a tool to help spark your imagination or get you back into your crafting groove. They’re simple enough for beginner stampers, yet versatile enough to inspire fun fold ideas for more advanced crafters.
By printing off these quick and easy card sketch ideas and storing them in a 3-ring binder, you’ll always have a wealth of inspiration right at your fingertips—perfect for when you need a creative boost or want to try something new!
That said, in each blog post I do provide the measurements I used for my sample cards. You’re welcome to jot those down when you print the sketch or just use them as a guide.
Ready to Create?
Let’s dive into today’s sketch and see where your creativity takes you!
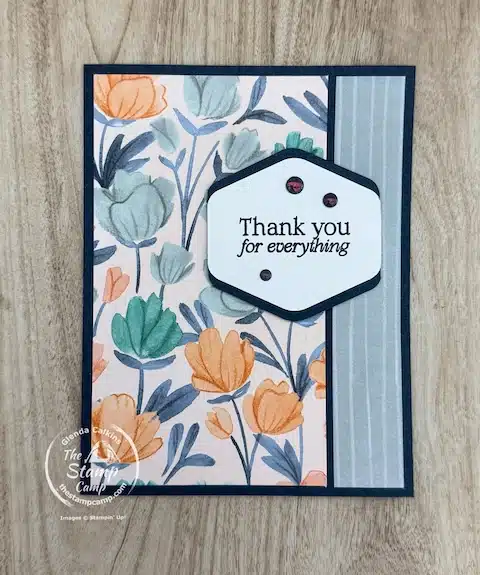
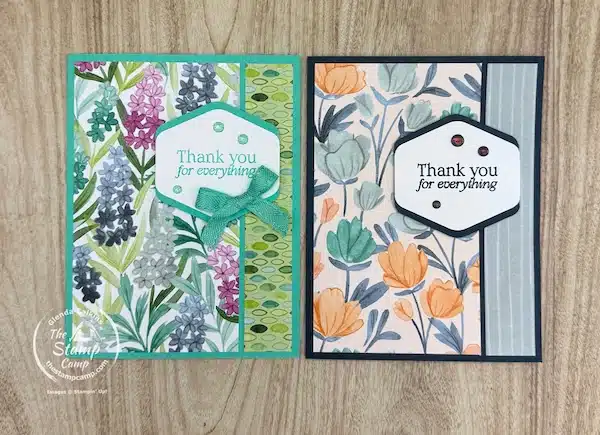
The first card follows the sketch exactly as shown in the vertical orientation. For the “any shape” sentiment piece, I used the Heartfelt Hexagon Punch—one of my go-to tools! I love using punches because they’re quick, easy, and don’t require pulling out the Cut & Emboss Machine, making them perfect for creating a fast and fabulous card.
If you’re working directly from the sketch, here are the measurements I used:
-
Card base: 5 1/2″ x 8 1/2″, scored at 4 1/4″
-
Florals in Bloom DSP panels: 3″ x 5 1/4″ and 3/4″ x 5 1/4″
I kept these dimensions the same for all my cards; the only thing that changes is the card base when you start incorporating fun fold options.
For this first card, I chose Secret Sea for the card base and the mat behind my sentiment. Then, using the same vertical sketch, I created a second card with a different floral print from the Florals in Bloom paper pack and switched the base color to Summer Splash.
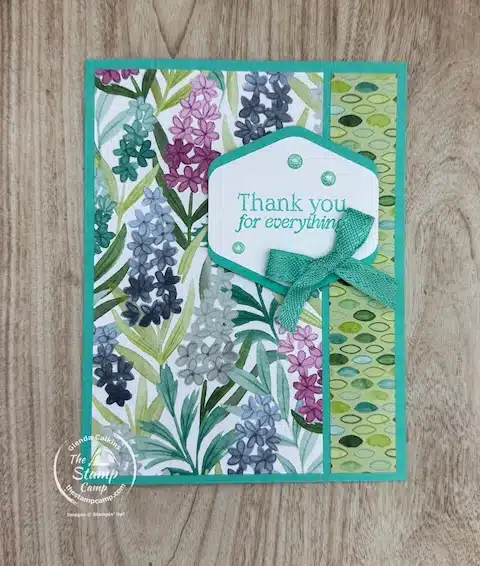
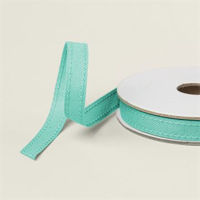
To elevate the look of the second card, I added Summer Splash Ribbon for a touch of elegance—this ribbon is currently on the Last Chance List, so yes, it’s on sale!
This is a great example of how simply changing the colors or embellishments can completely transform the look and feel of your card—all while using the same sketch!
For this next card, I rotated the layout to a horizontal orientation—same sketch, just turned on its side! The measurements remain exactly the same, and I even used the same floral print as the first card to show how a simple change in direction can create a completely different look.
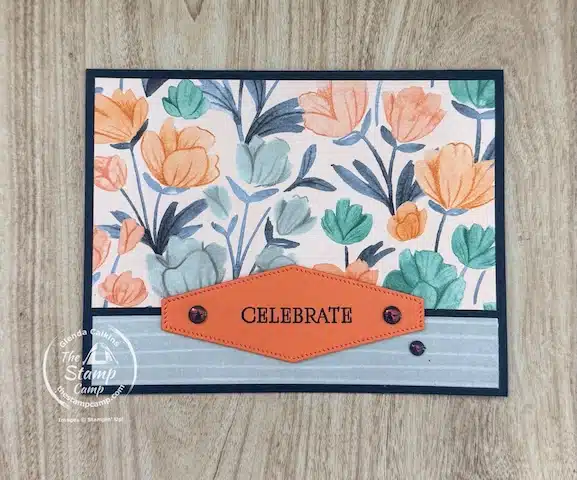
This time, I brought out my Cut & Emboss Machine and used the Nested Essentials Dies to create the sentiment piece. To add a pop of color and make the sentiment stand out, I used Timid Tiger cardstock, while the sentiment itself is stamped in Secret Sea ink, which matches the card base.
It’s a simple yet elegant card—don’t you think?
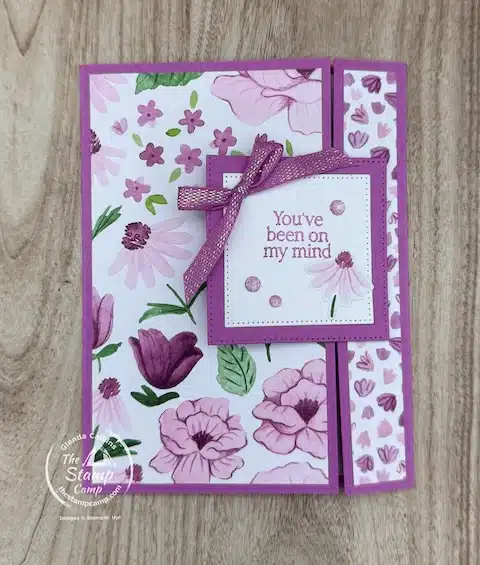
Now let’s take this same sketch and turn it into a fun fold card! You might be wondering how—well, it’s as simple as changing the card base measurements, and just like that, you’ve created another quick and easy card sketch idea with a fun twist.
For this card, I chose another beautiful print from the Florals in Bloom Designer Series Paper and paired it with a Petunia Pop card base. The base measures 5 1/2″ x 8 1/2″, scored at 3 1/4″ and 7 1/2″, creating what’s known as a smaller gatefold card.
To change things up, I used the Stylish Shapes Dies for my sentiment piece—layering a Petunia Pop square mat behind a Basic White square for the stamped sentiment. For a cohesive look, I hand-cut a flower from the printed paper and added it to the sentiment, tying the design together beautifully.
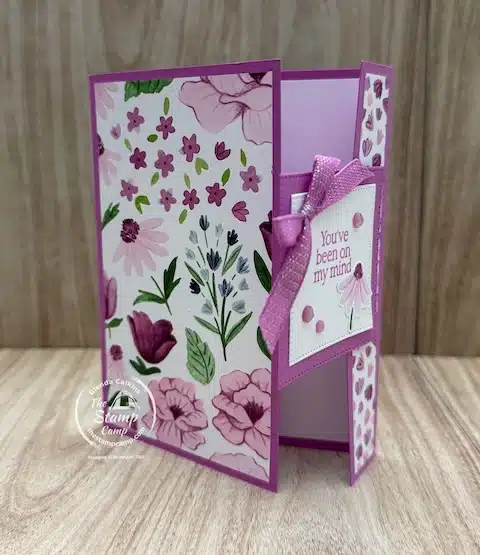
The sentiment square is adhered with dimensionals ONLY on the right-hand side, allowing the card to open in a unique and interactive way.
For a bit of sparkle, I added Petunia Pop ribbon from the new Online Exclusive Spooky Sweet Collection (just released on July 1st!), and finished the look with sparkly Petunia Pop gems. These particular gems are from the retired In Color Shimmer Gems, which are no longer available—but no worries! Use any coordinating gems you have on hand. And if you don’t have Petunia Pop gems, you can color ones you may already have with your Stampin’ Blends to match your project perfectly.
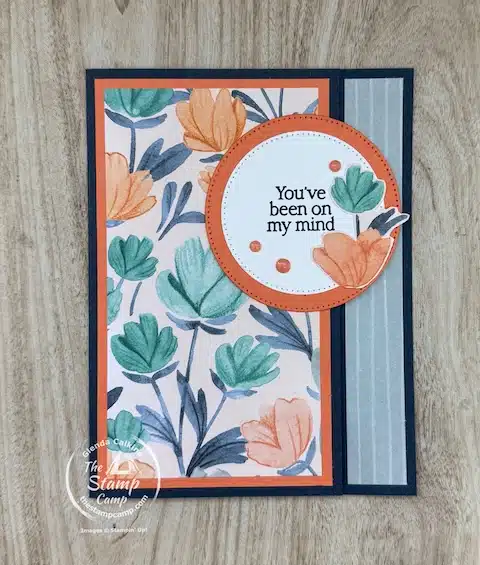
This final card may look just like the original sketch at first glance—but there’s a fun surprise! The Floral Impressions Designer Series Paper panel on the right-hand side is actually adhered to the inside of the card. This card uses a fold-back flap fun fold for a creative twist on the sketch layout.
For the base, I used 5 1/2″ x 7 1/2″ cardstock, scored at 3 1/4″ and 6 1/2″. To add a pop of color, I matted the DSP onto Timid Tiger cardstock. The mat measures 3″ x 5 1/4″, so I trimmed the DSP to 2 3/4″ x 5″.
For the sentiment, I used a circle die cut from the Stylish Shapes Dies, stamped on Basic White, and layered it onto a Timid Tiger circle for contrast. I also fussy-cut another flower from the designer paper and added it to the sentiment circle for a cohesive look.
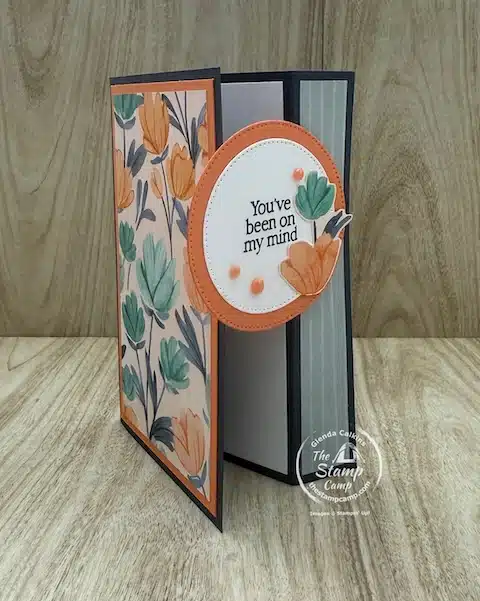
Just like in the previous fun fold, the sentiment circle is attached with dimensionals on the right-hand side only—but this time, the right side is actually the inside flap of the card, creating a unique opening feature.
And there you have it—four different cards using the same easy card sketch templates! From simple to stepped-up fun folds, this one layout offers endless creative possibilities.
Here is the Supply List for My Quick and Easy Card Sketch Ideas Featuring the Floral Impressions Designer Series Paper:


Click on any of the supplies you wish to purchase and add them to your shopping cart.
Join me every Wednesday here on my blog for the latest in my quick and easy card sketch ideas.
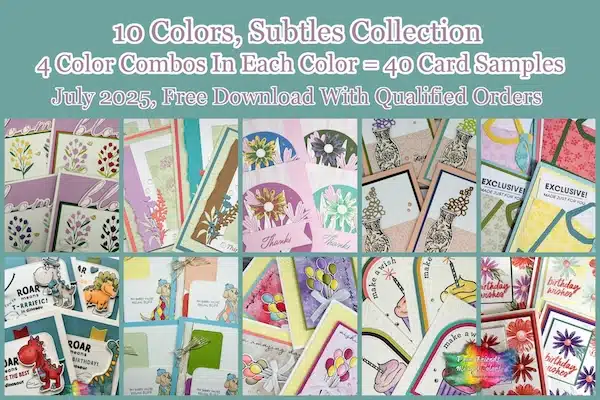
July Customer Appreciation – Huge PDF file
 Orders of $50.00 or more (before tax and shipping) placed on my online store will qualify for this month’s download.
This month’s PDF download includes the Subtles Collection Color Combination: Forty Color Combinations and Forty Cards in the download.
Plus, a Bonus PDF file featuring the Bubble Bath color.
To receive all the details click HERE.
My customer appreciation (PDF Download) is unavailable for purchase and only available with qualified orders. It is a token of appreciation to all who place orders with me.
Place your orders Here: https://stampl.ink/shop