
If you are looking for beginner-friendly quick and easy card tutorials, then you are going to love last night’s One Sheet Wonder class. This fun stamping class focused on creating multiple cards from a single sheet of designer paper, making it perfect for anyone who wants beautiful results without complicated steps.
During class, we featured the Easter Joy Specialty Designer Series Paper, and it truly stole the show. This paper pack is filled with bright, cheerful colors that are perfect for handmade Easter cards as well as springtime birthdays, celebrations, and special events.
Why You’ll Love the Easter Joy Specialty Designer Series Paper
The Easter Joy Specialty Designer Series Paper is a little different from traditional designer series paper, and that’s part of what makes it so special. It has a subtle glossy finish and is slightly thicker than standard paper. While it may take a bit of getting used to when cutting and adhering, the end results are absolutely worth it.
The glossy look adds just the right amount of shine to your cards, making them feel extra special without needing a lot of embellishments. This makes it an excellent choice for quick and easy card tutorials, especially when you want your cards to look impressive with minimal effort.
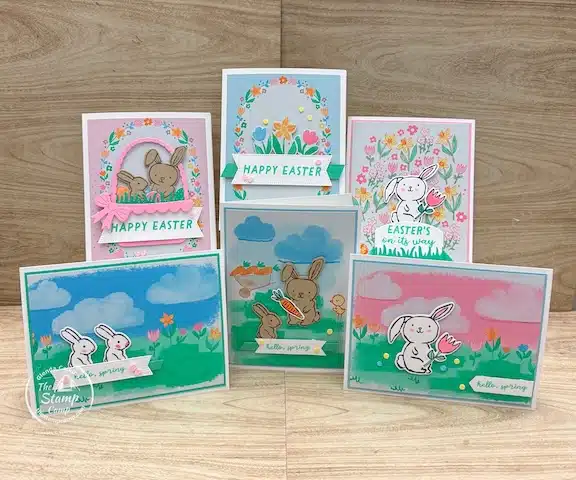
Let’s Take a Closer Look at These One Sheet Wonder Cards
One of the best things about One Sheet Wonder cards is how much variety you can get from just one 12″ x 12″ sheet of designer paper. Using a single sheet of the Easter Joy Specialty Designer Series Paper, we created six quick and easy handmade cards—each with its own look and personality.
This is exactly why One Sheet Wonder designs are so popular. They are beginner-friendly, efficient, and perfect when you want beautiful results without complicated layouts or lots of supplies.
Card #1
Card #1 is so cute and truly quick and easy to create, making it perfect for beginners or anyone who wants fast results. I used the coordinating Easter Basket Bundle to stamp and die cut the adorable bunny and flower images, which pair beautifully with the Easter Joy Specialty Designer Series Paper.
To bring the images to life, I colored them using Pretty in Pink and Shy Shamrock Stampin’ Blends. These soft, cheerful colors work perfectly for handmade Easter cards and really complement the bright patterns in the designer paper.
The sentiment is also from the Easter Basket Bundle. I punched it out using the Three Panel Punch and popped it up with dimensionals on the card front. That little bit of dimension adds interest without making the card complicated—exactly what you want in quick and easy card tutorials.
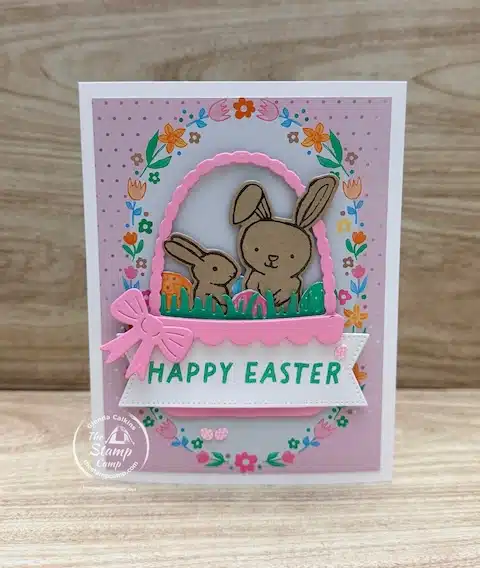
Card #2
Card #2 is a little more involved than the first card, but it’s still simple enough for beginners to create. For this design, I used several of the coordinating die cuts from the Easter Basket Bundle and popped everything up on the card front for added dimension.
The bunnies in the basket were stamped onto Crumb Cake cardstock using Early Espresso ink, giving them a soft, natural look. The grass was cut from Shy Shamrock cardstock, which adds a bright pop of spring color. For a fun finishing touch, the Easter eggs were hand-cut from one of the patterns in the Easter Joy Specialty Designer Series Paper pack.
The sentiment was created using the Stylish Shapes Dies, which make the perfect banner for greeting cards. This extra layering adds interest while still keeping the design clean and easy to assemble.
Card #3
For Card #3, I wanted to show how versatile the Easter Joy Specialty Designer Series Paper really is. Even though this paper has a glossy finish, you can color directly on the images. I used Pretty in Pink, Shy Shamrock, Peach Pie, and Lemon Lolly Stampin’ Blends to color in the background image on the paper.
One thing to keep in mind when coloring on glossy cardstock is that the colors won’t be quite as vibrant as they are on regular cardstock—but they still look beautiful and soft. This is a great way to customize your paper and stretch your supplies even further when creating One Sheet Wonder cards.
The sentiment on this card was stamped and punched out using the Sign Design Punch, which is currently on the Last Chance list at a discount—so if this punch is on your wish list, now is the time to grab it before it’s gone. This punch works perfectly with the grass die cut from the Easter Basket Bundle, making it easy to layer your sentiment right into the design.
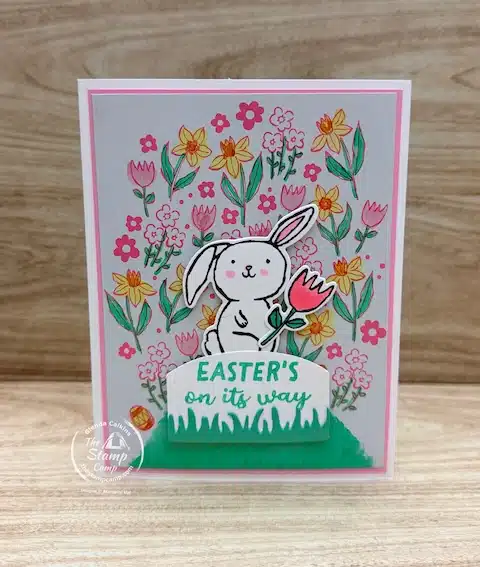
Card #4
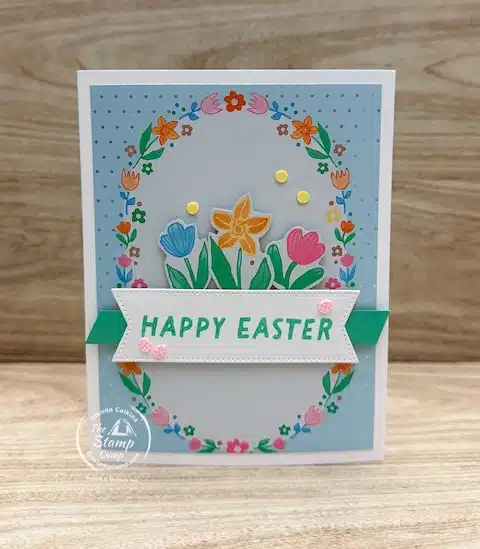
Card #4 is another lovely handmade Easter card, but this time I changed things up by focusing on florals instead of bunnies. I used the flower images from a different print in the Easter Joy Specialty Designer Series Paper pack.
I hand-cut three of the flower images from the designer paper and popped them up along with the Easter sentiment for added dimension. This simple layering keeps the card quick and easy to assemble while still giving it a polished look.
This design is a wonderful option for sending an Easter card to someone who may prefer a more classic style. By combining springtime florals with an Easter greeting, you get a beautiful card that feels seasonal and thoughtful—without the cutesy bunny theme.
Card #5
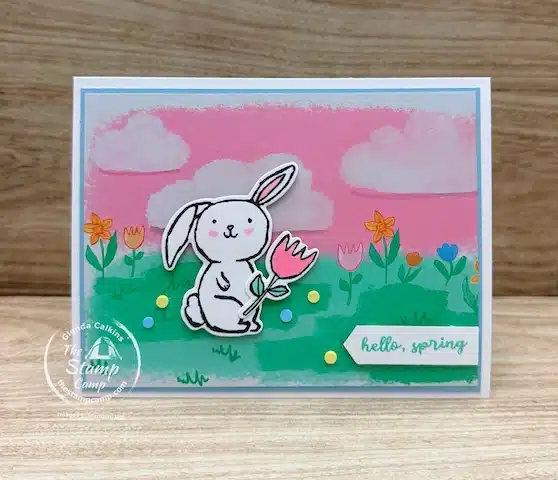
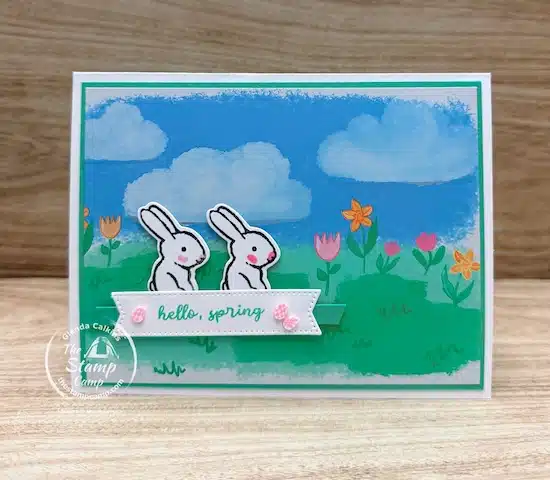
Card #5 is the perfect scenic spring card, and it honestly couldn’t be easier to put together. The designer paper does all the work on this one. All I added were a couple of sweet little bunnies and the sentiment, and the card was ready to go.
This card really reminds me of what I see every day at home. Every time I drive up or down my driveway, there are little bunnies hiding in the bushes. I’m pretty sure they’re just as ready for spring to arrive and melt all this snow as we are!
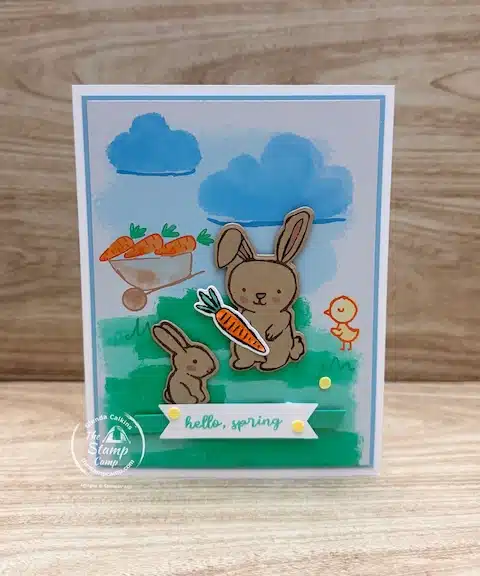
Card #6 is another beautiful scenic Easter card that comes together quickly and easily. Just like Card #5, the designer paper creates most of the scene for you. I simply added a couple of bunnies, the sentiment, and a hand-stamped and die-cut carrot to coordinate with the background.
The carrot was stamped and die cut using the Easter Basket Bundle, and it adds the perfect finishing touch without overwhelming the design. This card is super sweet and so easy to create, making it another great option for beginners or anyone looking for quick and easy card tutorials.
Together with the other five designs, this card really shows how versatile One Sheet Wonder cards can be. From cute bunnies to scenic spring backgrounds, you can create a full set of handmade Easter cards from just one 12″ x 12″ sheet of designer paper.
Grab your Supplies Below and start creating these Quick and Easy Card Tutorials, Perfect for Beginners and Stampers Beyond.


Click on any of the supplies you will need and add them to your shopping cart. Thanks SO much for your order, it is greatly appreciated!
Get Your One Sheet Wonder Download Project Sheets
You have three easy options to receive the downloadable project sheets for these One Sheet Wonder cards:
Option #1 – Join the Stamp Camp at Home Card Club Kit
Subscribe to the Stamp Camp at Home Card Club Kit and get access to these project sheets as part of your monthly club kit. See this post to subscribe.
Option #2 – Join the One Sheet Wonder Club
If you love creating One Sheet Wonder cards, the One Sheet Wonder Club is perfect for you. Club members receive downloadable project sheets each month. (Note: If you’re already in the Stamp Camp at Home Card Club, you automatically have access to these One Sheet Wonders in the club member photo gallery on my blog.)
To join the One Sheet Wonder Club for $24.95/month, subscribe HERE.
Option #3 – Purchase Individual Download
You can also purchase the downloadable project sheet for this specific set for $9.95. Simply fill out the Contact Me form with your name, email address, and specify which One Sheet Wonder download project sheet you wish to purchase. For this set, please note:
“Feb 5, 2026 – Six Easter Joy One Sheet Wonder Cards.”
No matter which option you choose, you’ll be able to recreate these quick and easy card tutorials and enjoy all the fun of crafting beautiful handmade Easter cards.
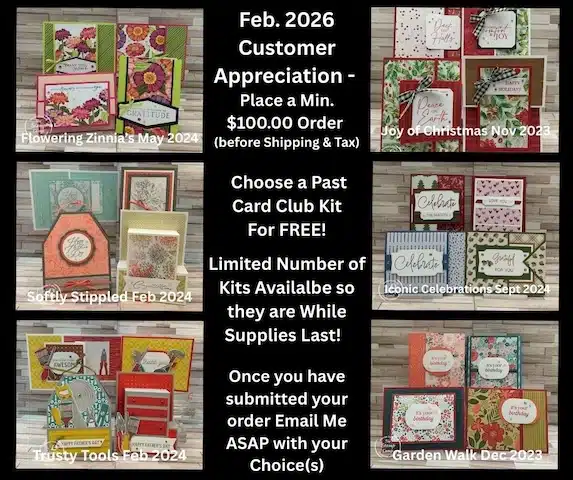
The Stamp Camp Customer Appreciation for February 2026:
February is my Stampin’ Up! Anniversary, so I decided to celebrate by sharing my favorite offering — my Stamp Camp at Home Card Club Kits!
These kits are chock-full of value, packed with products, creative ideas, one sheet wonder patterns, exclusive downloads, and bonus PDF files. All of this makes my Stamp Camp at Home Card Club Kits one of the most valuable and idea-packed services available.
Try My Stamp Camp at Home Card Club Kit Club — FREE This Month!
If you’ve ever thought about joining my Stamp Camp at Home Card Club Kit Club, this is the perfect month to give it a try — for FREE!
Simply place a minimum $100.00 online order (before shipping and tax) with me, and I’ll send you a past Stamp Camp at Home Card Club Kit for FREE!
Important Details to Know:
-
Kits are limited and available while supplies last
-
If you see a kit you love, be sure to place your $100.00 minimum order ASAP
-
After placing your order, email me using the contact form HERE
In your email, please include:
-
Your name
-
Your email address
-
The kits you’d like to receive, listed in order of preference
I strongly recommend listing more than one preference. Once a kit is gone, it’s gone — and you’ll receive the next available choice on your list.
No kit is guaranteed and all kits are first come, first served.
Please note: I have additional kits available beyond what’s shown in the photo below. You’ll find the full list of available kits below the photo.
Available Kits:
Flowering Zinnia’s
Softly Stippled
Trusty Tools
Garden Walk
Joy of Christmas
Iconic Celebrations
Meandering Meadows
Splendid Autumn
If you would like to see these kits you can find them in my Photo Gallery under Stamp Camp Card Club
Each Stamp Camp at Home Card Club Kit Includes:
-
Designer Series Paper
-
Cardstock to create 8 cards
-
All die cuts or punched pieces needed
-
Envelopes
-
Embellishments (these were the coordinating gems, jewels, dots, ribbons, etc. from the suite)
-
All bonus PDF files associated with that kit
This is a fun, risk-free way to experience Stamp Camp at Home — and I can’t wait to send one your way!
Place your orders Here: https://stampl.ink/shop
2 thoughts on “Quick and Easy Card Tutorials with One Sheet Wonder Cards”
Glenda is there a way you can see the kits closer.
Hi Janis, I’m not sure which kits you are referring to.