
Did you catch last night’s class on my YouTube channel? If not, I’ll get you all caught up here, and below in this post I’ll also share the video tutorial so you can see these easy stamping techniques in action.
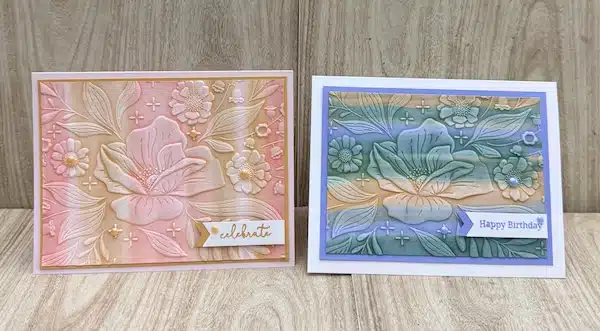
Last night at The Stamp Camp I shared one of my favorite techniques using Ink Refills and 3D Embossing Folders. If you’ve ever wondered what you can do with your ink refills besides reinking your pads, you are going to love this fun and creative idea.
This easy stamping technique for beginners starts with a simple baby wipe technique combined with embossing. After adding color with the ink refills, I finished the cards with a swipe of the Whisper White Craft Ink Pad across the raised embossed design for the final reveal. The white ink really makes all the beautiful embossed details pop!
This technique is actually a twist on the stamping technique I shared last week, only this time I incorporated the new 2026–2028 In Color Reinkers for even more vibrant and blended backgrounds. I paired the backgrounds with sentiments from the Banner Sayings Bundle to complete the cards.
For my samples, I used the Floral Spray 3D Embossing Folder. Unfortunately, this folder is currently sold out and not expected back in the warehouse until the week of August 3. I asked over on my Facebook page if everyone wanted me to wait until it came back in stock or go ahead and share the technique now. The overwhelming response was to show the technique right away, so I went live and demonstrated these easy stamping techniques using ink refills during my class.
The best part about this project is that you do not need the exact embossing folder I used. This technique will work beautifully with any 3D embossing folder you already have in your crafting stash. Simply change the embossing folder to fit the occasion. Florals work beautifully for birthdays and thank you cards, while snowflakes, leaves, or geometric designs can completely change the look for holidays and seasonal cards.
If you are looking for easy techniques for beginners, this is a wonderful place to start because the process is simple, fun, and gives you unique results every single time. Plus, it is a great way to use those ink refills for more than just refreshing your ink pads.
Each card I created last night used the very same technique — I simply changed up the ink refill color combinations to create completely different looks. That’s one of the things I love most about this technique. Just by changing the colors or the direction of your swiping gives you a brand-new design every time.
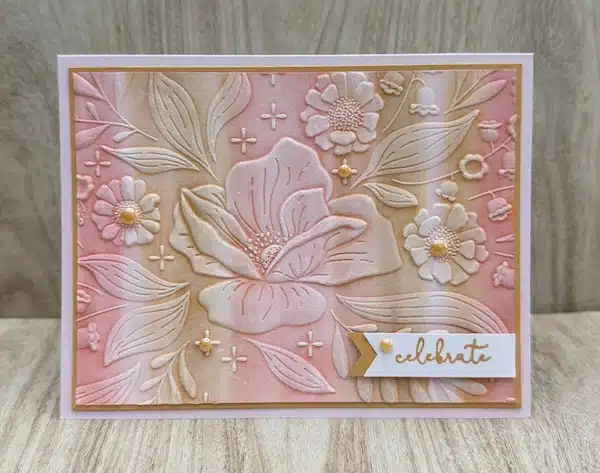
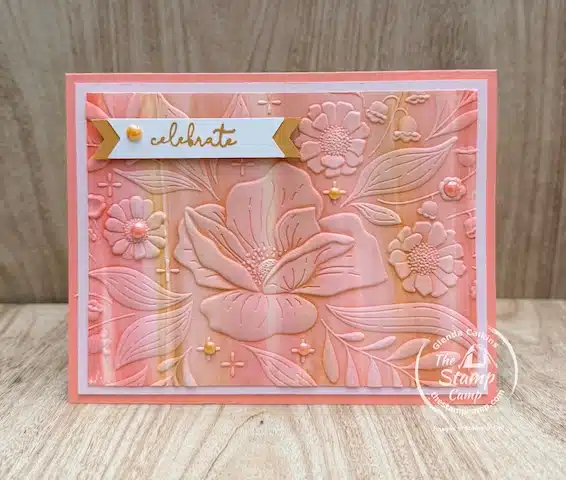
During the live class at The Stamp Camp, my first color combination included Crisp Cantaloupe, Barely Blush, and Golden Glow. I added drops of these ink refills onto a pile of baby wipes, creating a custom ink pad of sorts. Once the baby wipes absorbed the colors, I simply swiped the “ink pad” across a piece of Thick Basic White cardstock.

For this sample, I swiped the colors diagonally across the cardstock, but you can completely change the look depending on the direction you use. In the next sample, I used a vertical swipe pattern, and for my final card featuring Hydrangea Hue, Peaceful Pine, and Golden Glow, I used horizontal swipes. It’s amazing how such a small change can create a totally different background effect.
Once your Thick Basic White cardstock has been covered using the ink refill baby wipe technique, it is time to emboss your handmade background using a 3D embossing folder. When placing your cardstock into the embossing folder, be sure the colored side is facing the inverted side of the embossing folder. This helps create the best raised embossed effect for the next step.
After embossing, allow the cardstock to dry completely. Once dry, gently rub the Whisper White Craft Ink Pad over the raised embossed areas. This final step really makes the embossed image stand out and is what takes this project from pretty to absolutely stunning.
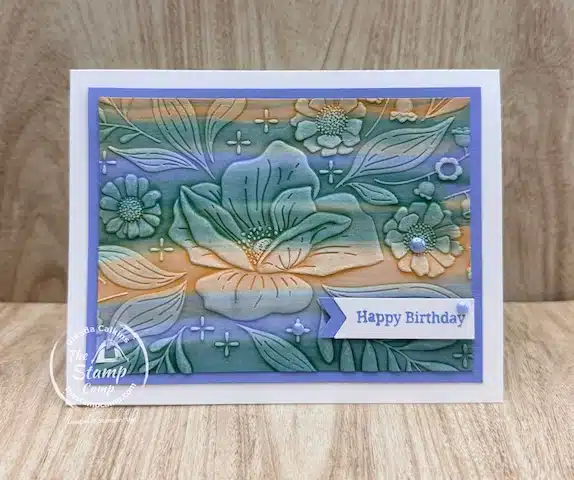
To finish my cards, I layered the embossed panels onto coordinating cardstock and added sentiments from the Banner Sayings Bundle. I chose smaller sentiments because I really wanted the focus to stay on the beautiful embossed backgrounds created with these stamping techniques using ink refills.
Finally, I added a few 2026–2028 In Color Dots for just the right finishing touch, and just like that, these quick and easy handmade cards were complete.
Now for the inside of the cards — how do you bring that beautiful design from the card front to the inside of your handmade card?
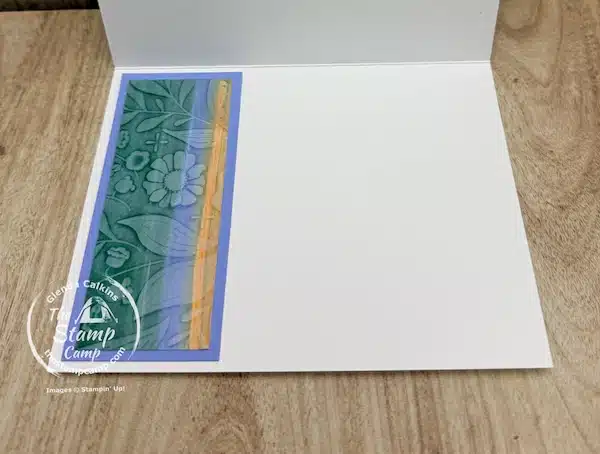
Well, I simply used the exact same easy stamping technique from the card front, but instead of using a full embossed panel, I cut the handmade ink refill backgrounds into strips and added them to the inside of the card.
This is a wonderful way to carry the design throughout the entire card while also using up every little piece of your embossed backgrounds. I love when stamping techniques can be both beautiful and practical!
You can keep the strips simple by adhering them directly onto the Basic White cardstock inside your card, or you can mat them onto coordinating cardstock first for a more layered look. Both options work beautifully and coordinate perfectly with the colorful embossed card fronts.
Adding these decorative strips to the inside really gives your handmade cards a polished and professional finish. It is those little extra details that make recipients feel extra special when they open your card.
These easy stamping techniques using ink refills and 3D embossing folders are such a fun way to create unique backgrounds, and I love that the leftovers can easily be incorporated into the inside design as well. Nothing goes to waste, and every card becomes a one-of-a-kind creation.
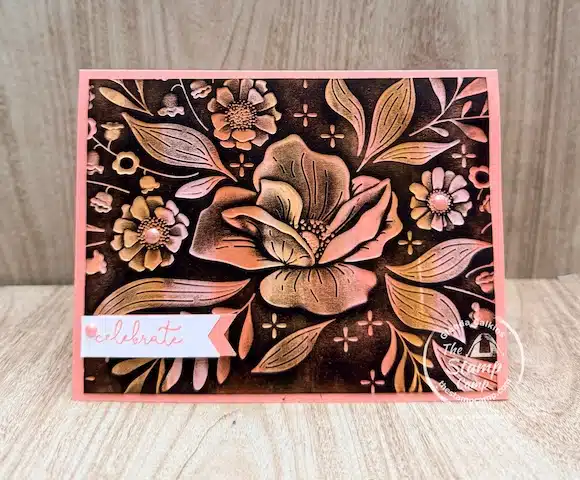
For this next sample, I actually did exactly what I told you not to do — and honestly, the results turned out pretty amazing! That’s one of the fun things about experimenting with easy stamping techniques. Sometimes the “mistakes” end up creating a completely new look.
Instead of placing my handmade ink refill cardstock into the embossing folder with the colored side facing down onto the inverted side, I accidentally placed the white side facing the inverted side. This meant my colorful background became debossed rather than embossed.
Because of that, I decided not to use the Whisper White Craft Ink Pad over the top as I did on the other samples. Instead, I rubbed the Early Espresso Ink Pad across the raised areas, and I really love the rich vintage look it created.
The darker ink completely changed the feel of the card and gave this technique using ink refills a whole different style. It created more depth and contrast while still allowing all those beautiful blended In Color backgrounds to peek through the design.
This just goes to show there really is no wrong way to experiment with this technique using ink refills and 3D embossing folders. By simply changing the direction of the embossing folder or the ink color you swipe across the raised areas, you can create endless looks for your handmade cards.
So if you accidentally emboss your cardstock the “wrong” way, don’t toss it aside. Try adding a darker ink over the top and see what happens. You may end up loving the results just as much as I did!


Click on any of the supplies you wish to purchase and add them to your shopping cart. I appreciate any and all orders.
Here’s the Video:
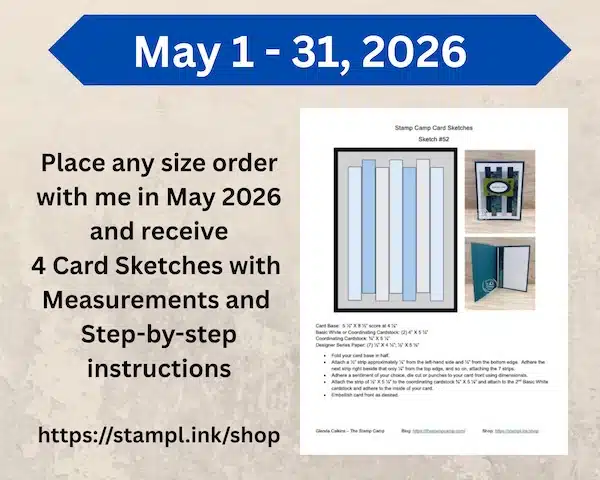
The Stamp Camp Customer Appreciation for May 2026:
Place a min. $1–$49.99 Order in my Stampin’ Up! Store
You will receive:
- A Download Project Sheet
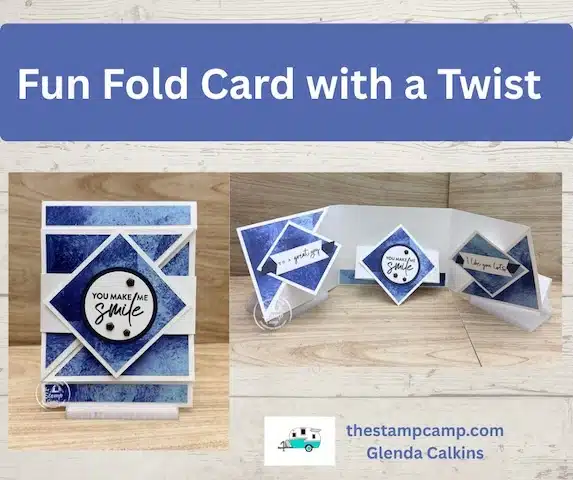
- Step-by-step video tutorial for a sweet fun fold card with a twist, perfect for any occasion
- Four Card Sketches with Measurements and Step-by-Step Instructions (This month it is Card Sketches 52-55)
- Total 5 Cards
Place a min. $50+ Order (before shipping & tax)
You will receive:
- The sweet fun fold card with a twist download project sheet and video shown above.
- 4 step-by-step Card Sketch Tutorials with Measurements and Step-by-Step Instructions
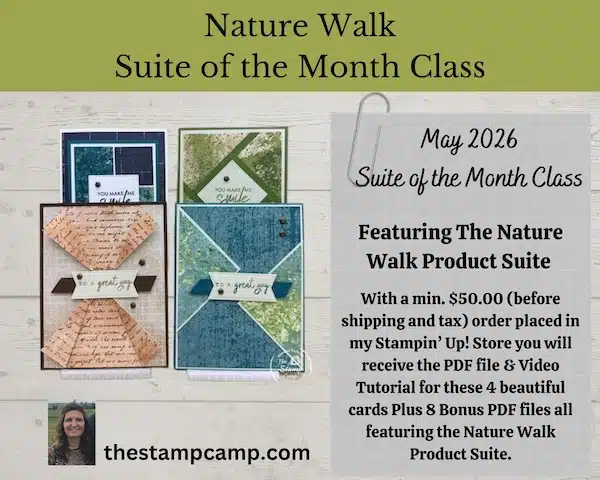
- 4 additional cards using the Nature Walk Suite
- Step-by-step videos + PDF instructions
- 7 bonus card PDF tutorials (cards not shown and no video tutorial but step-by-step instructions)
- Total 16 cards

Place a min. $75+ Order (before shipping & tax)
You will receive:
- Everything in the $50 level PLUS
- 3 additional BONUS projects:
- A fun fold card
- A One Sheet Wonder (4 cards) Includes One Sheet Wonder Pattern
- A beautiful Father’s Day Gift Card Holder/Treat Box with coordinating card & envelope
- Total 22 cards and Treat Box


I hope you enjoyed seeing all the projects I have ready to share using the beautiful Nature Walk Suite! I truly had so much fun creating these for you, and I know you’re going to love making them too.
If you’d like to get your hands on these tutorials, now is the perfect time to place your order and take advantage of this month’s Suite of the Month Class offerings.
Simply place your Stampin’ Up! online order with me and you’ll receive all the coordinating projects based on your order level.
Place your orders Here: https://stampl.ink/shop
Thank you so much for stopping by, and for your continued support of my small business. It truly means so much to me.
Happy Stamping!