
Are you looking for new stamping techniques? Have you ever tried quilting with Designer Series Paper? This was a first for me, how about you?
Each month France Martin and I have a combined team meeting with her team and mine. Each month France and I take turns talking about the latest Stampin’ Up! news and demonstrating something like a new fun fold, technique, or different ways to use a certain product. This month it was my turn to announce all the happenings going on for the month of March and France did the presentation. This month France showed us this faux quilting techniques with designer series paper. I had never done anything like this before so it was fun to try something new.
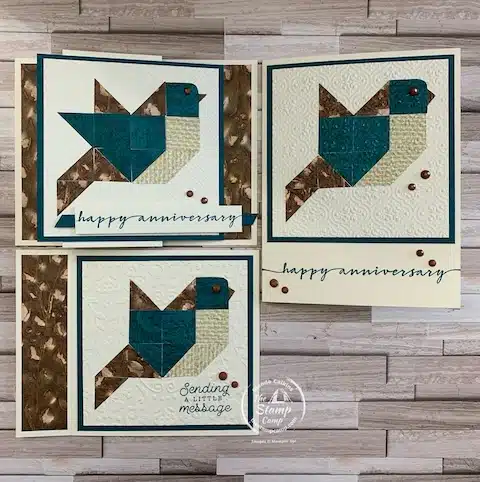
Now keep in mind this was the first time I did this technique so be nice. :). When I look at my birds, the song my oldest son would love to hear on Sesame Street came to my mind immediately. It went a little something like this, One of these things is not like the others, One (actually in my case Two) of these things just doesn’t belong here. Can you spot what I did wrong? What is the difference? Maybe taking a closer look at each card will help.
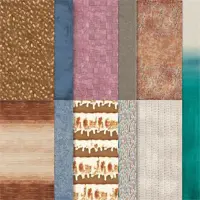
When I was creating these cards I couldn’t stop at just one; I had to make more. The designer series paper that I chose to use was the Earthen Elegance paper. I loved the blues and the browns with the little bit of Very Vanilla for my birds. When you do stamping techniques do you try it in a lot of different ways or in a variety of folds?
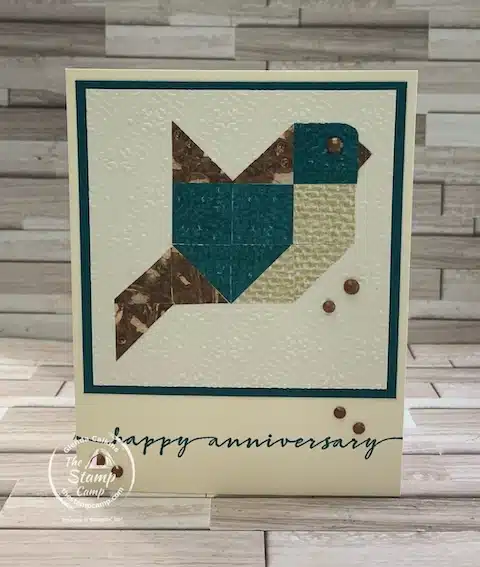
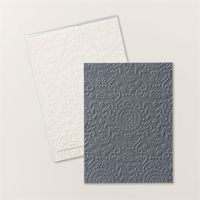
Once you have assembled your bird you then put it inside some sort of embossing folder and run it through your Cut & Emboss machine. For this card I chose the Quatrefoil Tile embossing folder.
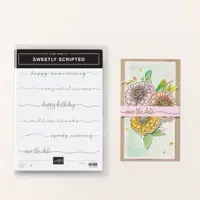
You may be wondering where did that sentiment come from? That is a new Online Exclusive stamp set where all the sentiments are scripted and long like that. This is a fun new sentiment stamp set. You can find all the new Online Exclusive products HERE.

You may also notice that each of my cards is a different fold or way of using my quilted bird piece. I wanted to explore my options and see which way I liked it best. This is a faux Book Binding technique I’m sure you’ve tried before.
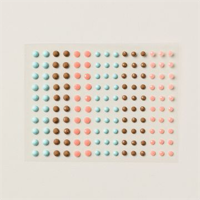
The embossing folder for this card was the Countryside Blossoms embossing folder and the dots I used are the retired Opaque Faceted Gems Sale-a-bration dots you could get for free.
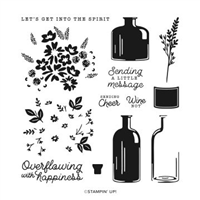
The sentiment for this card came from the Bottled Happiness stamp set and inside was a Happy Anniversary message.
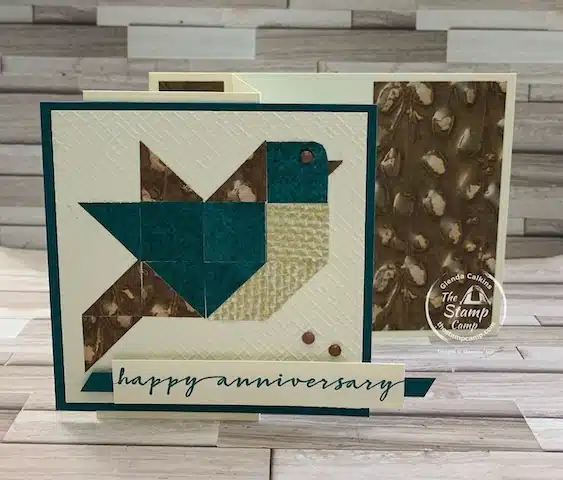
This final card is another anniversary card that I just cut down to the size that I wanted and added it to the bottom of this book binding z fold card. Have you watched my video yet creating one sheet wonder cards with this fun fold stamping techniques? You can catch it HERE.
The embossing folder I chose to use for this card was the Online Exclusive Crosshatch embossing folder which is part of the Basics 3D embossing folder pack; there are 3 embossing folders in the pack.
Now have you spotted the difference yet? Take a closer look. In the comments section of this blog post tell me what the difference is and I’ll put your name into a drawing for a package of those Opaque Faceted Gems from Sale-a-bration. I will post the winner this week Friday. So make sure to comment before then.
Silly me, I never noticed the difference until I posted my take of the quilted bird card on our team Facebook page. These went out to 3 of my team members who have a Stampin’ Up! anniversary this month; I’m sure they loved the bird card no matter what.
Here is your Shopping List for This New To Me Stamping Techniques Faux Quilting Cards:


Remember you MUST use the Host Code unless your order is over $150.00, then do NOT use the host code and you will receive the host benefits, plus my rewards.
My Customer Appreciation for March:
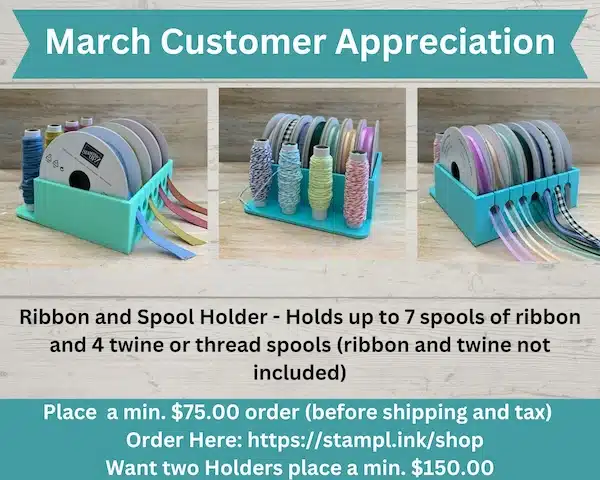
My 3D printer has been buzzing getting ready for this months customer appreciation special. Do you have a spot or a way of storing your ribbon and twine spools? If not check out this combo ribbon/twine storage system. My combo ribbon and twine holder will hold up to 7 spools of ribbon depending on the size of the spool and 4 spools of twine or thread. This is perfect to sit on your desk and keep your spools in order and upright or place on a shelf.
Do you have the White Open Storage Cube from Stampin’ Up! with the Topper Storage? If not you can check it out on page 124 of the annual catalog. This is a cube that you can store ink pads, ribbon, adhesives, small embellishments and more. I’ve taken my ribbon storage system and made them to fit inside the cube and with the topper storage you have the space on top to hold my ribbon storage system as well. (check out what I’m talking about in the photo below.). Yes the bottom ribbon storage system has the twine/thread spool holder inside; you will just need to slide it out of the cube to get at the spools when needed.
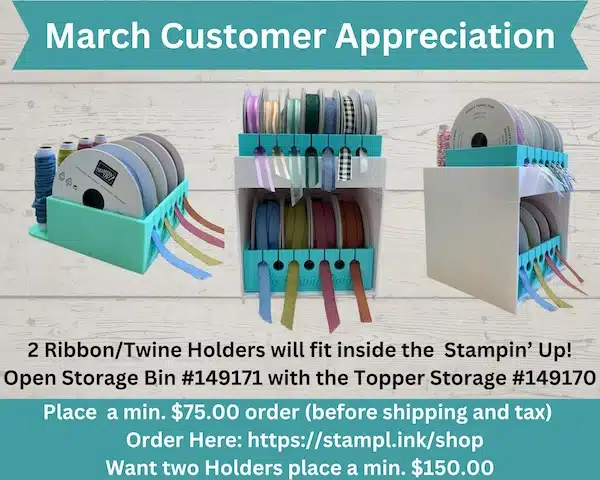
To get one of my Ribbon holders you will need to place a min. $75.00 online order with me and use the host code. If you would like two holders you will need to submit a min. $150.00 order and no need to use the host code. I will send you the ribbon holder(s) free of charge. I will however need you to email me with your color choice; baby blue, mint green, or purple. If I don’t hear from you or if you do not respond to my email regarding your ribbon holder, I will assume you do not want the holder.
Place your orders Here: https://stampl.ink/shop
Click HERE to view How To Use A Host Code
17 thoughts on “Looking For New Stamping Techniques – Paper Quilting”
Part of the wing is missing on two of the birds. The cards are very pretty!
Two of the birds show both wing tips and one doesn’t have one tip
You did wonderful. Can’t wait to see what you will present in April 🙂
Hi France, Thanks for commenting. I can’t wait to see what I will be presenting as well; guess we will both be surprised!
Hello, You are very close; I think you meant two birds are missing a wing and one has both wings. Thanks for commenting and make sure to check back on Friday!
Hi Helen, You are correct two of the birds a missing a wing. Thanks for checking out my blog post and leaving me a comment. Make sure to check back on Friday!
Two of your birds can’t fly, they lost part of their wings. I love them!! You created beautiful cards again, Glenda
Hi Patricia, You are correct. They are still cute and loved just the same. Thanks for commenting and checking out my blog.
One wing missing on two of the cards
The card is lovely but one bird has 2 wings open and the other 2 birds are closed!
Will you please show us how to make this gorgeous bird card!
Hi Lou, Yup, I forgot a wing on two of the birds; whoops. I’ll have to make a video on this technique; so easy and oh so pretty.
I like them both, yes one is showing two wings I cannot wait to get the sizes of these blocks. It will be a challenge but I think it is beautiful and cannot wait to try it.
where are the directions???
Hi Sharon, Sorry I do not have any directions.
Hi Deborah, The squares are 3/4″ X 3/4″. I think you would probably do 1″ squares but I haven’t tried it. Happy Stamping!
Hello Patricia,
Winner Winner!
Patricia Gush – Thank You for the comments on my blog post regarding the Bird Quilting Cards.
Send your snail mail address to me to claim your prize!
[email protected]