
Do you ever sit down to make a card and feel stuck on where to start? That’s where card sketches come to the rescue! A sketch is simply a layout design — think of it as a map for your card. You don’t have to reinvent the wheel every time you create. With just one sketch, you can make countless designs by swapping paper, stamps, colors, or embellishments.
This week’s simple card sketch is one of my favorites because it has so many possibilities. Today, I’m sharing 3 fun and easy card design techniques that will inspire you to grab your supplies and start creating right away.
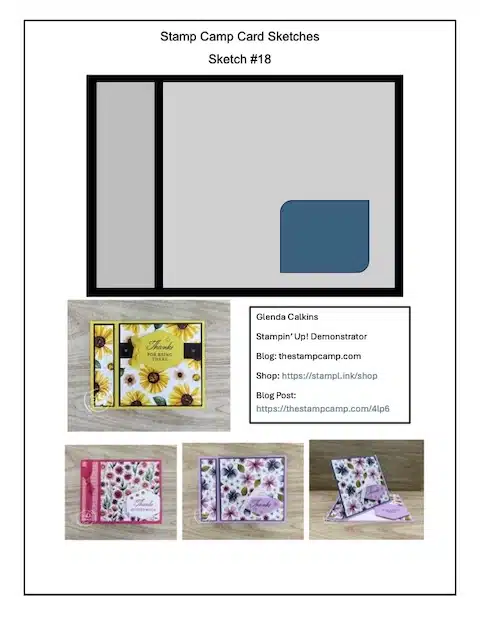
To download and print Sketch #18 Click HERE
To download and print Sketch #17 Click HERE
To download and print Sketch #16 Click HERE
To download and print Sketch #15 Click HERE
To download and print Sketch #14 Click HERE
To download and print Sketch #13 Click HERE
To download and print Sketch #12 Click HERE.
To download and print Sketch #11 Click HERE.
If you would like to print Sketches #1 – #10 Click HERE.
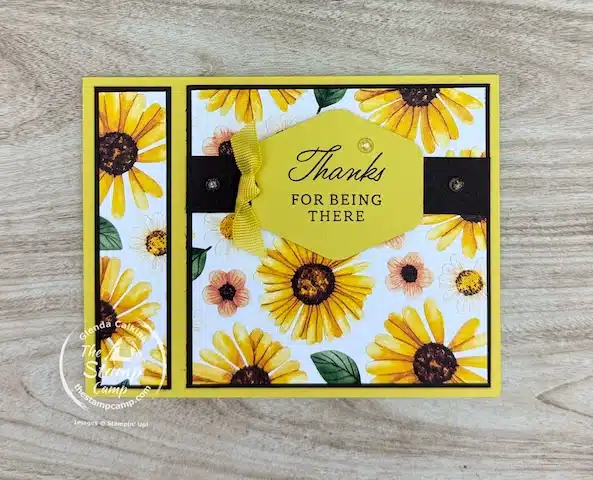
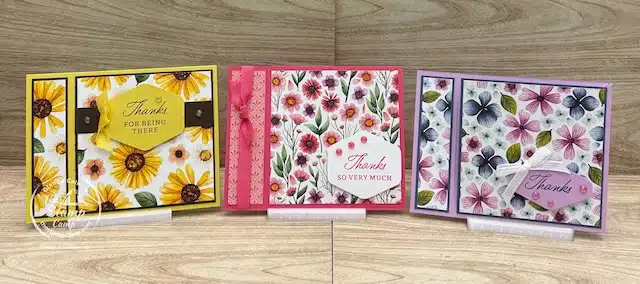
Card #1: Keep It Clean and Simple
For the first card, I followed the sketch closely. I chose the bold Floral Impressions Designer Series Paper for the card front and matted it with a layer of Early Espresso cardstock to give it a crisp, finished look. The card base is the new Darling Duckling In Color, which coordinates beautifully with the rich tones of the DSP.
To finish it off, I stamped a sentiment and punched it out using the Heartfelt Hexagon Punch, then attached it to an Early Espresso strip across the card front. For a touch of texture, I added a Darling Duckling ribbon tied in a simple knot and accented it with a clear sparkle gem from the Strawberry Slush and Pretty in Pink Gems pack.
This card is actually a sneak peek into my upcoming September Stamp Camp at Home Card Club Kit, where I’ll be featuring the Floral Impressions Designer Series Paper along with the Strawberry Slush and Pretty in Pink Gems.
This design is perfect when you need a card in a hurry but still want it to look polished and put together.
Technique Tip: When working with bold patterned paper, let it do most of the work! Keep the rest of the card simple so the design shines.
Measurements for Card #1
-
Card Base – Darling Duckling cardstock, 4 1/4″ x 11″, scored at 5 1/2″
-
Early Espresso Mats – 4″ x 4″ and 1″ x 4″
-
Floral Impressions Designer Series Paper – 3 7/8″ x 3 7/8″ and 7/8″ x 3 7/8″
-
Early Espresso Strip (behind sentiment) – 3/4″ x 4″
-
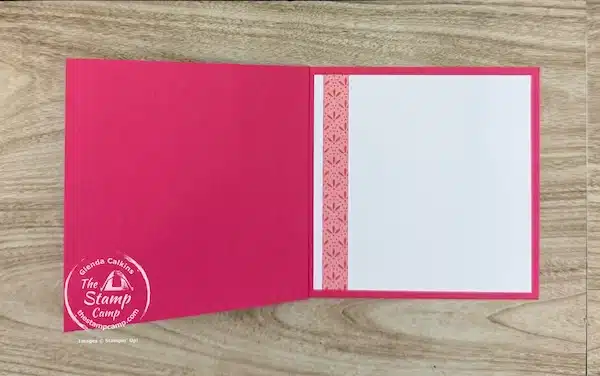
Inside Basic White – 4″ x 5 1/4″
-
Inside DSP Strip – 3/4″ x 5 1/4″
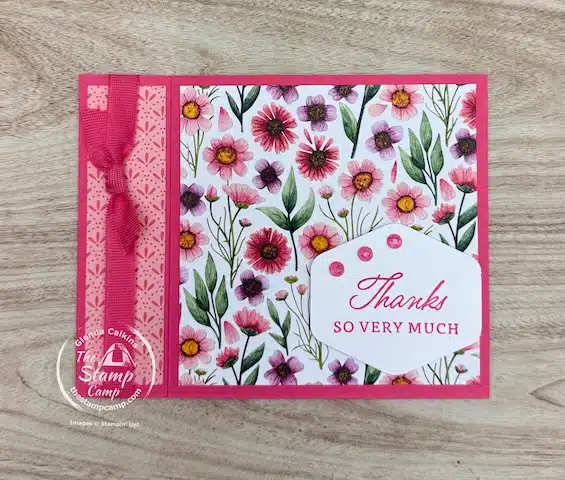
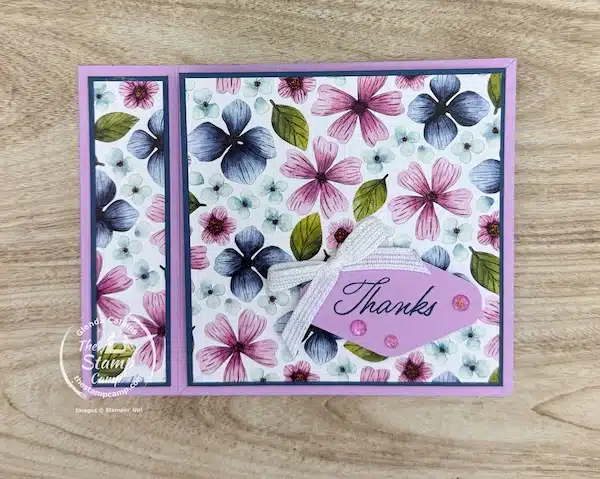
Card #2: Book Binding Card
For this card, I stayed with the Floral Impressions Designer Series Paper (on sale this month—save 15%!) but switched up the base color to Strawberry Slush. To create the book binding fold, I added the Strawberry Slush ribbon along the left-hand side before adhering that section closed on the inside of the card. The ribbon was tied in a knot on the front for a sweet finishing touch.
For the sentiment, I used the Impressions Abloom coordinating stamp set with the Heartfelt Hexagon Punch, stamping the greeting in Strawberry Slush ink (also on sale until the end of the month—save 15%!). This coordinated beautifully with the DSP and ribbon, keeping the whole design cohesive and polished.
Measurements for Card #2
-
Card Base – Strawberry Slush cardstock, 4 1/4″ x 11″, scored at 4 1/4″ and 5 1/2″
-
Floral Impressions DSP – 4″ x 4″ and 1″ x 4″
-
Inside Basic White – 4″ x 4″
-
Inside DSP Strip – 1/2″ x 4″
Technique Tip: The book binding fold is a quick way to give your card extra “wow” without adding much work. Simply score, fold, and adhere one section shut to create the look of a book spine—it’s simple, fun, and always a crowd pleaser!
Card #3: Twisted Easel Book Binding Card
Card #3 is a book binding card with a twist—literally! This version turns the same sketch into a twisted easel fun fold, which gives the card an interactive element while still keeping the same polished look as Cards #1 and #2.
This card design is perfect when you want to impress the recipient with something extra special while still sticking to an easy sketch layout.
Measurements for Card #3
-
Card Base – Fresh Freesia cardstock, 4 1/4″ x 11″
-
Score at 4 1/4″ and 5 1/2″ (for the book binding)
-
On the 4 1/4″ x 4 1/4″ panel, score diagonally from the bottom left corner to the top right corner to create the twist
-
-
Misty Moonlight Mat – 4″ x 4″ and 1″ x 4″
-
Floral Impressions DSP – 3 7/8″ x 3 7/8″ and 7/8″ x 3 7/8″
-
Inside Basic White – 4″ x 4″
-
Inside DSP Strip – 3/4″ x 4″
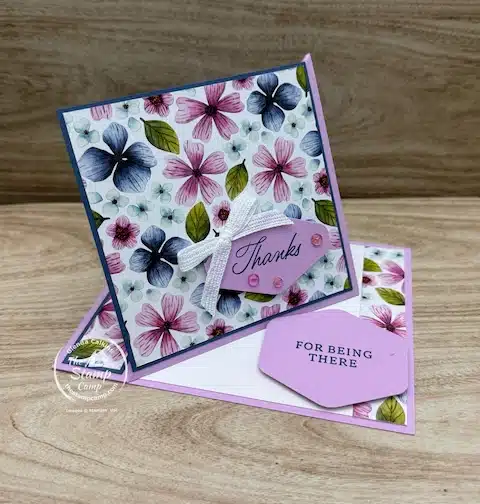
Technique Tip: Twisted easel cards are much easier than they look! Once you’ve made the diagonal score line, fold along the line and attach your matted DSP panel to the lower triangle. For the inside stopper, I punched another Heartfelt Hexagon sentiment from the coordinating stamp set and popped it up using dimensionals. This keeps the easel standing beautifully while adding a fun focal point inside the card.
Wrap-Up: Fun and Easy Card Design Techniques
These three cards show just how versatile a single card sketch can be. From the clean and simple design of Card #1, to the book binding fold of Card #2, and the twisted easel book binding of Card #3, each card is unique in how it opens—but all three are easy, fun, and quick to make.
Using a sketch as your starting point gives you creative freedom while still providing structure. You can swap papers, change colors, or experiment with folds, and each version will feel fresh and new.
If you love these designs, you’ll get even more inspiration from my September Stamp Camp at Home Card Club Kit, where I’m featuring the Floral Impressions Designer Series Paper, coordinating stamp sets, and the Strawberry Slush and Pretty in Pink Gems. This is a fun way to try these techniques and create your own beautiful cards from the comfort of home.
Your Challenge: Grab your favorite sketch, pick a few papers, and try creating three cards just like these—but make them your own! Experiment with folds, colors, and embellishments. You might be surprised at how many variations you can make from one simple layout.
You’ll Need These Supplies For Today’s Fun and Easy Card Design Techniques:


Sale: $10.63
Price: $12.50


Click on any of the supplies you wish to purchase and add them to your shopping cart. I appreciate any and all orders, it is what is keeping me going.
Do you love fun and easy card design techniques?
Sale Ending Soon!
2025–2027 In Color products are 15% off from August 5–31, 2025—including paper, ink, embellishments, and more. Don’t miss out on stocking up while your favorites.
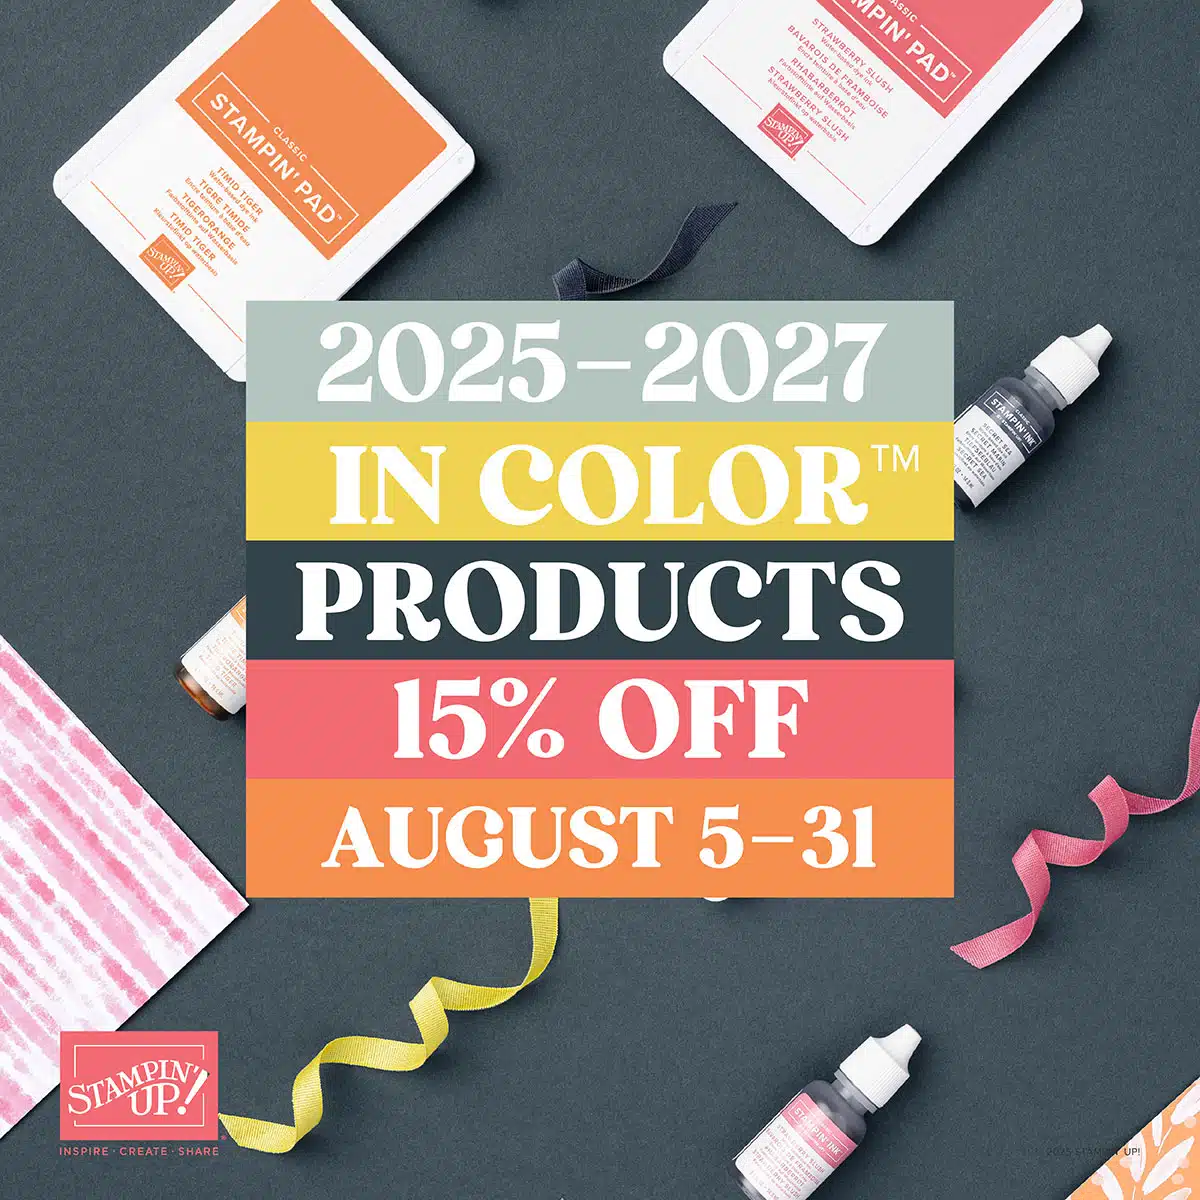
Click HERE to Shop The In Color Sale.
August Customer Appreciation – Huge PDF file Featuring the Brights Color Family
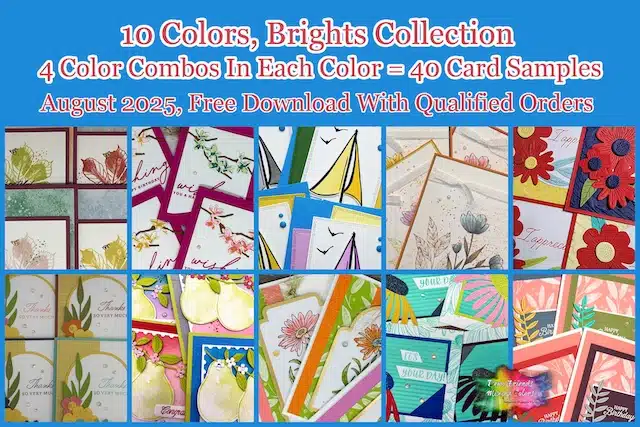 Orders of $50.00 or more (before tax and shipping) placed on my online store will qualify for this month’s download.
This month’s PDF download includes the Brights Color Combination: Forty Color Combinations and Forty Cards in the download.
Plus, a Bonus PDF file featuring the Berry Burst color.
My customer appreciation (PDF Download) is unavailable for purchase and only available with qualified orders. It is a token of appreciation to all who place orders with me.
Speaking of fun and easy card design techniques you will love my customer appreciation PDF files.
Place your orders Here: https://stampl.ink/shop